
Setting Guide (Video Edition)
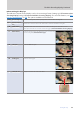
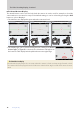
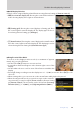
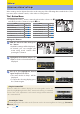
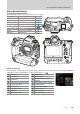
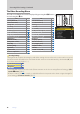
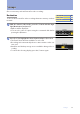
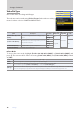
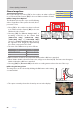
Table Of Contents

13
Getting Ready
The Video Recording Display, Continued
13
■ Quick Display Selection
Controls can be assigned display-related functions using Custom Setting g2 [Custom controls].
b [Live view info display o]: Pressing the control hides indicators
in the shooting display. Press again to view indicators.
b [Framing grid]: Pressing the control displays a framing grid. Press
the control again to turn the display o. The display type can be se-
lected using Custom Setting g11 [Grid type].
D [Virtual horizon]: Pressing the control displays the virtual horizon.
Press the control again to turn the display o. The display type can be
selected using Custom Setting d16 [Virtual horizon type].
■ Using Zoom in Video Mode
To zoom in on the display in video mode (to a maximum of approxi-
mately 16×), press the X button.
Use the X and W (Q) buttons to zoom in and out.
A navigation window will appear at the bottom right corner of the
display.
Use the multi selector to scroll to areas of the frame not visible in the
display.
Pressing X during recording zooms the display in to a 1 : 1 (100%) zoom ratio. Press W (Q) to can-
cel zoom.
When viewing videos, you can zoom in on the current frame while playback is paused.
When shooting in video mode, you can also zoom in on the current fo-
cus point using a control assigned [Zoom on/o] via Custom Setting
g2 [Custom controls]. The zoom ratio can be chosen from [Low mag-
nication (50%)], [1 : 1 (100%)], and [High magnication (200%)].