
Setting Guide (Auto Capture Edition)
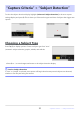
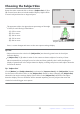
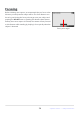
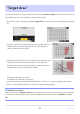

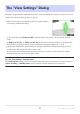
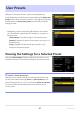
Table Of Contents
- Table of Contents
- Auto Capture: An Overview
- Using Auto Capture
- Using Auto Capture: Workflow
- Getting Ready
- Adjusting Camera Settings
- The Photo Shooting Menu “Auto Capture” Item
- “Capture Criteria”
- “Capture Criteria” > “Motion”
- “Capture Criteria” > “Distance”
- “Capture Criteria” > “Subject Detection”
- “Target Area”
- “Timing Options”
- The “View Settings” Dialog
- Initiating Auto Capture
- User Presets
- Recommended Trigger Criteria
- Troubleshooting

Subjects detected by the camera are shown by green boxes in
the settings confirmation dialog.
The “View Settings” Dialog
The view settings (settings confirmation) dialog can be used before auto capture is initiated to check
whether the selected criteria perform as desired.
If an option other than [Auto-area AF] is selected for AF-area mode, you can choose the focus
point.
If [Wide-area AF (C1)] or [Wide-area AF (C2)] is selected for AF-area mode, you can choose the
size of the focus area by holding the focus mode button and pressing 4, 2, 1, or 3.
The AF-area mode can be selected from the settings confirmation dialog by pressing the focus
mode button and rotating the sub-command dial.
If green boxes are not displayed as expected, press the i button to return to the auto capture
settings display and choose new trigger criteria.
Tip: The “View Settings” Standby Timer
The [View settings] display will turn off automatically when the time selected for Custom Setting c3
[Power off delay]> [Standby timer] expires. Choose a longer standby timer if required.
37
The “View Settings” Dialog