
Setting Guide (Auto Capture Edition)
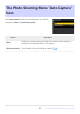
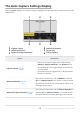
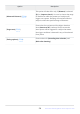
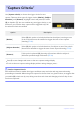

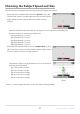
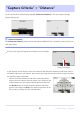
Table Of Contents
- Table of Contents
- Auto Capture: An Overview
- Using Auto Capture
- Using Auto Capture: Workflow
- Getting Ready
- Adjusting Camera Settings
- The Photo Shooting Menu “Auto Capture” Item
- “Capture Criteria”
- “Capture Criteria” > “Motion”
- “Capture Criteria” > “Distance”
- “Capture Criteria” > “Subject Detection”
- “Target Area”
- “Timing Options”
- The “View Settings” Dialog
- Initiating Auto Capture
- User Presets
- Recommended Trigger Criteria
- Troubleshooting

[Capture criteria]
[Advanced: Motion]
[Advanced: Subject detection]
1
2
3
[Advanced: Distance]
[Target area]
[Timing options]
4
5
6
The Auto Capture Settings Display
Selecting [Start] displays auto capture settings. Highlight items and press J to display options for the
selected item.
1 2
4 5
3
6
Option Description
[Capture criteria] (0 25)
Choose auto capture trigger criteria from among
[Motion], [Subject detection], and [Distance]. You
can combine any two trigger criteria, or use all three
if you so desire.
Auto capture will be triggered only if all the selected
criteria are satisfied.
[Advanced: Motion] (0 26)
This option will take effect only if [Motion] is selected
(M) for [Capture criteria]. This option is used to choose
the direction of motion, size, and speed of subjects that
will trigger auto capture.
[Advanced: Subject detection] (0 32)
This option will take effect only if [Subject detection] is
selected (M) for [Capture criteria]. It is used to choose
the types and sizes of subject that trigger auto capture.
23
The Photo Shooting Menu “Auto Capture” Item