
Setting Guide (Video Edition)
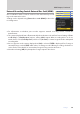
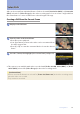
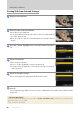
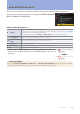
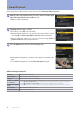
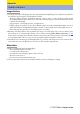
Table Of Contents
- Table of Contents
- Getting Ready
- Settings
- Accessing Video Settings
- Storage
- Picture Quality
- Exposure
- Focus
- Audio
- Auto Capture
- Controls and Displays
- Timecode
- Hi-Res Zoom
- Power Zoom
- Reverse Ring for Focus
- Focus Ring Rotation Range
- Control Ring Response
- Customize i Menu
- Custom Controls
- Control Lock
- Fine ISO Control (Mode M)
- View Assist
- Zebra Pattern
- Grid Type
- Brightness Information Display
- Custom Shooting Displays
- Red REC frame indicator
- Viewfinder Display Size
- Auto Temperature Cutout
- Monitor Mode
- HDMI Output
- Viewing Videos
- Appendix

84
Viewing Videos
84
Video Stills, Continued
Creating Stills from Selected FootageCreating Stills from Selected Footage
1
Display a video full frame.
2
Pause the video on the desired frame.
Press 3 to pause playback.
Your approximate position in the video can be ascertained from
the video progress bar.
Press 4 or 2 or rotate the command dials to locate the desired
frame.
3
Press the i button, highlight [Save consecutive frames], and press
2.
4
Choose a destination.
Choose the destination.
Press 1 or 3 to highlight a card slot and press J.
You will not be prompted to select the slot if only one memory
card is inserted.
5
Choose the length of footage.
Choose the length of footage that will be saved as stills.
6
Press J.
The selected footage will be saved as a series of JPEG stills. The number varies with the video
frame rate.
!
“Save Consecutive Frames”
• Stills are saved at the dimensions selected for [Frame size/frame rate] in the video recording menu
when the video was recorded.
• They cannot be retouched.