
Setting Guide (Video Edition)
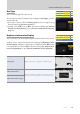
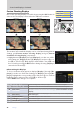
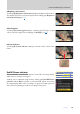
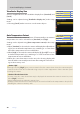
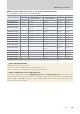
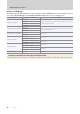
Table Of Contents
- Table of Contents
- Getting Ready
- Settings
- Accessing Video Settings
- Storage
- Picture Quality
- Exposure
- Focus
- Audio
- Auto Capture
- Controls and Displays
- Timecode
- Hi-Res Zoom
- Power Zoom
- Reverse Ring for Focus
- Focus Ring Rotation Range
- Control Ring Response
- Customize i Menu
- Custom Controls
- Control Lock
- Fine ISO Control (Mode M)
- View Assist
- Zebra Pattern
- Grid Type
- Brightness Information Display
- Custom Shooting Displays
- Red REC frame indicator
- Viewfinder Display Size
- Auto Temperature Cutout
- Monitor Mode
- HDMI Output
- Viewing Videos
- Appendix

74
Settings
74
Controls and Displays, Continued
Viewfinder Display SizeViewfinder Display Size
Select a magnication for the viewnder display from [Standard] and
[Small].
Settings can be adjusted using [Viewnder display size] in the setup
menu.
Selecting [Small] makes it easier to see the entire subject.
Auto Temperature CutoutAuto Temperature Cutout
The level at which the camera will turn o automatically as its internal
temperature rises can be selected from [Standard] and [High].
Settings can be adjusted using [Auto temperature cutout] in the setup
menu.
When [Standard] is selected, the camera will display rst a J and then
a K icon as its internal temperature rises, switching to a count-down
timer if the temperature increases still further.
When [High] is selected, the camera will display J, K, and M icons as
its internal temperature rises, switching to a count-down timer if the
temperature increases still further.
When the count-down timer reaches zero, the shooting display will
turn o and the camera will power down after saving the current foot-
age to the memory card.
Caution: “High”
Although selecting [High] gives you more time before the camera shuts down, the camera may be-
come hot to the touch. We recommend using a tripod or other equipment to reduce the time spent
touching the camera.
Cautions: When the Camera Is Hot
• In some cases, the count-down timer may be displayed the moment the camera is turned on, even
when [High] is selected.
• Image quality may drop when the camera is hot.
• Memory cards inserted in a hot camera may also become hot. Wait for the temperature to drop before
handling the camera or memory cards.
ii-button menu-button menu
—
Camera controlsCamera controls —
Other menusOther menus
4
ii-button menu-button menu
—
Camera controlsCamera controls —
Other menusOther menus
4