
Setting Guide (Video Edition)
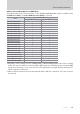

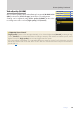
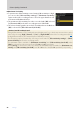
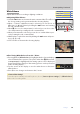
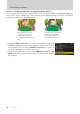
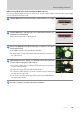
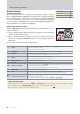
Table Of Contents
- Table of Contents
- Getting Ready
- Settings
- Accessing Video Settings
- Storage
- Picture Quality
- Exposure
- Focus
- Audio
- Auto Capture
- Controls and Displays
- Timecode
- Hi-Res Zoom
- Power Zoom
- Reverse Ring for Focus
- Focus Ring Rotation Range
- Control Ring Response
- Customize i Menu
- Custom Controls
- Control Lock
- Fine ISO Control (Mode M)
- View Assist
- Zebra Pattern
- Grid Type
- Brightness Information Display
- Custom Shooting Displays
- Red REC frame indicator
- Viewfinder Display Size
- Auto Temperature Cutout
- Monitor Mode
- HDMI Output
- Viewing Videos
- Appendix

30
Settings
30
Picture Quality, Continued
Picture ControlsPicture Controls
Choose a Picture Control according to the subject or type of scene.
Choose [Same as photo settings] to use the option currently selected for
photos. [Flat] preserves details over a wide tone range, from highlights
to shadows, making it a good choice for footage that will be tweaked in
post-production. Combining this option with highlight-weighted me-
tering minimizes loss of detail in highlights.
■ Choosing a Picture Control
Hold the g (Fn4) button and rotate the main command dial to choose
a Picture Control.
The shooting display will immediately be updated to show the eects
of the selected Picture Control.
When a Creative Picture Control is selected, the eect level can be
chosen by holding the g (Fn4) button and rotating the sub-com-
mand dial.
The camera will exit to the shooting display.
g (Fn4) button
n
[Auto]
The camera automatically adjusts settings based on the [Neutral] Picture Control to optimize
contrast and outlines for videos.
• Recommended for most situations.
Q
[Standard] Choose for results that give more priority to resolution than does [Auto].
R
[Neutral]
Minimal processing for natural results.
• Choose for photographs that will later be processed or retouched.
S
[Vivid]
Pictures are enhanced for a vivid, photoprint effect.
• Choose for photographs that emphasize primary colors.
T
[Monochrome] Take monochrome photographs.
o
[Portrait] Smooth complexions for natural-looking portraits.
4
[Rich Tone Portrait]
Produces more vivid results than [Portrait] while capturing details of the subject’s complex-
ion and avoiding loss of detail in highlights.
• Choose for pictures that will later be processed or retouched.
p
[Landscape] Shoot vibrant landscapes and cityscapes.
q
[Flat]
Details are preserved over a wide tone range, from highlights to shadows.
• Choose for photographs that will later be extensively processed or retouched.
k01–
k20
[Creative Picture Control]
Creative Picture Controls offer unique combinations of hue, tone, saturation, and other set-
tings tuned for particular effects.
• Choose from a total of 20 options, including [Dream] and [Morning].
HLG and N-Log Recording
• Picture Controls are not available in [HLG] and [N-Log] video tone modes. Settings for HLG recording
can be adjusted using [HLG quality] in the video recording menu (033).
• Picture Controls are not applied to RAW footage.
ii-button menu-button menu
4
Camera controlsCamera controls
4
Other menusOther menus
4