
Setting Guide (Auto Capture Edition)
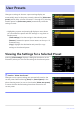
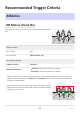
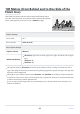
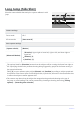
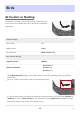
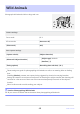
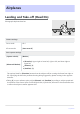
Table Of Contents
- Table of Contents
- Auto Capture: An Overview
- Using Auto Capture
- Using Auto Capture: Workflow
- Getting Ready
- Adjusting Camera Settings
- The Photo Shooting Menu “Auto Capture” Item
- “Capture Criteria”
- “Capture Criteria” > “Motion”
- “Capture Criteria” > “Distance”
- “Capture Criteria” > “Subject Detection”
- “Target Area”
- “Timing Options”
- The “View Settings” Dialog
- Choosing Start Day and Time
- Initiating Auto Capture
- User Presets
- Recommended Trigger Criteria
- Troubleshooting

Place the camera beside the sand pit to capture athletes in mid-
jump.
Long Jump (Side Shot)
Camera settings
Focus mode AF‑C
AF-area mode [Auto-area AF]
Auto capture settings
[Capture criteria] [Motion]
[Advanced: Motion]
[Direction]: Upper right to lower left, right to left, and lower right to
upper left
[Slowest]: [3]
[Smallest]: [2]
The options listed for [Direction] assume that the subjects will be crossing the frame from right to
left. Specifying the direction prevents shooting being triggered by people in the frame moving in
the opposite direction.
Taking [3] as your reference point, adjust [Slowest] and [Smallest] according to subject speed and
size relative to the frame. Users of wide-angle lenses, in particular, will need to choose smaller sizes
to reflect the subjects’ smaller apparent size.
The camera may detect that the subject has stopped moving and end shooting at the top of
the jump or at the landing. This can be prevented by choosing a shooting time using [Timing
options]> [Recording time selection].
45
Athletics