
Setting Guide (Auto Capture Edition)
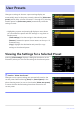
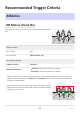
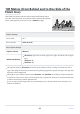
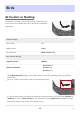
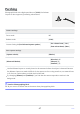
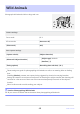
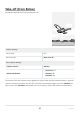
Table Of Contents
- Table of Contents
- Auto Capture: An Overview
- Using Auto Capture
- Using Auto Capture: Workflow
- Getting Ready
- Adjusting Camera Settings
- The Photo Shooting Menu “Auto Capture” Item
- “Capture Criteria”
- “Capture Criteria” > “Motion”
- “Capture Criteria” > “Distance”
- “Capture Criteria” > “Subject Detection”
- “Target Area”
- “Timing Options”
- The “View Settings” Dialog
- Choosing Start Day and Time
- Initiating Auto Capture
- User Presets
- Recommended Trigger Criteria
- Troubleshooting

Changes to settings in the auto capture settings display are
automatically saved to the preset currently selected for [Select user
preset] (which offers a choice of Presets P-1 through P-5). Selecting
another preset for [Select user preset] automatically recalls the
settings it stores.
Highlighting a preset and pressing 2 displays a menu where
you can rename the preset and view settings or copy them to
another preset.
[View settings]: View the settings in the selected preset.
[Rename]: Rename the preset. Preset names can be up to 19
characters long.
[Copy]: Highlight the destination and press J to copy
settings to the selected preset.
-
-
-
Selecting [View settings] displays a dialog like that shown in the
illustration, where you can view the settings in the selected preset.
Changes to auto capture settings are automatically saved to the
current preset. Before selecting [Start] for [Auto capture] in the
photo shooting menu, be sure to check under [Select user preset]
to ensure that the desired settings have been chosen for the
current preset.
User Presets
Viewing the Settings for a Selected Preset
D Caution: “Select User Preset”
42
User Presets