
Setting Guide (Auto Capture Edition)
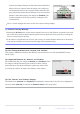
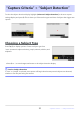
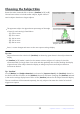
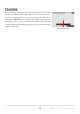
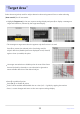

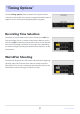
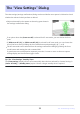
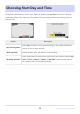
Table Of Contents
- Table of Contents
- Auto Capture: An Overview
- Using Auto Capture
- Using Auto Capture: Workflow
- Getting Ready
- Adjusting Camera Settings
- The Photo Shooting Menu “Auto Capture” Item
- “Capture Criteria”
- “Capture Criteria” > “Motion”
- “Capture Criteria” > “Distance”
- “Capture Criteria” > “Subject Detection”
- “Target Area”
- “Timing Options”
- The “View Settings” Dialog
- Choosing Start Day and Time
- Initiating Auto Capture
- User Presets
- Recommended Trigger Criteria
- Troubleshooting

Press W (Q) to display options. Choose a subject type from
“auto” (automatic subject selection), people, animals, vehicles, and
airplanes.
“Capture Criteria”> “Subject Detection”
To view the subject detection display, highlight [Advanced: Subject detection] in the auto capture
settings display and press J. This is where you’ll choose the types and sizes of subject that trigger auto
capture.
Choosing a Subject Type
Press J or i to save changes and return to the subject detection display.
D Caution: Subject Detection
If “auto” or “people” is selected, auto capture will begin when human portrait subjects are detected,
whether or not they are facing the camera.
32
“Capture Criteria”> “Subject Detection”