
Setting Guide (Auto Capture Edition)
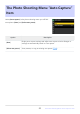
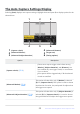
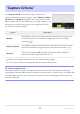
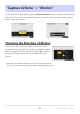
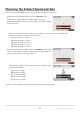
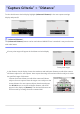
Table Of Contents
- Table of Contents
- Auto Capture: An Overview
- Using Auto Capture
- Using Auto Capture: Workflow
- Getting Ready
- Adjusting Camera Settings
- The Photo Shooting Menu “Auto Capture” Item
- “Capture Criteria”
- “Capture Criteria” > “Motion”
- “Capture Criteria” > “Distance”
- “Capture Criteria” > “Subject Detection”
- “Target Area”
- “Timing Options”
- The “View Settings” Dialog
- Choosing Start Day and Time
- Initiating Auto Capture
- User Presets
- Recommended Trigger Criteria
- Troubleshooting

Choose a Focus Mode
Select a focus mode.
If autofocus is enabled, the camera will temporarily switch to focus mode AF‑C during auto capture.
Manual focus allows access to the auto capture settings [Target area] item (
0 35).
Choose an AF-Area Mode
In autofocus mode, the camera will detect subjects in the vicinity of the focus points for the selected
AF-area mode.
Choose an AF-area mode to eliminate unwanted areas of the frame and then position the focus
point in the area in which you anticipate the subject will appear.
Choosing [Auto-area AF] for AF-area mode gives you access to the auto capture settings [Target
area] item (
0 35).
If [Auto-area AF] is selected for AF-area mode, the actual frame rate drops to 15 fps when a frame
advance rate of 20 fps is selected in continuous high-speed mode.
Adjust Exposure
Adjust shutter speed, aperture, and other exposure settings to suit your subject.
D Auto Capture: Restrictions
Auto capture cannot be combined with some camera features, including:
long time-exposures (“Bulb” or “Time”),
the self-timer,
bracketing,
multiple exposures,
HDR overlay,
interval-timer photography,
time-lapse video recording,
focus shift, and
electronic vibration reduction.
Tip: Silent Mode
Silent mode can be enabled by selecting [ON] for [Silent mode] in the setup menu.
21
Adjusting Camera Settings