
Manual cu modificările aduse de actualizarea firmware
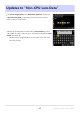
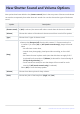
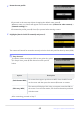
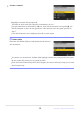
Table Of Contents
- Table of Contents
- Changes with “C” Firmware Version 4.00
- Features Available with “C” Firmware Version 4.00
- Changes Made with “C” Firmware Version 4.00
- New Bracketing Increments
- More Time for Pre-Release Capture
- New Large Size Option for JPEG + JPEG Recording
- New Menu Item: “Auto Capture”
- Low ISO Sensitivity Settings for N-Log Video
- New Options for Hi-Res Zoom Speed
- New: Slow-Motion Videos
- Changes to i-Menu “Select for Upload” Options
- "Priority Upload" Options Added to i Menu
- Support for Power Zoom
- New Custom Setting: d6 “Exposure Delay Mode”
- New Options for Custom Settings f2 “Custom Controls (Shooting)” and g2 “Custom Controls”
- New Options for Custom Setting f3: “Custom Controls (Playback)”
- Updates to “Non-CPU Lens Data”
- Increased Character Limit for IPTC “Category” Entries
- New Shutter Sound and Volume Options
- Support for “Viewfinder Display Size” Selection in Video Mode
- Updated Distance Display for Manual Focus
- Changes and Additions to “Connect to FTP Server”
- Changes to Synchronized Release
- New “Overwrite Copyright Info” Option for Master Cameras
- Menu Items and Defaults for “C” Firmware Version 4.00
- Post-Upgrade Specifications for “C” Firmware Version 4.00
- Changes with “C” Firmware Version 4.10
- Index

Name the new profile.
Highlight [Search for Wi-Fi network] and press J.
To connect without entering an SSID or encryption key, press
X in Step4. Next, pr
ess J and choose from the options
below.
To proceed to the next step without changing the default name, press X.
Whatever name y
ou choose will appear in the network menu [Connect to other cameras]>
[Network settings] list.
To rename the profile, press J. Press X to proceed after entering a name.
The camera will search for networks currently active in the vicinity and list them by name (SSID).
D “Easy Connect”
Option Description
[Push-butt
on WPS]
For routers that support push-button WPS. Press the WPS button
on the r
out
er and then pr
ess the camera J button to connect.
[PIN-entry WPS]
The camera will display a PIN. Using a computer
, enter the PIN on
the router. For more information, see the documentation provided
with the router.
After connecting, proceed to Step7.
49
Changes to Synchronized Release
3
4