
Portrait and Wedding Photography Guide

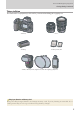
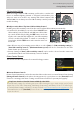
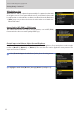
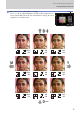
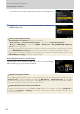
Table Of Contents

7
Getting Ready, Continued
Portrait and Wedding Photography Guide
ISO Sensitivity: ISO 200ISO Sensitivity: ISO 200
When choosing a value for ISO sensitivity, you’ll need to consider such
factors as ambient lighting (natural or designed) and whether your
subject is static or in motion—try starting with values between ISO
100 and 800. You can always use auto ISO sensitivity control if you have
trouble deciding.
Subject on the Move? Try Auto ISO Sensitivity ControlSubject on the Move? Try Auto ISO Sensitivity Control
Enabling auto ISO sensitivity control lets the camera adjust ISO sensitivity automatically.
In modes P, S, A, and M, you can select from ISO AUTO (auto
ISO sensitivity control enabled) and ISO (auto ISO sensitiv-
ity control disabled) by holding the S button and rotat-
ing the sub-command dial. In b mode, auto ISO sensitivity
control is enabled by default. To switch to a manually-se-
lected value, hold the S button and rotate the main com-
mand dial.
P, S, A, and M modes
b mode
One eective way of preventing motion blur is to select [Auto] for [ISO sensitivity settings]>
[Auto ISO senstivity control]> [Minimum shutter speed] and choose a fast value for auto min-
imum shutter speed selection.
Custom Setting e4 [Auto c ISO sensitivity control] can be used to choose how the camera ad-
justs ash level when auto ISO sensitivity control is enabled.
Picture Control: PortraitPicture Control: Portrait
This choice smooths complexions for natural-looking portraits.
Custom Picture ControlsCustom Picture Controls
Picture Control parameters can be ne-tuned and the results saved as custom Picture Controls using
[Manage Picture Control] in the photo shooting menu. It’s a good idea to use the [Portrait] Picture
Control as a starting point when creating custom Picture Controls for portrait photography.
Using Picture Controls to Soften Skin Texture and Make Eyes More Visible
Picture Control settings for softening skin tones while leaving the eyes clearly visible can be found
under ‘Step2: Fine-Tune “Sharpening”, “Mid-Range Sharpening”, and “Clarity”’ in the Z7/Z6 Profession-
al Technical Guide: Images, available for download from https://downloadcenter.nikonimglib.com/. The
Technical Guide uses the [Standard] Picture Control as an example, but this has no effect on the tech-
niques described.