
Setting Guide (For Still Photography)
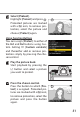
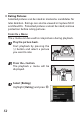
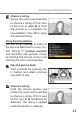
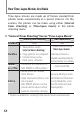
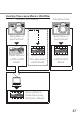

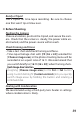
Table Of Contents
- Table of Contents
- Landscapes
- Portraits
- Sports
- Tips and Tricks
- Time-Lapse

59
Ready a TripodReady a Tripod
Use a tripod for time-lapse recording. Be sure to choose
one that won’t tip or blow over.
Before Shooting
Position the CameraPosition the Camera
Choose a location, position the tripod, and secure the cam-
era. Check that the camera is steady, the power cable un-
obstructed, and the power source within reach.
Check Framing and FocusCheck Framing and Focus
• Take a test shot and check framing and focus.
• Time-lapse footage shot with [FX (36× 24)] selected for
[Choose image area] in the photo shooting menu will be
recorded at an aspect ratio of 16∶9. We recommend that
you switch briey to [16:9 (36× 20)] when framing shots.
Quick Image‑Area Selection
Assigning [Choose image area] to the Fn1 or Fn2 button
using Custom Setting f2 [Custom controls] lets you quickly
switch image areas by holding the button and rotating a
command dial.
Dealing with CondensationDealing with Condensation
We recommend using a third-party lens heater in settings
where condensation is likely.
●