
User's Manual
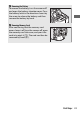
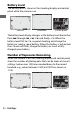
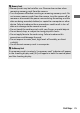
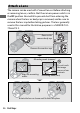

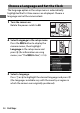
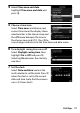

Table Of Contents
- Package Contents
- Table of Contents
- For Your Safety
- Notices
- Getting to Know the Camera
- First Steps
- Basic Photography and Playback
- Basic Settings
- Shooting Controls
- The i Menu
- Menu List
- Troubleshooting
- Technical Notes
- The Camera Display and Control Panel
- The Nikon Creative Lighting System
- Other Accessories
- Caring for the Camera
- Caring for the Camera and Battery: Cautions
- Specifications
- NIKKOR Z 24–70mm f/4 S Lens User’s Manual
- FTZ Mount Adapter User’s Manual
- Approved Memory Cards
- Memory Card Capacity
- Battery Endurance
- Notices
- Bluetooth and Wi-Fi (Wireless LAN)
- Index
- Warranty Terms - Nikon Europe Service Warranty

40 First Steps
8 Choose a date format.
To choose the order in which the year,
month, and day are displayed, select
Date format, then highlight the
desired option and press J.
9 Exit to shooting mode.
Press the shutter-release button halfway to exit to
shooting mode.
D The t (“Clock Not Set”) Icon
The camera clock is powered by an independent, rechargeable power
source, which is charged as necessary when the main battery is
installed. Two days of charging will power the clock for about a month.
If a t icon flashes in the display, the clock has been reset and the date
and time recorded with new photographs will not be correct. Use the
Time zone and date> Date and time option in the setup menu to set
the clock to the correct time and date (0 151).
A SnapBridge
Use the SnapBridge app to synchronize the camera clock with the
clock on a smartphone or tablet (smart device). See SnapBridge on-
line help for details.