
Operation Manual


Overview Appendices
Return to fi r s t page
59
Using Camera Control Pro
The Camera Menu 1/4
The commands in the Camera menu are used to adjust the following camera settings:
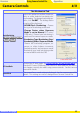
Custom Settings…
Selecting this option opens the
Custom Settings dialog
Custom Settings dialog, where camera Custom Set tings can be
ad just ed.
Set Date and Time…
Selecting this op tion opens the dialog shown at right, where you can
set the cam era’s clock calendar to the current date and time. To view
the cur rent time and date set tings, click Use Current Date/Time.
Click Set to set the clock cal en dar to the time and date shown.
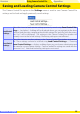
Edit Camera Curves…
This op tion is used to create a custom tone com pen sa tion curve and down load it to the cam era,
where it applies when “Cus tom” is se lect ed for the camera tone compensation option.
The controls in the Edit Camera Curves win dow are similar to those used to edit tone curves in
Adobe Photoshop and other imaging software, except in the following respects: (1) only the mas-
ter channel, not individual RGB channels, may be edited; (2) there is a limit of 20 spline points; (3)
the midpoint may not be edited; (4) a user-defi ned sample image can be se lect ed by clicking
Sample Image… (the sample image must be a RAW image created with a D1-series, D2-series,
D100, D200, D70S, D70, or D50 camera). Any chang es to curves are refl ected in the sample image.
In the case of the D2Xs, up to three curves can be edited using the Select the Curve for Edit
menu. To copy the edited curve to the camera, click OK.
The upper left section of the Edit Camera Curves window contains Load… and Save… but tons.
By clicking the Load… button, previously stored curves, with less than 20 spline points, can be
selected via the “Open” dialog (if the selected fi le has more than 20 spline points, a warning will
be displayed, and no fi le will be loaded). The Curves settings fi les from Nikon Capture Editor can
also be selected. Look for fi les with the “.ntc” or “.ncv” ex ten sion.
The Save… button opens the “Save As” dialog, where you can save the current curve.