Nikon The Nikon Guide to Digital Photography with the DIGITAL CAMERA (E:
Where to Find It Find what you're looking for from: ~'!'; The Table of Contents See pages v-vi Find items by function or menu name. The Q&A Index See pages vii-ix Know what you want to do but don't know the function name? Find it from the "question and answer" index. .... ..<)I, :~ The Index See pages 147-149 Search by key word. Error Messages See pages 132-133 If a warning is displayed in the control panel, viewfinder, or monitor, find the solution here.
Introduction ----------- Photography and Playback __ _-_ _----_. ._---------_. .. ._--_.- .. More on Photography (All Modes) __ - - - - - - - - - - _..__.._-------_. ------------_._--_._._-- _....._-_._--_ .•. _._-_._._---_._-_._._._------_ _._-. - .. Connecting to aTelevision, Computer, or Printer Playback Options: The Playback Menu ._--_ .. __._._---_.-.._-------_._--_.---- ------------------------.._ - ---_._---_.._ _._----_._----------_._------. __ __._._---_._---.
For Your Safety To prevent damage to your Nikon product or injury to yourself or to others, read the following safety precautions in their entirety before using this equipment. Keep these safety instructions where all those who use the product will read them. The consequences that could result from failure to observe the precautions listed in this section are indicated by the following symbol: ~ This icon marks warnings. To prevent possible injury, read all warnings before using ~ this Nikon product.
Do not handle the plug or charger with wet hands. Failure to observe this precaution could result in electric shock. it Use appropriate cables When connecting cables to the input and output jacks, use only the cables provided or sold by Nikon for the purpose to maintain compliance with product regulations. it CD-ROMs CD-ROMs containing software or manuals should not be played back on audio CD equipment. Playing CD- & ROMs on an audio CD player could cause hearing loss or damage the equipment.
Symbol for Separate Collection in European Countries This symbol indicates that this product is to be collected separately. The following apply only to users in European countries: • This product is designated for separate collection at an appropriate collection point. Do not dispose of as household waste. • For more information, contact the retailer or the local authorities in charge of waste management.
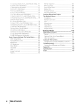
Table of Contents For Your Safety Notices Q & A Index ii iii vii Introduction 1 Getting to Know the Camera 2 Using Camera Menus First Steps Attaching a Lens Charging and Inserting the Battery Basic Setup Inserting Memory Cards Adjusting Viewfinder Focus 9 11 11 12 14 15 17 Tutorial 18 lJ IJPoint-and-Shoot Photography (AOO Mode) Creative Photography (Digital Vari-Programs) ~ ..L Portrait ~ Landscape ~Close up ~ SportsAutofocus ~ Night landscape ~ Night portrait...
15: Command Dials (P, S, A, and M Modes Only) 91 16: FUNC Button (All Modes) 92 17: Illumination (All Modes) 93 18: AE-L/AF-L (All Modes) 94 19: AE Lock (All Modes)... . 94 20: Focus Area (All Modes) 94 21: AF Area Illumination (All Modes) 95 22: Built-in Flash (P, S, A and M Modes Only) 95 23 Flash Warning (P, S, A and M Modes Only) 98 24: Flash Shutter Speed (P, S, A, and M Modes Only) .
Q&Alndex Find what you're looking for using this "question and answer" index.
Taking Photographs Question Key phrase Page # _.-.. --~. __._--..
Viewing, Printing, and Retouching Photographs Page# 61,63 62-63 .
~ Life·Long Learning As part of Nikon's "lifeLong Learning" commitrnent to ongoin~J product support and education, con tinually-updated information is available on-line at the following sites: · For users in the USA: http.//www.nikonusa.com/ • For users in Europe and Africa: http.//www.europe-nikon.com/support • For users in Asia, Oceania, and the Middle East: http.//www.nikon-asia.
Introduction I Thank you for your purchase of a Nikon D80 single-lens reflex (SLR) digital camera with interchangeable lenses. This manual has been written to help you enjoy taking pictures with your Nikon digital camera. Read this manual thoroughly before use, and keep it handy when using the product. To make it easier to find the information you need, the following symbols and conventions are used: ~ This icon marks tips, additional information that may be helpful when using the camera.
I Getting to Know the Camera Take a few moments to familiarize yourself with camera controls and displays. You may find it helpful to bookmark this section and refer to it as you read through the rest of the manual. Camera Body i+-ii-\-....;-+- 30 ~~29 I '--==:::0==-...
Memory card slot cover Focus selector lock Memory card access lamp CD button Battery-chamber cover latch Battery-chamber cover Multi selector' Tripod socket CI (playback zoom) button QUAL (image quality/size) button (thumbnail) button ISO (ISO sensitivity) button fII (help/protect) button WB (white balance) button • (menu) button @J (playback) button Monitor • (delete) button FO~ (format) button e 10 Viewfinder eyepiece Viewfinder eyepiece cup Diopter adjustment contro!.
The Mode Dial o The 080 offers a choice of the following eleven shooting modes: Advanced Modes (Exposure Modes) Select these modes for full control over camera settings. P - Programmed auto (tyj 47): Camera chooses shutter speed and aperture, user controls other settings. S - Shutter-priority auto (tyj 48): Choose fast shutter speeds to freeze action, slow shutter speeds to suggest motion by blurring moving objects.
Control Panel Shutter speed 48, 50 Exposure compensation value 54 Flash compensation value 55 ISO sensitivity 43 White balance fine-tuning, or color temperature 58,59 Number of shots in bracketing sequence .....................................................................................
If the battery is totally exhausted or not inserted, the display in the viewfinder will dim. The viewfinder display will return to normal when a fully-charged battery is inserted. Framing grid (displayed when On is selected 89 for Custom Setting 8 (Grid display)) 8-mm (0,31 in.
Supplied Accessories The MH- 78a Quick Charger ~ 72) The MH-18a is for use with the supplied EN-EL3e battery. CHARGE lamp Wall plug (shape varies with country of sale) AC inlet The EN-EL3e Rechargeable LHan Battery (1Ij 72, 73) The EN-EL3e is for use with the 080. 'J(!1fT1V'Itr·uO'~ ~on Nlkon NII
The Camera Strap Attach the camera strap as shown below. The BM-7 LCD Monitor Cover A clear plastic cover is provided with the camera to keep the monitor clean and protect it when the camera is not in use. To attach the cover, insert the projection on the top of the cover into the matching indentation above the camera monitor (CD) and press the bottom of the cover until it clicks into place (@).
Using Camera Menus Most shooting, playback, and setup options can be accessed from the camera menus. To view the menus, press the. button. Choose from playback, shoot-ing, Custom Settings, setup, and retouch menus (see below) Slider shows position in current menu Current setting for each option is shown by icon If I/?I/ icon is displayed, help for the current item can be viewed by pressing. button Menu ~ o @ 11' ~ L..
To modify menu settings: 1 a 2 SETUP MENU /;;~~O SETUP MENU ';." CSM/Setup menu 'f'i: Format memory card ~~ Format memory card "..rr;:;l ~ ~~~I~~t~ess /} World time Y LCD brightness Video mode Language USB ~~ Display menus. 0 Video mode Language :,~ USB: Ifill£) ,j En --:.~ 0 0 Ifill£) En .:.\lIC Highlight icon for current menu. 3 s 4 Position cursor in selected menu. 7 6 o~ Display options. 8 Image quality -_._ ..... _.~~ 10 NEF(RAW) ~ ~. .
First Steps Attaching a Lens Care should be taken to prevent dust from entering the camera when the lens is removed. 1 Turn the camera off. 2 Remove the rear cap from the lens. Remove the camera body cap. 3 Keeping the mounting index on the lens aligned with the mounting index on the camera body, position the lens in the camera's bayonet mount and rotate the lens in the direction shown until it clicks into place.
Charging and Inserting the Battery The supplied EN-EL3e battery is not charged at shipment. Charge the battery using the supplied MH-18a battery charger as described below. 1 Charge the battery. 1.1 Remove the terminal cover from the battery. 1.2 Connect the power cord to the charger and plug it in. 1.3 Place the battery in the charger. The CHARGE lamp will blink rr=;::::;:::==;---::----, as the battery charges. About two and a quarter hours are required for an exhausted battery to fully charge. 1.
2 Insert the battery. I 2.1 After connrming that the camera is off, open the battery chamber cover. 2.2 Insert a fully charged battery as shown at right. Close the battery chamber cover. ~ The Battery and Charger Read and follow the warnings and cautions on pages ii-iii and 127-128 of this manual, together with any warnings and instructions provided by the battery manufacturer. Use only EN-EL3e batteries.
Basic Setup The first time the camera is turned on, the language selection dialog shown in Step 1 will be displayed in the monitor. Follow the steps below to choose a language and set the time and date. 1 Language(LANG) --- .. _--- --------_.De Deutsch ---------~ . ~I 2 Language(LANGl --.,-_.. _,._--_. ... _ - .. __ ... De Deutsch ~ Es Espanol Fi Suomi Fr Fran~is It Italiano NI Nederlands Es Espanol Fi Suomi Fr Fran~ais It Italiano NI Nederlands Turn camera on. I' Select language.
Inserting Memory Cards The camera stores pictures on Secure Digital (SO) memory cards (available separately). 1 Insert a memory card. 1.1 Before inserting or removing memory cards, turn the camera off and open the card slot cover. 1.2 Slide the memory card in as shown at right until it clicks into place. The memory card access lamp will light for about a second. Close the memory card slot cover. 1.3 Turn the camera on.
Memory cards must be formatted the fIrst time they are used in the 080. To format the memory card, turn the camera on and press the FO~ (8 and eJ) buttons until control panel and viewfinder displays flash as shown at right. Pressing both buttons together a second time will format the memory card. During formatting, the letters F 0 " will appear in the frame-count display.
Adjusting Viewfinder Focus Photographs are framed in the viewfinder. Before shooting, make sure that the display in the viewfinder is in clear focus. I ~ Viewfinder Focus Viewfinder focus (diopter) can be adjusted ill the range -2-+ 1 mi. Corrective lenses (available separately; 122) allow diopters of -5 - + 3 rn l . tm 1 Remove the lens cap and turn the camera on. 2 Rotate the diopter adjustment control until the focus brackets are in sharp focus.
Tutorial Photography and Playback The Tutorial outlines the basics of taking and viewing photographs in A~ (auto) and Digital Vari-Program modes. This section assumes that default camera settings are used; for information on restoring default settings, see page 134. ~~«c- ~ Use a CPLJlens AUTO o ,'v"rr"',..--,r,,'j aperture dnd for about tton 6s ••_ Ie 5 .5.6 133 C'l Exposure meters on III U! (Auto meter off; 18 I Tutorial iTTC,' ... c,nc,[)n irldicatol's iii rrleter off), to rCa':.
IIPoint-and-Shoot" Photography (Ag Mode) This section describes how to take photographs in A~ (auto) mode, an automatic "pointand-shoot" mode in which the majority of settings are controlled by the camera in response to shooting conditions. 1 Turn the camera on. 1.1 Remove the lens cap and turn the camera on. The control panel and viewfinder displays will light. The monitor remains off during shooting. 1.2 Check the battery level in the viewfinder or control panel.
2 Select A~ mode and choose autofocus. 2.1 Rotate the mode dial to A~. 2.2 Rotate the focus-mode selector to AF (autofocus). 3 Check settings in the control panel. The default settings for A~ mode are listed below. @ ® _Option CD Flash sync mode m=T@ CD + + + 20 Default Auto '-m- .....
4 Frame a photograph in the viewfinder. The monitor remains off during shooting. 4.1 Hold the camera as shown. /-;-;,~ !. 7-,e~) .-J~ 7?,~, , _ ,/ ~t~folding the Ca!"era !~- . . I .~.' / ~.~ , / ......... ) / . ,/ IIff '"'.,\,,, .-. "-\ (/ /9 1/1 J'( ~---'-" (\ j\ / ) 4.2 Frame a photo in the viewfinder with the main subject positioned in any of the eleven focus areas. Focus area ~ Using a Zoom Lens Zoom in Use the zoom ring to zoom in on the subject so that it fills a larg~~.
5 Focus. - 5.1 Press the shutter-release button halfway to focus. The cam- t era will select the focus area automatically. If the subject is dark, the flash may pop up and the AF-assist illuminator may light. 5.2 When the focus operation is complete, the selected focus areas will be briefly highlighted, a beep will sound, and the in-focus indicator (e) will appear in the viewfinder (the beep may not sound if the subject is moving).
6 Take the photograph. Smoothly press the shutter-release button the rest of the way down to release the shutter and record the photograph. The access lamp next to the memory card slot cover will light. Do not eject the memory cord or remove or disconnect the power source until the lomp has gone out ond recording is complete. 7 Turn the camera off when shooting is complete.
Creative Photography (Digital Vari-Programs) In addition to A~, the D80 offers a choice of six Digital Vari-Program modes. Selecting a program automatically optimizes settings to suit the selected scene, making creative photography as easy as rotating the mode dial. -----=-~=.:..::.-.-:.:-====---=- - :--== ---.:..:::=-=--=--=--=--=--=--.=::::...--==--===-----==-=---==-=----=.. Mode '!PO=rt~~iCt"--==c"'=cc=-'~- - -- - - _--=-_.. ===-=-==-=-.----;-....===:--=-~=-===--_._--_ . . ._.. __.._---_._-------.
:l Portrait Use for portraits with soft, natural-looking skin tones. If the subject is far from the background or a telephoto lens is used, background details will ,--b_e_so_f_te_n_e_d_t_o_l_e_n_d_t_he_c_o_m_p_o_s_it'_IO_n_a_s_e_n_se_o_f_d_ep_t_h_. ---' I ~Landscape Use for vivid landscape shots. The built-in flash and AF-assist illuminator turn off automatically. ~C1oseUp Use for close-up shots of flowers, insects, and other small objects.
Basic Playback Photographs are automatically displayed for about four seconds after shooting. If no photograph is displayed in the monitor, the most recent picture can be viewed by pressing the @J button. Additional pictures can be displayed by rotating the main command dial or pressing the multi selector left or right. Press the multi selector up or down to view highlights or additional shooting information about the current photograph (~62-63).
Reference This section builds on the Tutorial to cover more advanced shooting and playback options. More on Photography (All Modes): ~ 28 IShoot a moving subject or focus manually IAdjust image quality and size I~e Quality and Size:. 33 Take photographs in one at a time, in bursts, or using the self-timer or a remote control IUse the built-in flash Choosing aShooting Mode:. 36 Using the Built·in Flash: .
More on Photography (All Modes) Focus Focus can be adjusted automatically (see Autofocus;' below) or manually (~32). The user can also select the focus area for automatic or manual focus (~30) or use focus lock to focus to recompose photographs after focusing (~31). 1/ Autofocus Controls used: Focus mode selector When the focus mode selector is set to AF, the camera focuses automatically when the shutter-release button is pressed halfway. In single-area AF, a beep will sound when the camera focuses.
Controls used: Autofocus Mode I button The fo!lowing autofocus modes a~e availabl~whe~.the focus mode ?~~~,set~() AF~c= Autofocus mode AF-A Auto select (default setting) AF-S Single-servo AF Description. . _. _,... Camera automatically selects single-servo autofoc:us when subject is stationary, continuous-servo autofocus when subject is moving. Shutter can only be released if camera is able to focus. ----For stationary subjects. Focus locks when shutter-release button is pressed halfway.
Focus Area Selection Controls used: Multi selector (monitor off) The 080 offers a choice of eleven focus areas that together cover a wide area of the frame. At the default settings, the camera chooses the focus area automatically or focuses on subject in the center focus area. The focus area can also be selected manually to compose photographs with the main subject positioned almost anywhere in the frame. 1 At default settings, the focus area is selected automatically in A~, 7, ~, ~, and 1:.:1 modes.
Focus Lock Controls used: AE-UAF-l button (AF-AIAF-C)/Shutter·-release button (AF-S) Focus lock can be used to change the composition after focusing, making it possible to focus on a subject that will not be in a focus area in the final composition. It can also be used when the autofocus system is unable to focus (~29). 1 Position the subject in the selected focus area and press the shutter-release button halfway to initiate focus. 2 Check that the in-focus indicator (e) appears in the viewfinder.
Manual Focus Controls used: Focus mode selector/lens focusing ring Manual focus is available for lenses that do not support autofocus (non-AF Nikkor lenses) or when autofocus does not produce the desired results (fI129). To focus manually, set the focus-mode selector to M and adjust the lens focusing ring until the image displayed on the clear matte field in the viewfinder is in focus. Photographs can be taken at any time, even when the image is not in focus.
Image Quality and Size Together, image quality and size determine how much space each photograph occupies on the memory card. Larger, higher quality images can be printed at larger sizes but also require more memory, meaning that fewer such images can be stored on the memory card. ~e e 'v?>\.~s
Image Quality Controls used: . . button + main command dial (monitor off) The camera supports the following image quality options (listed in descending order by image quality and file size): __ ~ption _~_~escription _ _ .~ _ --~EF (~A~;~Compressed raw- data' from the image sensor are saved directly to merrio·ry·card. ._.__.. .>._~. . Choose for images that will be processed on a computer. ._ ---------------_.__. _ - - - - - - - ,__.. JPEG Fine _0 ••• ._. •_ _ ~ ~ __ • • __ • ' • • _.
Image Size Controls used:. button + sub-command dial (monitor off) Image size is measured in pixels. The following options are available. =_ Image size Large (3872 x 2592/10.0 M) (default) Medium (2896 x 1944/5.6 M) Small (1936 x 1296/2.5 M) Size (pixels) Approximate siz~_'I.'hen printed a! 20~dpr 3,872 x 2,592 49.2 x 32.9cm (19.36 x 12.96 in.) 2,896x 1,944 36.8x24.7cm (14.48x9.72 in.) 1,936 xl ,296 24.6 x 16.5 cm (9.68 x 6.48 in.
Controls used: I button Shooting mode determines how the camera takes photographs: one at a time, in a continuous sequence, with a timed shutter-release delay, or with a remote control. Mode Description Single frame Camera takes one photograph each time shutter-release butto~is p~essed. Access lamp will light while photo is recorded; next shot can be taken immediately if enough space remains in memory buffer.
Self-Timer Mode (~) The self-timer can be used to reduce camera shake or for self-portraits. 1 Mount the camera on a tripod or place the camera on a stable, level surface. 2 Press the ~ button until ~ is displayed in the control panel. ~a I a~ ~ 3 4 • 0 ,- ~ ! I L . ... ~_ ... Frame the photograph. Before taking a photograph with the flash in P, 5, A, or Mmodes (t¥J 45), press the 0 button to raise the flash and wait for the ~ indicator to be displayed in the viewtlnder (t¥3 40).
Using a Remote Control (~) Use the optional ML-L3 remote control for self-portraits remotely. (tY3 123) or to operate the camera t~l~B~fo~;:n~i~n~_th~~e~~_~! COI'l!ro~ ~_ . . J~~' f(-~E~- u c; i1_1S]~ t Ii ~': 1~~~1 () t e ~~ 0 n trc)IJc)t t ~i-e fi r<; ~t~ iim-E\-r~~·I:YillVet1leCi(~.;st . ~-_.=_=c=:=~~ ic 1:;Jit E~ rymS0:;t(2:'~;rl~~~t'---- . 1 Mount the camera on a tripod or place the camera on a stable, level surface. 2 Press the I button to select one of the following modes: ===~===o~.
r:J Using the Built-in Flash If the Ai -'sh i<;~ '-eCll1'--"!il'erl ,;q I . e.... ..... 1 tf"o') r-amE'r-j c \' VVII l le,- 1._ fE"poncl '''C'' rh"t. II L.J ,tile 1 . .r~'uttDr-role':I"e ),1 . l J .. b''-- 1tt(')I" .,\. l ()i'l .. "r,I,' (J ,1/...... _ 1...1.\.... r '-- .. '-'jr"l/"e '-.' I...~_. 1 2 :\:1 VlL ,,1....
Using the Built-in Flash The camera supports a variety of flash modes for photographing poorly lit or backlit subjects. Using the Built-in Flash: A8", 7, ~, and I::J Modes 1 Rotate the mode dial to select the desired mode. the 0 button and rotate until the desired flash mode is displayed in the control 2 Press panel ~41). 3 Take pictures. The flash will pop up as required when the shutter-release button is pressed halfway, and fire when a photograph is taken.
~ Flash Mode _~J The CutTent flash mode is displayed in the control panel as shown below. c:i) is displayed vvhen the flash is off. ET~I i L~ _ . . - - - - - - @: Red-eye reduction Use for portraits. Red-eye reduction lamp lights before flash fires, reducing "red-eye~' ,-----, : @ :- - c:i): Off :... ,, l ~ ~. I REARJ L Flash does not fire even when lighting is poor or subject is back-lit.
~ The Built-in Flash Use with (TU Ie-rbes with foced lengths of 'j 8-300 mr,l or non-CPU lenses vvith focai ii:,rKJths of 1g-200 rmn (~ 118; note that auto flJsh level control is available with CPU lenses only) f~r::·rnove lens hO()(i~) to picve! It <;hadows Lenses th;:lt block the "ubjeet's view of the red eye redUCTlO!"1 !al'np may l!lt('rlere \Hth red eye' l-echK lion.
ISO Sensitivity Controls used: e button -+- main command dial (monitor off) "ISO sensitivity" is the digital equivalent of film speed. The higher the ISO sensitivity, the less light needed to make an exposure, allowing higher shutter speeds or smaller apertures. ISO sensitivity can be set between values roughly equivalent to ISO 100 and ISO 1600 in steps equivalent to '13 EV. Values over 1600 are displayed as H 0.3 (ISO 2000 equivalent), H 0.7 (ISO 2500 equivalent), and H 1.0 (ISO 3200 equivalent).
Controls used: ~ button + Qj button The camera settings listed below can be restored to default values by holding the ~ and Qj buttons down together for more than two seconds (these buttons are marked by a green dot). The control panel turns off briefly while settings are reset. Custom Settings are not affected. .~~tion ._ __ __ Shooting mode - . . _.. ___!>.e!a.~.!!. .__ _ - ------------------"._-,_ .. 36-39) ~,._. _.
p, S, A, and MModes P, S, A, and M modes offer control over a variety of advanced settings, irlcluding exposure (~ 52), white balance, and image optimization. Each of these modes offers a different degree of control over shutter speed and aperture: Description __ _ ==~= Camera sets shutter speed and aperture for optimal exposure. RecomProgrammed auto mended for snapshots and in other situations in which there is little (~47) time to adjust camera settings. ---_.
Exposure r lit..' C'XpOSUIC' (bii':!htness) of photoeJrapt'!s is determined by the arnount ot light the'lt falls ()[i the image ',cnsci (CCD) while the shutter is open. Two factors that deterniine exposure are shutter speed and i1perture. !-\perture reters 1n the size of the openln(j through which the light passes The larger the aperttlfC', the CJlc?ter the amOUill of light that passe") throll~lh the opening and the briqhter the exposure ~)maller i1pertures r"ean less light and darker exposures.
Mode P(Programmed Auto) In this mode, the camera automatically adjusts shutter speed and aperture for optimal exposure in most situations. This mode is recommended for snapshots and other situations in which you want to leave the camera in charge of shutter speed and aperture. To take photographs in programmed auto: 1 Rotate the mode dial to P. 2 Frame a photograph, focus, and shoot.
Mode S(Shutter-Priority Auto) In shutter-priority auto, you choose the shutter speed from values between 30 sand 1/4,000 s while the camera automatically selects the aperture that will produce the optimal exposure. Use slow shutter speeds to suggest motion by blurring moving subjects, high shutter speeds to "freeze" motion. To take photographs in shutter-priority auto: 1 Rotate the mode dial to S. 2 Rotate the main command dial to choose the desired shutter speed. ~ ::- C'So ~ ret) ,,.
Mode A(AAertllre-Prioriq Alto) In aperture-priority auto, you choose the aperture from values between the minimum and maximum for the lens while the camera automatically selects the shutter speed that will produce the optimal exposure. Small apertures (high f-numbers) increase depth of field, bringing both the main subject and background into focus. Large apertures (low f-numbers) soften background details. To take photographs in aperture-priority auto: 1 Rotate the mode dial to A.
Mode M(Manual) In manual exposure mode, you control both shutter speed and aperture. Shutter speed can be set to values between 30 sand 1/4,000s, or the shutter can be held open for indefinitely for longer exposures (b u t b). Aperture can be set to values between the minimum and maximum values for the lens. To take photographs in manual exposure mode: 1 Rotate the mode dial to M. 2 Rotate the main command dial to choose a shutter speed, and the sub-command dial to 'J" set aperture.
Long Time-Exposures Shutter speeds of"bulb" and "__" can be used for long time-exposure photographs of moving lights, the stars, night scenery, or fireworks. To prevent blurring caused by camera shake, use a tripod and an optional remote control 123) or remote cord 12'3). .Shutter speed buLb Desc!iption .. _ ___ ._ . -.~c=~~c=cc~=c.~c===-c~=c~c=~_c~~~==c='c,=cccc==-c= Shutter remains open while the shutter-release button is held down. -~---------O-ptional-ML-C3 remote control required (~ 123).
Exposure Metering Controls used: e button + main command dial The metering method determines how the camera sets exposure. The following options are available: __ ._. . [te) ~et~!~. .~ Des(~iption ~ _ . _ ====== Recommended in most situations. Camera meters a wide area of the frame 3D Color Matrix II and sets exposure according to distribution of brightness, color, distance, and composition for natural results. ._-_._--~-------~----------------- ~ GJ .
Autoexposure Lock Controls used: AE-UAF-l button Use auto exposure lock to recompose photographs after metering exposure: 1 Select mode P, S, or A and choose center-weighted or spot metering (exposure lock has no effect in mode M, while A~ and Digital Vari-Program modes are not recommended as center-weighted and spot metering are not available in these modes). If using centerweighted metering, select the center focus area with the multi selector (~ 30). ..J tttl ~ ,,-, [ ~ L_. ~.__._. [0]. • .__ .
Controls used: ~ button + main comrnand dial Exposure Compensation Exposure compensation is used to alter exposure from the value suggested by the camera, making pictures brighter or darker. It is most effective when used with center-weighted or spot metering 52). Exposure compensation is available in modes P, S, and A (in mode M, only the exposure information shown in the electronic analog exposure display is affected; shutter speed and aperture do not change).
Flash Exposure Compensation Controls used: 0 button + sub command dial Flash exposure compensation is used to alter flash output from the level suggested by the camera, changing the brightness of the main subject relative to the background. Flash output can be increased to make the main subject appear brighter, or reduced to prevent unwanted highlights or reflections. Press the 0 (DB) button and rotate the sub-command dial until the desired value is displayed in the control panel.
Bracketing Controls used: (Jr button + command dials Bracketing automatically varies selected settings slightly with each shot, "bracketing" the current value. The setting affected is chosen with Custom Setting 13 (Auto BKT set; ~ 90); Below, it is assumed that AE & flash is selected to vary exposure and flash level. Other options can be used to vary exposure or flash level separately or to bracket white balance.
3 Compose a photograph, focus, and shoot. The camera will vary exposure and flash level with each shot. At default settings, the first shot will be taken at the current values for exposure and flash compensation and the following shots at modified values. If the bracketing sequence consists of three shots, the ~ bracketing increment will be subtracted from the current values in the second shot and added in the third shot, "bracketing" the current values.
White Balance Controls used: WB button + main command dial (monitor off) White balance ensures that colors are unaffected by the color of the light source. Auto white balance is recommended for most light sources; if necessary, other values can be selected according to the type of source. The following options are available: A .~P!~_~n. .~=,~"c~===,_. __~~~c!p_t~.~,~,,,, . ~~., .., =..=,,=c..="~===_c_ .. ===_===.~" . . . . . ===.. .~- . . ._.. _'._"."=~='" .cc=....._~,,= . ,.. ,_. ~. =.
Choosing a Color Temperature Controls used: WB button + sub-command dial (monitor off) At a setting of [3 (Choose color temp.), color temperature can be selected by pressing the WB button and rotating the sub-command dial until the desired value is displayed in the control panel. Color temperature can also be selected in the shooting menu (t¥J 82).
Measuring a Value for Preset White Balance 1 Place a neutral gray or white object under the lighting that will be used in the nnal photograph. A standard gray card can be used as a reference in studio settings. Do not use exposure compensation. 2 Press the WB button and rotate the main command dial until PRE is displayed in the control panel. 3 Release the WB button briefly and then press the button until displays start to nash as shown at right.
More on Playback Viewing Photographs on the Camera To view photographs in the monitor, press the @ button. Photographs taken in "tall" (portrait) orientation are displayed in tall orientation as shown at right. The following operations can be performed in full-frame playback: To View additional photographs View photo information Zoom in on photo Delete photo Protect photo View thumbnails Exit to shooting mode View menus Retouch photo ===Use Description ...
Photo Information Photo information is superimposed on images displayed in full-frame playback. Press the multi selector up or down or rotate the sub-command dial to cycle through the following information: Basic Information H Shooting Data Page 1 H Shooting Data Page 2 H Retouch History (retouched copies only) H Highlights H RGB Histogram H Basic Information.
Highlights Highlights are areas of the image in which details may be lost ("washed out") due to overexposure. Use the highlight displayas a guide when adjusting exposure. Protect status 65 Retouch indicator 109 Image highlights (areas of image that are "washed out") are indicated by flashing border Frame number/total number of images RGB Histogram A histogram is a graph showing the distribution of tones ill the image.
Taking a Closer look: Playback Zoom Press the II button to zoom in on a photograph in full-frame playback. ,The following operations can be performed: To - -- - ----- Use _=C~==_-~_~7~_-==~=-_= Zoom in and out View other areas of image I View other images ------------ _ .. a/G . rrJ.f\ .1 1<11 --, [~j m , _~~sc~~pti.'l~ '-.. .._, . Press-Gtoz-oo-m -Tnto--maxi' m-. um _ -------- -- Rotate main command dial to view same location in other images at current zoom ratio.
Protecting Photographs from Deletion In full-frame, zoom, and thumbnail playback, the til button can be used to protect photographs from accidental deletion. Protected files can not be deleted using the CI button or the Delete option in the playback menu, and have DOS "read-only" status when viewed on a Windows computer. Note that protected files will be deleted when the memory card is formatted (E¥3 102).
Connecting to a Til Computer, or Printer Viewing Photographs on TV The supplied EC~-D2 audio/video (AN) cable can be used to connect the camera to a television or VCR for playback or recording. Background music included with Pictmotion slide shows (fIj 75) will be played back over the television speakers. 1 Choose the appropriate video mode (~ 103). 2 Turn the camera off. Always turn the camera off before connecting or disconnecting the AN cable.
Connecting to a Computer This section describes how to connect the camera to a computer using the supplied UC-E4 USB cable. Once the camera is connected, Nikon Transfer (supplied) or optional Nikon software such as Camera Control Pro 2 or Camera Control Pro can be used to copy photographs to the computer or control the camera remotely. Before Connecting the Camera Install Nikon Transfer from the supplied Software Suite installer CD (see the Quick Start Guide for more information).
4 Turn the camera on. The computer will detect the camera automatically and display Nikon Transfer. If Mass Storage is selected for USB, the control panel and Viewfinder will display the indicators shown at right (when MTP/PTP is selected, the normal shooting indicators are displayed). P[l S Transfer photographs to the computer as described in the online help for Nikon Transfer. To view the online help, start Nikon Transfer and select Nikon Transfer help from the Nikon Transfer Help menu.
Printing Photographs Photographs can be printed by any of the following methods: • Connect the camera to a printer and print JPEG photographs directly from the camera (see below). • Insert the camera memory card in a printer equipped with a card slot (see the printer manual for details). If the printer supports DPOF (~ 134), photographs can be selected for printing using Print Set (t¥; 73). • Take the camera memory card to a developer or digital printer center.
Connecting the Printer Before printing, check that the camera battery is fully charged. If in doubt, charge the batteryor use an EH-5/EH-5a AC adapter (available separately). 1 Set the camera USB option to MTP/PTP (~ 104). 2 Turn the printer on. 3 Turn the camera off. 4 Connect the supplied UC-E4 USB cable as shown. Do not use force or attempt to insert the connectors at an angle. Connect the camera directly to the printer; do not connect the cable via a USB hub or keyboard.
Printing Pictures One at a Time To print the picture currently selected in the PictBridge playback display, press OK. The menu shown at right will be displayed. Press the multi selector up or down to highlight an option and press to the right to select. _____~~!ion ._. !!es~!.ip~~~ . . _ --- -.------------Pnntcurr-e-nt-r=;jctur-e~-T0cance-iand-retu rn toO-Pi ctBrlcJg-e--pfayba-ck-aispfay-b-e fo-re-print~ Start Printing ing is complete, press OK.
Printing Multiple Pictures To print multiple pictures or create an index print listing all JPEG photographs as small thumbnail images, press the GIl button in the PictBridge playback display. The menu shown at right will be displayed. Press the multi selector up or down to highlight an option and press to the right to select. Option " PlctBridge - - - 1"1' Print Sele' , . ~ Print (DPOF) Index Print Description Print Select Print selected pictures (see below).
Creating a DPOF Print Order: Print Set The Print Set option in the playback menu is used to create digital "print orders" for PictBridge-compatible printers and devices that support DPOF. Selecting Print Set from the playback menu displays the menu shown in Step 1. , 2 Highlight Select I Set. 3 Display selection dialog. Select pictures and specify number of prints as described in Steps 2 - 3 on previous page. Note that RAW (NEF) photos can not be selected for printing.
Menu Guide Playback Options: The Playback Menu The playback menu contains the following options (options displayed may differ if My menu is selected for the CSM/Setup menu option in the setup menu; tt3 101). See "Using Camera Menus" (~ 9) for more information on using the menus. ... .,c,~i~~~:==_-_~~sc~!e!l~~::_-_-:=~~n:~~_~::_=_::==,~_,::.::_~_:=~-~:::==~~~~~=-: Delete Delete all or selected photos. -_.-. __ . ~Iaybackfolde!_.s:_~~~_sefolder for play~~______ Rotate tall ---- ----_..
Playback Folder Choose a folder for playback: Option Description __ _ Only photos in the folder currently selected for Folders in the shoot-ing menu are displayed during playback. This option is selected Current automatically when a photo is taken. If a memory card is inserted (default) and this option selected before photos have been taken, a message stating that the folder contains no images will be displayed durin~1 playback. Select All to begin playback.
2 Choose a style Highlight Change settings and press the multi selector right, then highlight Style and press the multi selector right. Highlight one of the following options and press OK to select the highlighted option and return to the slide show menu. ·Standard: Pictures are played back at a selected interval, without background music, transitions, or other effects. ·Pictmotion: Select a pattern that includes background music with matching transitions and panning and zoom effects.
4 a Start the show To start the slide show, highlight Start and press OK. The following operations can be performed during a slide show: Slide show .~ ~ ALL Select pictures Cll Change settings Pause after ~~,,==-_r.0_======-~ __ ~.~~~=.= -=,,~-'-',_ restart~ :9)<) Description _ Go forward or 11"" f~l Press multi selector or rotate main command dial left to return to the prevIous frame, right to skip to the next frame. This opback one frame t\~ "7 ~/ Q ~ tion is not available if Pictmotion is select
Hide Image Hide or reveal selected photographs. Hidden images are visible only in the Hide Image menu, and can only be deleted by formatting the memory card. === Optio~~~ ~=-_~e~~r~~ion ~--==-cc~=-~--=_-=--=~~=,,=,-----c-="'==_~ Select/set Deselect all? ------~-~ Hide or reveal selected photographs (~ 74). - - - Reveal all photographs. ~~_Fili~i!!i~~!.~c~~_!~~_H~~_~e~=IJ!l~g!i=__~-__~~==_=~=,=~, ..==="====~~~=~-=_==-== .
Shooting Options: The Shooting Menu .__. 5~9_ClTJ.N~M~N U l::j Optimize Image (]) N I The shooting menu contains the following options (options displayed may differ if My menu is selected for the CSM/Setup option in the setup menu; 101). See "Using Camera Menus" 9) for more infor-· mation on using the menus. 0='cp=ti=on=====Descriptio~_ Optimize image' Image quality t Imagesize i White balance ' I _ Optimize images according to scene.
Customizing Image Enhancement Options: Custom Select Custom to make separate adjustments to the following options. After adjusting settings, highlight Done and press · Image sharpening: Choose how much outlines are sharpened during shooting. Choose high settings for sharp outlines, low settings for softer outlines. Default setting: Auto. m. · Tone compensation: Control contrast. Lower settings prevent loss of detail in highlights under harsh lighting or in direct sunlight.
Taking Pictures in Black-and-White: Black-and-White Selecting Black-and-white for Optimize image displays the menu shown at right. Choose Normal to take standard black-and-white pictures, or Custom to adjust sharpening and tone compensation before shooting as described in on page 80. Custom also supports the following color filter effects: Filter effect Off Description_ No color filter effect. - - - - ---------------- ---------------- - -Yellow - _ . _ - Enhances contrast.
White Balance (P, S, A, and M Modes) Nine options are available for white balance. See "Reference: White Balance" (~58). Copying White Balance from a Photograph A white balance value copied from an existing photograph can be used for preset white balance. Select White balance> White balance preset in the shooting menu. The menu shown in Step 1 will be displayed. 1 2 Highlight Use photo.' " To use lasr rf!c,lSlHed \laille Display current source photo.
ISO Sensitivity (All Modes) Adjust ISO sensitivity. See "Reference: ISO SellSitivity" 43). long Exp. NR (All Modes) Photographs taken at shutter speeds slower than 8 s can be processed to reduce "noise" in the form of randomly-spaced, brightly-colored pixels.
Multiple Exposure (P, S, A, and M Modes) Follow the steps below to record a series of two or three exposures in a single photograph. Note that at default settings, shooting will end automatically if no operations are performed for 30 s. For an interval between exposures of more than 30 s, choose 30 min for Custom Setting 28 (Auto meter-off; ~ 99) or use an optional EH-5/EH-5a AC adapter. 1 Selecting Multiple exposure in the shooting menu displays the menu shown at right.
S Highlight Done and press OK. MultIPle exposure o ~~ 2 Number of shots ON Auto gain A ~ icon will be displayed in the control panel. To exit without recording a multiple exposure, select Multiple exposure from the shooting menu, highlight Reset, and press OK. 6 Frame a photograph, focus, and shoot. The ~ icon will start to r ~ blink. '\ I / ~ I ~ Cancelling a M~~Exposure I' _ To erld shooting before the multiple exposure i:i complete, select Multiple exposure from the shooting menu, highlight
Custom Settings Custom Settings are used to customize camera settings to suit individual preferences. The following options are available when Simple (the default option) is selected for CSM/Setup menu in the setup menu (~ 101): ·C· CC.·=C.. '~~~~'=_~' __7' R Reset 86--. . ---_._, .. ---- _..... - ._----------_.__ 1 Beep 86 ------------_. _._----- -----_.__.. .. _-------.2 AF-area mode 87 --------------3 Center AF area 87 --- - - - _ . - . _ ..- _._----_._---- ---------4 AF-assist 87 ---_. __ ._-_.
2: AF-Area Mode (All Modes) This option determines how the focus area is selected in autofocus mode (~28). Choose from: _AF-area mode ;~ tt)~ Dynamic area [-j Auto-area Af Description , . _ , " . = _= = User selects focus area using multi selector; camera focuses on subject in selected focus area only. Use with stationary subjects. Default setting for P, S, A, M, and ...~ modes.
5: No Memory Card? (All Modes) If Release locked (the default setting) is selected, the shutter-release is disabled when no memory card is inserted. Choose Enable release to enable the shutter-release button when no memory card is inserted. Photographs will be displayed in the monitor but will not be saved. 6: Image Review (All Modes) If On (the default setting) is selected, photographs will automatically be displayed in the monitor for about four seconds after shooting.
8: Grid Display (All Modes) Select On to display grid lines in the viewfinder to assist in framing photographs (tvj 6). The default option is Off. 9: Viewfinder Warning (All Modes) Select On (the default option) to display the following warnings in the viewfinder (tv: 6): = = = . = = = = = --- Warning 81W cC]I __8 --=-_~=-_--=~~7 Description . .. Displayed when Black-and-whiteTs selected-for-Optin1iie im~ age in the shooting menu (t1jSl). Displayed when the battery is low.
12: Center-Weighted (P, S, A, and M Modes Only) This option controls the size of the area in the center of the viewfinder assigned the greatest weight in center-weighted metering. The default option is 8 mm. 13: Auto BKT Set (P, S, A, and M Modes Only) The following options are available: Auto BKT set _____ !lp~I! ~!~erip!ion .__.~_~ .__.__._ .... ... . . -.------------------_ ---AE & flash------------ ----------------.---------.------------.
1/ Compose a photograph, focus, and shoot. Each shot will be proF u l l\ \ cessed to create the number of copies specified in the bracketing 2 program, and each copy will have a different white balance. Modi- i / 1\ \ fications to white balance are added to the white balance adjust- MM ~. . ment made with white balance fine-tuning. I I \ If the number of images in the bracketing program exceeds the number of exposures remaining, F u t t (F u U will be displayed and the number of exposures remaining will b
16: FUNC Button (All Modes) Choose the function performed by the FUNC. button . .c_~~pct~~n~__ c.=R~~c.:r~ption _~~= ISO display __ The modified value for ISO sensitivity is displayed while the FUNC button is pressed. (default) .. -~._.,"--.~--,---_._~---------_ _._----~-----_. F . 'd rammg grl _ . _ ~ Press the FUNC button and rotate the main command dial to turn the grid display in the viewfinder on and off (~89). ---~---_._--_._-- -------_.
3 Position the subject in the center of the frame and press the shutter-release button halfway to focus. Check that the flash-ready indicator (~) is displayed in the viewfinder. 4 Press the FUNC. button. The flash will emit a monitor preflash to determine the appropriate flash level. Flash output will be locked at this level and a flash-value lock icon will appear in the viewfinder. S Recompose the photograph. 6 Press the shutter-release button the rest of the way down to shoot.
18: AE-LIAF-L (All Modes) AE-LfAH Choose the function performed by the AE-UAF-L button. .18J~1 ." 6, AE lock only 6, AF lock 610'~ AE lock hold AF AF-ON m FVlock H Focus area selection :_==..Q.etio-"~=,.~e~~~!io"-~~====~~=~~==--- AE/AF lock (default) Both focus and exposure lock while the AE-VAF-l button is pressed. -c-----------,-.:---------- AE lock only AF lock Exposure locks while the AE-VAF-L button is pressed. Focus is unaffected. Focus locks while the AE-VAF-L button is pressed.
21: AF Area Illumination (All Modes) At the default setting of Auto, the active focus area is highlighted in the viewfinder as need to establish contrast with the background. If Off is selected, the focus area is not highlighted. If On is selected, the focus area will always be highlighted, although it may be difficult to see against the background. 22: Built-in Flash (P, S, A, and M Modes Only) Choose a flash control mode for the built-in flash.
Built-in flash Commander mode: Use the built-in flash as a master flash controlling one • Commander mode Mode Camp or more remote optional SB-800, SB-600, or SB-R200 flash units in up to I' Built-inflashliiJ. ~ two groups (A and B) using advanced wireless lighting. Selecting this Group A OIl ~ GroupB OIl ~ option displays the menu shown at right. Press the multi selector up or Channel II CH <)Move C;)Sel (QK Done down to highlight the following options, up or down to change.
5 Press OK. the shot and arrange the flash units as shown below. Note that the maxi6 Compose mum distance at which the remote flash units can be placed may vary with shooting conditions. 60'-300 ~ ' 10 m/33 fr or less s/ __ ~ _, 30.0~r~esJ 5m/16fr or less '/ '\ ( Wireless remote sensors on flash units should face camera. ~'l'--~'" -'-1J~~u~~:~flash) ,'~ 0 30 or less \ .. @''' '0 " 5 m/16 ft or less 600-100 ~ 7 Turn all the remote flash units on and set them to the channel selected in Step 4.
23: Flash Warning (P, S, A, and M Modes Only) If On (the default setting) is selected and lighting is poor, the flashready light (~) will flicker in the viewfinder when the shutter-release button is pressed halfway to warn that the built-in flash is required. No warning will be displayed if Off is selected. 24: Flash Shutter Speed (P, S, A, and M Modes Only) Choose the slowest shutter speed at which the flash will be used in modes P and A (the default setting is 1/60 s).
28: Auto Meter-Off (All Modes) Choose how long the camera continues to meter exposure when no operations are performed (the default setting is 6 s). Choose a shorter meter-off delay for longer battery life. Regardless of the setting chosen, the exposure meters remain on for ten minutes when the camera is powered by an optional EH-S/EH-Sa AC adapter. ,Auto meter-off • @4s4s ~~ @8s8s @16s16s '~1Is30s @3DIl30min.
32: MB-D80 Batteries (All Modes) To ensure that the camera functions as expected when AA batteries are used in the optional MB-D80 battery pack, match the option selected in this menu to the type of batteries inserted in the battery pack. There is no need to adjust this option when using EN-EL3e batteries. _c. _._-_-,_,,_--==-=c=_O~!!c0,~ - . __ ._.==~_=~~'" lR6 (AA alkaline) ~!.~~!if!-~.!1 ~=,_==_ ~,__. -'O__"=CC_7=~ -~~ - =='c.
Basic Camera Settings: The Setup Menu A---- __ .sET~P_~.l:N~ The setup menu contains the options listed below (options displayed may differ if My Menu is selected for CSM/Setup menu). See "Using Camera Menus" (~9) for more information on using the menus. _ '0 •. CSM/Setup menu t] ~~~~\:;orycard II LCD brightness 0 iEllil : Video mode Language USB En ..".
3 Press the multi selector up or down to highlight items and then • press to the right to select or deselect. Selected items are indicated by a check mark. 't 4 Highlight Done and press OK to return to the list of menu names Select Items12 Done ~ Delete o Playback folder 0 Rotate tall ~ Slideshow ~ ~ Print set Select Items III '. Bark .~ ~ Delete o Playback folder y 0 Rotate tall ~ Slide show o Hide Image ~ Print set shown in Step 1. Repeat steps 2-3 to edit additional menus.
World Time World time Set the camera clock to the current date and time. .~ Option Description . Choose the time zone. The camera clock will automatically be Time zone reset to the time in the selected zone. Set the camera clock (~14). Reset the clock regularly for ac-Date curate time keeping. Choose the order in which the month, day, and year are disDate played. format Turn daylight saving time on or off. The camera clock is autoDaylight saving time matically advanced or set back one hour.
USB Choose a USB option for connection to a computer or PictBridge printer. Choose MTP/PTP when connecting to a PictBridge printer or using Camera Control Pro 2 or Camera Control Pro (both available separately). See "Connecting to a Computer" for information on selecting a USB option for use with Nikon Transfer 67). Image Comment Add a comment to photographs as they are taken. Comments can be viewed in ViewNX (supplied) or Capture NX (available separately; ~ 123).
Folders Create, rename, or delete folders or choose the folder in which new photographs will be stored. · Selectfolder: Choose the folder in which subsequent photographs will be stored. NCD80 (default folder) __~~l Current folder Other folders (in alphabetical order) • New: Create a new folder and name it as described in "Naming Folders;' below. • Rename: Select a folder from a list and rename it as described in "Naming Folders;' below. · Delete: Delete all empty folders on the memory card.
File No. Sequence File no sequence Choose how the camera names nles. · Off (default): File numbering is reset to 0001 when a new folder is creat;~ 't On ed, the memory card is formatted, or a new memory card is inserted. • On: File numbering continues from the last number used after a new Reset folder is created, the memory card is formatted, or a new memory card is inserted.
2 With the lens ten centimeters (four inches) from a well-lit, featureless white object, frame the object so that it fills the viewfinder and then press the shutter-release button halfway. In autofocus mode, focus will automatically be set to infinity; in manual focus mode, set focus to infinity manually. 3 Press the shutter-release button the rest of the way down to acquire Image Dust Off reference data. The monitor turns off when the shutter-release button is pressed.
Firmware Version View the current camera firmware version. Auto Image Rotation Photographs taken while On (the default option) is selected contain information on camera orientation, allowing them to be rotated automatically during playback (til 61) or when viewed in ViewNX (supplied) or Capture NX (available separately; 123).. The following orientations are recorded: .,- Auto Image rotation • y ~ Off ,'f,r,'. ~' .~ ~ " = \'" () ._~, ;1) Landscape (wide) orientation Y.
Creating Retouched Copies: The Retouch Menu The options in the retouch menu are used to create trimmed, resized, or retouched copies of the photographs on the memory card. The following options are available (options displayed may differ if My menu is selected for the CSM/Setup option in the setup menu;t'fj 101). See"Using Camera Menus" (~ 9) for more information on using the menus.
To copy photos from the retouch menu: 1 CI RETOUC H MENU -.- D-llghting ('h Red-eye correctIOn @ .If. 2 Trim ';( Y~c. l'i'.f Filter effects Small PICture Image overlay () Uioi ~ Highlight menu item. 3 Display selection screen. 4 ~~ Highlight photo. < Display retouch options. t , Photos carl also be highlighted using command dials: rllain cOlnmand dial r1lOves cursor horizontally, sub c:onilnand dial rTloves cursor veltically. To view selected picture full frame, press and hold. button.
Red-Eye Correction Selecting this option displays a preview image as shown below. Confirm the effects of redeye correction and create a corrected copy as described in the following table. Note that red-eye correction may not always produce the expected results and may in very rare circumstances be applied to portions of the image that are not affected by red eye; check the preview thoroughly before proceeding. Red-eye correction is available only with photographs taken using the nash.
Monochrome Choose from Black-and-white, Sepia, and Cyanotype (blue and white monochrome). Selecting Sepia or Cyanotype displays a preview of the selected image; press the multi selector up to increase color saturation, down to decrease. Press OK to create a monochrome copy and return to the retouch menu or full-frame playback. Filter Effects Choose from the following options.
Selecting Small picture from the retouch menu displays the menu shown in Step 1. Follow the steps below to create small copies of multiple pictures. 1 2 Small Picture • Choose size ~ u CiiiI 320x240 Q 160x120 utl Highlight Choose size. 3 Display options. 4 Highlight desired picture size. 6 5 Highlight Select picture. Display selection screen. 8 7 o Select pictures (~74). Selected pictures are marked with ~ icon. 9 10 Highlight Yes. . x Confirmation dialog displayed.
Image Overlay Image overlay combines two existing RAW photographs to create a single picture that is saved separately from the originals. The new picture is saved at current image quality and size settings; before creating an overlay, set image quality and size (~33; all options are available). To create a RAW image choose an image quality of NEF (RAW). l 1 Highlight Image overlay in the retouch menu and press the multi selector right.
7 Press the multi selector left or right to highlight the Preview column. Press the multi selector up or down to highlight one of the following options and press OK. • Overlay: Preview the overlay as shown at right. Press OK to save the new image. To return to Step 6 and select new photos or adjust ~jain, press E. Save: Save the overlay without viewing a preview. Image overlay • Overlay J~
Technical Notes Optional Accessories One advantage of digital SLR cameras is the wide variety of accessories they support. See our web sites or product catalogs for up-to-date information on accessories for the 080. Viewfinder accessories t1. Lenses Batteries AC adapters ML-L3 remote control Filters Software ~.l ",.~ e.l ®. ~ ,' . " i ,' . . .·.·.· 0. ",.,.;:"", __________________________ '~~.4.,ittw,_,:;.'*';.;._;,::· , ~ Use Only Nikon Brand Electronic Accessories Only [\Jikon brand acc
Lenses CPU lenses (particularly type G and D lenses) are recommended for use with the D80. CPU lenses can be identified by the presence of CPU contacts, type G and D lenses by a letter on the lens barrel. Type G lenses are not equipped with a lens aperture ring. CPU lens Type Glens The following CPU lenses can be used with the D80. IX Nikkor CPU lenses can not be used. ---------------- _~ .. - ... Camera setting ----------------- .- Focus .
~ Incompatible Non-CPU Lenses and Accessories The (ollowin'J r!OI1CPU lenses and accessories can ~'i(Y be used: • /-\F Tcleco[ivcrtcr Tc .. ! 0/\ • 200-600 rnrn 1/9.5 (serial numbers 280001- 300·190) • Non /\.1 lens,,,, • I en':,!'s lhell rf:\juin, ilk' I ocusin~J Uni! f\l )-1 (/100 mm fi4'iJ;()(J Inri1 fI')!" 200 mrn [/8, 1)00 rnm fill) · f'ishcyf:' (6 rmil I!"Ci, 31 nrn US, (1) 10 [)1IJ) 1/56) · .' i un f/4 • I xll'I1sion Rin9 K) · 180CJOOnlifi f/811 1 hClial numbc!s 174Ci"11-174H:XJ) ·360 I.
Optional Flash Units {Speedlights} Use the accessory shoe to mount optional flash units directly on the camera without a sync cable. The accessory shoe is equipped with a safety lock for 5peedlights with a locking pin, such as the 5B-800, 5B-600 and 5B-400. Before attaching an optional flash unit, remove the accessory shoe cover. The built-in flash will not fire when an optional 5peedlight is attached.
SB-R200 Wireless Remote Speedlight This high-performance wireless remote Speedlight has a Guide Number of 10/32 (m/ft, ISO 100, 20 °C/68 OF). Although it can not be mounted directly on the accessory shoe, the SBR200 servers as a remote flash when the built-in flash is in commander mode. It can also be controlled using an optional SB-800 Speedlight or SU-800 wireless Speedlight commander.
~ Notes on Optional Speedlights Refer to the Speedlight manual for detailed instructions. If the Speedlight supports the Creative Lighting System, refer to the section on CLS-compatible digital SLR cameras. The 080 is not included in the "digital SLR" category in the SB-80DX, SB-28DX, and SB-50DX manuals. If an optional Speedlight is attached with the camera in a Digital Vari-Program mode, the flash will fire whenever a photograph is taken. The following flash modes are available: .
Other Accessories • Diopter adjustment viewfinder lenses: Lenses are available with diopters of -5, -4, -3, -2, 0, +0.5, + 1, +2, and +3 m- I . Use diopter adjustment lenses only if the desired focus can not be achieved with the built in diopter adjustment control (-2.0 to + 1.0 m- 1). Test diopter adjustment lenses before purchase to ensure that the desired focus can be achieved. • OK-21M magnifying eyepiece: Increases viewfinder magnification to approximately 1.
Accessories for the 080 At the time of writing, the following accessories were available for the 080. Up to date information is available at Nikon websites or from our latest product catalogs. Power sources • EN-EL3e rechargeable Li-ion battery: Additional EN-EL3e batteries are available from local retailers and Nikon service representatives. EN-EL3a and EN-EL3 batteries can not be used.
Caring for the Camera Storage When the camera will not be used for an extended period, turn the camera off, replace the monitor cover, remove the battery, and store the battery in a cool, dry area with the terminal cover in place. To prevent mold or mildew, store the camera in a dry, well-ventilated area.
The Low-Pass Filter The image sensor that acts as the camera's picture element is fitted with a low-pass filter to prevent moire. If you suspect that dirt or dust on the filter is appearing in photographs, you can clean the filter as described below. Note, however, that the filter is extremely delicate and easily damaged. Nikon recommends that the filter be cleaned only by Nikon-authorized service personnel. 1 A reliable power source is required when inspecting or cleaning the low-pass filter.
7 Turn the camera off. The mirror will be lowered and the shutter curtain will close. Re- place the lens or body cap. ~ Use a Reliable Power Source The shutter curtain is delicate and easily damaged. If the camera powers off while the mirror is raised, the curtain will close automatically. To prevent damage to the curtain, observe the following precautions: . Do not turn the camera off or remove or disconnect the power source while the rnirror is raised . .
Caring for the Camera and Battery: Cautions Do not drop: The product may malfunction if subjected to Cleaning: When cleaning the camera body, use a blower to strong shocks or vibration. gently remove dust and lint, then wipe gently with a soft, dry cloth.
Batteries: Dirt on the battery terminals can prevent the camera trom functioning and should be removed with a soft, dry cloth before use. Batteries may lei1k or explode if improperly handled. Observe the following precautions when handling batteries • Turn the product off before replacing the battery · The battery may become hot when used for extended periods. Observe due caution when handling the battery. • Use only batteries approved for use in this equipment.
Troubleshooting If the camera fails to function as expected, check the list of common problems below before consulting your retailer or Nikon representative. Refer to the page numbers in the rightmost column for more information. -- Camera takes time to turn on. EI Solution Problem 65,74, 105 Delete files or folders. Adjust viewfinder focus or use optional diopter adjust17, 122 ment lenses. 12 Insert a fully-charged battery. Viewfinder is dark.
Solution ~ Flash in use. If On is selected for Custom Setting 25 Full range of shutter speeds not (Auto FP) modes P, S, A, and M, optional SB-800, SB98,119 available. 600, and SB-R200 Speedlights can be used at all shutter speeds. • Unlock focus area selector. 30 · Auto-area AF selected for Custom Setting 2 (AF87 Can not select focus area. area mode): choose another mode. 18 • Press shutter-release button halfway to turn monitor off or activate exposure meters.
Solution Problem Final photo is larger than area shown Viewfinder horizontal and vertical frame coverage is in viewfinder. approximately 95 %. • Lower ISO sensitivity or use high ISO noise reduction. Randomly-spaced bright pixels • Shutter speed is slower than 8 s: use long exposure ("noise") appears in photographs. noise reduction. Reddish areas may appear in long time-exposures. Reddish areas appear in photos. Turn long exposure noise reduction On when shooting at shutter speeds of"bulb"or"--".
Camera Error Messages and Displays This section lists the warning indicators and error messages that appear in the viewfinder, control panel, and monitor. Indicator Controi""panel I Viewfinder FE E - • No lens attached. • Non-CPU lens attached. (blinks) --- ~ t15 Solution Lens aperture ring not locked at Lock ring at minimum aperture minimum aperture. (highest f-number). (blinks) F- Problem rClIII Low battery. 11 • Attach lens (IX Nikkor excluded). 7,117 50 • Select mode M. -_.
, _._- ._-"- Indicator ---- .... --_.-_ .... _- ............ .--"'Solution Monitor Control panel Viewfinder Problem NO CARD [- E-) fg/[-E -) No memory card. Insert memory card. PRESENT write-protect card Memory card is locked Slide CARD IS [[HR1/[ OJ (blinks) switch to "write" position. LOCKED (write protected). - ---_._._ .... - .. - ..
Appendix The Appendix covers the following topics: ~ • Supported Standards · Available Settings and Defaults · Memory Card Capacity and Image Quality / Size · Exposure Program (Mode P) · Bracketing Programs · White Balance and Color Temperature · Flash Control · Shutter Speeds Available with the Built-in Flash • Aperture, Sensitivity, and Flash Range ~ 134 134 ~ 138 ~ 139 ~ 140 tI1140 ty; 141 t'l141 ~ 141 Supported Standards • DCF Version 2.
I I 1: Beep 2: AF-area mode 3: Center AF area 4: Built-in AF assist illuminator 5: No memory card 7 I 6: Image review V V v I v V V V V V V V V V V V V V V V V V V V V V V V V V V V V V V V V V V V V V V V V V V V V 7: ISO auto 8: Grid display 9:Viewnnderwarning I I ---------..:::..
The following defaults are restored when a two-button reset is performed: ~ ~J:_-~~-~L~~=-I ii [~--=-~r~-[~=r-~p s--l~-_-A·]~J-r:: __ • _ _ .u ~ ~ -- .. Image sizE' White bala~ce- --- ISO sensitivity ----~-~. - - -...--.---------------. iO _lI~~J~~~oi~~J~m-e~_ C r. • - ~?ge qlJ~fitL. JPEG Normal L (3872 x 2592) --=~ __·-_· -----ACto-- =:=== ---~-- -~---~~~~==-~-=-~~--_~~~---=:~:~~-~~ ~_~_:~~_~~--~~ ::~~~----~==5;~~~-E~_--~~-~-~ _~ ----_.----_.. AUTO 100 -_ ....
The following defaults are restored with Custom Setting R (Reset): = = = = ~ A8? i ~ -ITT ~ - r-[;j L_f:j 1 m:r::r=s--L A~~-- I__~ _ On ------------- -r- - 0 -T 1: Beep ~I Auto-area AF 2- AF-area mode I Auto-area AF menter AF area r- 4: Built-in AF assist illuminator _ _ O_n_] I I Single area Normal frame ~'_-_------O-n- On"] 5: No memory card 7 Release locked 6 Image review On --------=-----------j------------------7: ISO auto 8: Grid display --',~---------+--------9: Viewfinder warning ~----- -
Memory Card Capacity and Image Quality I Size The following table shows the approximate number of pictures that can be stored on a 1GB Panasonic Pro HIGH SPEED card at different image quality and size settings. ==~ Im~~e q~~~ty=:,~l- ~_Ie ~~l~ ~ ~um~~!2!_~~a[~~~-=L BUff_~.r-c~_~~ty 1~~ Image!ize L 17.2 _._- _._---------- NEF+JPEGFine~ ._--------------.- .~~ NEF + JPEG Normal ------~ M S ----_. L ----. M J 15.1 +----_._-- 13.6 14.8 -t-------- 13.8 S ._---- ... _ .
Exposure Program (Mode P) The exposure program for mode P is shown in the following graph. ai fnm :?' - - - - - f- IDn.nTI, F :> 55 rr!ITl rTirn 1/1 1/1.4 ~'¥-*-JiL----+"""'!";......,io'-7~~*-*+-+- +---+'--+---71"----71"---71' 1/2 1/2 8 1'----+--¥---+------+----7I"----*'-----"I'---+--+'--'+)C----+'-----'*-----*'----cl~¥___7I'_____+_ -6' 1/4 I'D ;:::;. 1/5.
Bracketing Programs The number of shots and bracketing increment are shown in the control panel as follows: Number of frames -+-~( 3 F) L )~ Bracketing increment ~------+-- Bracketing progress indicator The Bracketing Progress Indicator and Number of Frames .~-- - ..:::::.:=-- - . 3F - -_., Progress indic~t()r -.._+4 •• - -- ...._._--- Number of fra_l11 es - .. --~----- -'- :.»: -- :.,:, --- +4 • ~, ~ -- ._- .. ,~,. ...__ ._--------- , - ---- Description . 3 frames:_.
Flash Control (~42, 120) The following types of nash control are supported when a CPU lens is used in combination with the built-in nash or optional S8-800 or S8-600 Speedlights. . i-TTL Balanced Fill-Flash for Digital SLR: Flash output is adjusted for a natural balance between the main subject and the background. . Standard i-TTL Fill-Flash for Digital SLR: Flash output is adjusted for the main subject; the brightness of the background is not taken into account.
Specifications _ S i n g l e - l e n s reflex digital camera _ 1 0 . 2 million ::;:::;:::;::=;:::::;==:;~::::;:::;:::;:::::=========::::: 23.6x 15.8 mm; total pixels: 10.
Three-mode through-the-Iens (TIL) exposure metering 3D color matrix metering II (type G and D lenses); color matrix metering II (other CPU lenses); metering performed by 420-segment RGB sensor Weight of 75% given to 6, 8, or 10 mm circle in center of frame Meters 3.smmcircle (about 2.5% of frame) centered on active focus area oto 20 EV (3D color matrix or center-weighted metering) 2 to 20 EV (spot metering) CPU coupling Digital Vari-Program (A~ auto, 7 portrait.
_ F i r m w a r e can be upgraded by user I Chinese (Simplified and Traditional), Dutch, English, Finnish, French, German, Italian, Japanese, Korean, Polish, Portuguese, Russian, Spanish, Swedish .
78-735 mm f/3.5-5.6G ED AF-S OX Zoom-Nikkor Lens (Available Separately) Type C;-type AF-S ox Zoom-Nikkor lens with built-in CPU and Nikon mount ~Nikonox format digital cameras I ==:=:================: 18 - 135 ITl m • 1:3.
~ Battery Life fhe number of shots that can be taken with a tu!!ycharged ENEUe battery (1500 rnl\h) varies with the condition of the battery, ternperature, and how the carnera is used. The following [llCaSUremerlts '!\!t're perforlned (It a temperature of 2()OC (68'T). Example 1: 2,700 shots AF-':, DX 18--] 3'5 !rim t/3.5-56G CD iem; continuous shoOlirt~J nlocie; continuous-servo clutofoClIS; imaqe qlla!ity ser to JPFC 8ciSic; irnaqe sixc set to M; shuner speed i,X,O": ShUth"irelease button pressed r\llfwa
Index Symbols 3D color matrix metering II. See Metering 420-segment RGB sensor. See Metering; White balance A~ (auto mode), 19--23 \o~ (close-up mode;, 24-25 Q!J (continuous shooting indicator), 36 IB (exposure compensation),54 ~ (flash compensation), 55 ~ (flash-ready indicator), 23 (FV lock), 92-93 ~ (landscape mode), 24-25 ~ (night landscape mode), 24-25 (night portrait mode), 24-25 ~ (portrait mode), 24-25 (remote control indicator), 38-39 C'£> (self timer indicator), 37 ~ (sports mode), 24-25 m 1::
Firmware version ("PliIP menu),108 FINE See Image quality Flash brarketinc], 56-~),7 buill In, 23,40-42, ')5 compensatiun, 55 level, 42, 90, 92 monitor preflash, 93, 95-97 optional, 119·-121 ranqe, 23, 119, 14 I ready indicator, 23, IJ3, 121 remote, 119 sync speed, 42 Flash mode, 40-42 Flash shutter speed (Custom Settings menu), 98 Flash warning (Custom Set· tings rnellu), 98 Flexible program. See f)rogramrned auto Focus, 28-32.
MTP/PTp 67-68, 70, 104 S S. See Image size S. See Shutter-priority auto [§] (single-frame shooting indicator),36 Saturation. 80 SO. See Memory card S.ecure Digital. See Memory card Self timer, 36, 99 Self timer (Custom Settings menu),99 Self-portra itS. See Self ti mer Sensitivity See ISO sensitivity Sepia.
Nikon No reproduction in any form of this manual, in whole or in part (except for brief quotation in critical articles or reviews), may be made without written authorization from NIKON CORPORATION. NIKON CORPORATION Fuji Bldg.
us 1 This guide provides first-time users with information on taking photographs with the 080, on copying photographs to a computer, and printing photographs. Complete information on using your Nikon digital camera can be found in the Nikon Guide to Digital Photography with the 080 and Software Suite help. Digitutor "Digitutor;' a series of "watch and learn" manuals in movie form, is available at the following website: Attach t~h~~e~S~tr.l1afag • 2 Attacb a ~Le~r.I~.s~~~ .
3 Ready the (amer.a A language-selection dialog will be displayed the first time the camera is turned on. Follow the steps below to choose a language and set the camera clock. 7 2 Select language. Display map of world time zones. Hold the hand-grip with your right hand Keepyour-[ elbows in Support the lens with your --=----7---+-'~ left hand 3 Stand with one foot half a pace in front of - - - - . . the other Select local time zone. Display Daylight saving time options.
Apple QuickTime Installing Software Some time may be required to complete installation on some systems. Users of Windows Vista are requested to visit the Apple website for support information. Nikon recommends downloading and installing the most up-to-date version of QuickTime for Windows Vista. The supplied Software Suite CD contains Nikon Transfer and ViewNX software. Nikon Transfer is used to copy (transfer) pictures from the camera to the computer, ViewNXto view pictures after transfer.
Nikon AF-S OX NIKKOR 18-SSmm f/3.S-S.6G VR {fm~B,ij~ P.2-11 User's Manual Benutzerhandbuch PP.12-19 5.20-27 Manuel de I'utilisateur P.28-35 Manual del Usuario PP.36-43 Anvadarhandbok 5.44-51 PykOBO,QCTBO nonb30BaTenH CTP.52-59 Gebruikshandleiding P.60-67 Manuale d'uso PP.68-75 1fJfH5t I~JH~ P.76-85 ~m~OOiJ P.86-93 A~~ ~~Ai P.
Notes on Safety Operations LtCAUTION Do not disassemble Touching the internal parts of the camera or lens could result in injury. Repairs should be performed only by qualified technicians. Should the camera or lens break open as the result of a fall or other accident, take the product to a Nikon-authorized service representative for inspection after unplugging the product and/or removing the battery.
Nomenclature ( ): reference page CD Lens hood* (Po 14) Lens hood attachment button (Po 14) @ Focus ring @ Zoom ring (Po 15) ® Focal length scale ® Focal length scale index (j) Mounting index (Po 14) ® CPU contacts (P. 17) ® A-M mode switch (Po 15) @ Vibration reduction ON/OFF switch (Po 16) o VA ON OFF ®>kE...&.l.l..
Thank you for purchasing the AF-S OX NIKKOR 18-55mm f/3.5-5.6G VR. OX Nikkor lenses are specially designed for use with Nikon digital-SLR (Nikon OX format) cameras, such as the 02-series and 040-series. When mounted on Nikon DX-format cameras, the lens' picture angle is equivalent to approximately 1.5x the focal length in 35mm format. Before using this lens, please read these instructions and refer to your camera's User's Manual.
Focusing, zooming, and depth of field Manual focus mode Before focusing, rotate the zoom ring @ to adjust the focal length until the desired composition is framed in the viewfinder. If your camera has a depth of field preview (stop-down) button or lever, depth of field can be previewed through the camera viewfinder. Set the A-M mode switch ® on the lens to [M]. Rotate the focus ring (]) manually to focus. Shooting is possible when camera focus mode is set to either AF or M.
Vibration reduction mode (VR) Enabling vibration reduction (VR) allows for shooting at shutter speeds approximately three stops* slower (at a focal length of 55mm) than when vibration reduction is disabled. Panning is also supported. (*Based on results achieved under Nikon measurement conditions. The effects of vibration reduction may vary depending on individual and shooting conditions.) Turning the vibration reduction on and off 1 Set the vibration reduction ON/OFF switch @ to [ON].
Flash photography using cameras with a built-in flash Vignetting is the darkening of the corners around the image that occurs when the light emitted by the flash is obstructed by the lens hood CD, or lens barrel depending on the focal length or shooting distance. • To prevent vig netti ng, do not use the lens hood CD. • It is not possible to shoot at distances shorter than 0.6 m (2.0 ft.) using the camera's built-in flash.
Standard accessories Picture angle • 52mm snap-on front lens cap LC-52 Focal length scale 18,24,35,45,55mm Optional accessories Distance information Output to camera body Zoom control Manually via separate zoom ring Focusing Autofocus using a Silent Wave Motor; manually via separate focus ring Vibration reduction Lens-shift method using voice coil motors (VCMs) Closest focus distance 0.28 m (0.9 ft.
Notes on using wide or super-wide angle AF Nikkor lenses In the following situations, autofocus may not perform as expected when shooting with wide or super-wide angle AF Nikkor lenses. E A person standing in front of a distant background [ ] ,.., 1. When the main subject in the focus brackets is relatively small When a person standing in front of a distant background is placed within the focus brackets, as shown in Fig. E, the background may be in focus, while the subject is out of focus. 2.
Nikon 1~ffl~B~~0)~g1J\~~~UcILJ: -:::> L:fU~7fc~tJ: l, \ (~l~Do icC. ~Id:,
Please send products and other correspondence to: First-Class Postage Required Nikon Inc. 1300 Walt Whitman Rd. Melville, NY 11747 Attn: Marketing Services Department Post Office will not deliver without proper postage. TNR01-01 Nikon. PO BOX 173031 DENVER CO 80217-3031 11 •• 1.11 ••••• 1.1 ••• 111 ••• 1•• 11.
.---"'-11 OFFICIAL SWEEPSTAKES RULES: NO PURCHASE NECESSARY TO WIN. PURCHASES DO NOT ENHANCE CHANCES OF WINNING. Sweepstakes is sponsored by Equifax Marketing Services ("EMS"), and will be offered in a number of different presenlalions. EMS will award Ihe following prizes: one 1st Prize of $50.1)00; one 2nd Prize of $25.000; and five 3rd Prizes of $5,000. Sweepstakes begins May 20. 2005 al 12:00 a.m. E.D.S.T.. and ends December 31. 2007 at II :59 p.m. E.S.T.
Please fold here. Please check all that apply to your household. 01. 0 Shop by CataloglMail 06. 0 Have a Dog 02. 0 Shop via the Internet 07. 0 Have a Cat 03. 0 Member of Frequent Flyer Program 08. 0 Own a Wirele.. /Cellular Phone 04. 0 Donate to Charitable Cau e 09. 0 Sub cribe to an OnlinelInternet 05.0 Own a Compact Di c Player Service To help us understand our customers lifestyles, please indicate the interests and activities participating on a regular basis. 01. 02. 03. 04. 05. 06. 07. 08. 09. 10. 11.
1 YEAR WARRANTY + 4 YEARS EXTENDED SERVICE COVERAGE = Nikonn- 5 YEARS OF PROTECTIO for Nikkor AF and PC Lenses Years of Protection Included ~,., Please note: You must register this ESC with Nikon Inc. within 10 days of your retail purchase. See inside for details.
Nikkor AF or PC Nikkor 1 Year WSrT8nty + 4 Year Extended service Coverage = Nikon~ 1. Mr. 5 Mrs. YEARS Of: PROTECTION Ms. RrstName Initial Last Name Street Apt. No. City Zip Code E-mail 2. Dealer Name State City Zip Code 3. Your Telephone # 6. Lens Model: _ 7.
Nikon Nikkor AF/PC-Nikkor Lens 1 Year Warranty + 4 Year Extended Service Coverage = 5 Years of Protection To obtain Extended Service Coverage (ESC), you must register with Nikon Inc. within ten days from the date of the original retail purchase of this NIKKOR AF or PC-NIKKOR lens. Failure to register invalidates your ESC. To register, complete and mail the attached postcard to Nikon Inc. This ESC becomes valid upon the expiration of the Nikon Inc.
Nikkor AF or PC Nikkor 1 Year Warranty + 4 Year Extended Service Coverage ~ UkOIlN 1. Mr. 5 = YEARS OF PROTECTION Mrs. Ms. First Name Initial Last Name Street Apt. No. City State Zip Code State Zip Code E-mail 2. Dealer Name City 3. Your Telephone # 6. Lens Model: , 7.
TNX01-01 PLACE STAMP HERE Nikon. NIKKOR LENS ESC REGISTRATION P. O. BOX 173031 DENVER, CO 80217-3031 11 •• 1.11"1111.1'1.111'1.11111.11"11.11111.
IMPORTANT NOTICE: YOU MUST PRESENT THE ATTACHED WARRANTY fORM (PART 1) TOGETHER WITH PROOf-Of-PURCHASE AND PROOf-Of-PURCHASE DATE TO OBTAIN WARRANTY SERVICE.
THIS FORM MUST BE PRESENTED FOR WARRANTY SERVICE I-----:&iO.----;~'"'''~~* I ....''''.....~OA;__i"""iiii~I rAn This is your Nikon Inc. One Year Limited Warranty (valid in the Continental United States, Alaska, Hawaii, Puerto Rico and U.S. Vi rg in Islands). YOU S Hit RPROOF-OF-PURCHASE AND PROOF-OF-PURCHASE DATE TO OBTAIN WARRANTY SERVICE. This Nikon product is warranted by Nikon Inc. to be free from defects in materials and workmanship for a period of one (1) year from the date of purchase.
Nikon AUTHORIZED SERVICE STATIONS For a list of local Nikon AUTHORIZED SERVICE STATIONS, please visit nikonusa.com and proceed to the Service tab, or call 800 NIKONSV (800 645 6678) toll free.
Retain this Worldwide Warranty with proof-of-purchase for your records Nikon ONE YEAR WORLDWIDE LIMITED WARRANTY (Excluding the Continental United States, Alaska, Hawaii, Puerto Rico and U.S. Virgin Islands) Welcome to the worldwide family of Nikon owners. Your Nikon equipment has been manufactured to the highest quality standards by NIKON CORPORATION, Tokyo, Japan. This warranty entitles the original consumer to worldwide warranty protection in accordance with the terms and conditions.
Nikon SERVICE FACILITIES Argonllna. Eduardo Ude",o y Cia (As of May 2008) Ayacucho 123S, Buonos Aires (1111) SACI.fI. Phone +54-11-48111B64 Australia: Nikon Australaa Pry ltd Unn Fl. UdcOlnbe Bus,n... Pali<. 3-29 Bo",e Avenue. Udcombe NSW 2141 Phone +61-2-1I748-S200 Austria: Krc.a Kamera SeMee Ptater5tt 600117. A-1020W"", PIlone +43-1-2180910 Bolg,um: H De Beukelae< & Co NVIS.A Iloo
Nikon AF-S OX VR Zoom-Nikkor 55-200mm f/4-5.6G IF-ED 1fm~B,ija Instruction Manual Bedienungsanleitung Manuel d'utilisation Manual de instrucciones Manuale di istruzioni if: JF.Ii~ p~ ~ fimifta~w (E: ffm~BJ3!O)fJgb\~ffitJcIL~:) "[flJ~Jfr~~<~:)tcc::~lct, ==r/1j-~':::Z1l~IL"[~ft GG '1fm~BJ3~~d)*6f)
II 11 /I n ~ A ---. an 8 II II lJ l! \I 1I II M r0- ®-H-mJ C') N A c G) 7-t-.:: ® ® 7.- L"IJ ::;/j' ® 7- t-.
English-----------------Thank you for purchasing the AF-S DX VR Zoom-Nikkor 55-200mm f/4-5.6G IF-ED. DX Nikkor lenses are specially designed for use with Nikon digital SLR (Nikon DX format) cameras, such as the D2-Series and D300. When mounted on Nikon DX format cameras, the lens' picture angle is equivalent to approx. 1.5x focal length in 35mm format Before using this lens, please read these instructions and the Notes on Safety Operations.
Vibration reduction mode (VR) Pictures can be taken at shutter speeds approx. 3 stops' slower than is possible without using a VR lens. Panning is also possible. ('Under Nikon measurement conditions. The effects of vibration reduction vary depending on individual and shooting conditions.) .Setting the vibration reduction ON/OFF switch 1 Set the Vibration reduction ON/OFF switch @ to [ON]. Note: Be sure to set the switch @ so that the indicator aligns with [ON] precisely.
Please send products and other correspondence to: First-Class Postage Required Nikon Inc. 1300 Walt Whitman Rd. Melville, NY 11747 Attn: Marketing Services Department Post Office will not deliver without proper postage. TNR01-01 Nikon. PO BOX 173031 DENVER CO 80217-3031 11 •• 1.11 ••••• 1.1 ••• 111 ••• 1•• 11.
.---"'-11 OFFICIAL SWEEPSTAKES RULES: NO PURCHASE NECESSARY TO WIN. PURCHASES DO NOT ENHANCE CHANCES OF WINNING. Sweepstakes is sponsored by Equifax Marketing Services ("EMS"), and will be offered in a number of different presenlalions. EMS will award Ihe following prizes: one 1st Prize of $50.1)00; one 2nd Prize of $25.000; and five 3rd Prizes of $5,000. Sweepstakes begins May 20. 2005 al 12:00 a.m. E.D.S.T.. and ends December 31. 2007 at II :59 p.m. E.S.T.
Please fold here. Please check all that apply to your household. 01. 0 Shop by CataloglMail 06. 0 Have a Dog 02. 0 Shop via the Internet 07. 0 Have a Cat 03. 0 Member of Frequent Flyer Program 08. 0 Own a Wirele.. /Cellular Phone 04. 0 Donate to Charitable Cau e 09. 0 Sub cribe to an OnlinelInternet 05.0 Own a Compact Di c Player Service To help us understand our customers lifestyles, please indicate the interests and activities participating on a regular basis. 01. 02. 03. 04. 05. 06. 07. 08. 09. 10. 11.
1 YEAR WARRANTY + 4 YEARS EXTENDED SERVICE COVERAGE = Nikonn- 5 YEARS OF PROTECTIO for Nikkor AF and PC Lenses Years of Protection Included ~,., Please note: You must register this ESC with Nikon Inc. within 10 days of your retail purchase. See inside for details.
Nikkor AF or PC Nikkor 1 Year WSrT8nty + 4 Year Extended service Coverage = Nikon~ 1. Mr. 5 Mrs. YEARS Of: PROTECTION Ms. RrstName Initial Last Name Street Apt. No. City Zip Code E-mail 2. Dealer Name State City Zip Code 3. Your Telephone # 6. Lens Model: _ 7.
Nikon Nikkor AF/PC-Nikkor Lens 1 Year Warranty + 4 Year Extended Service Coverage = 5 Years of Protection To obtain Extended Service Coverage (ESC), you must register with Nikon Inc. within ten days from the date of the original retail purchase of this NIKKOR AF or PC-NIKKOR lens. Failure to register invalidates your ESC. To register, complete and mail the attached postcard to Nikon Inc. This ESC becomes valid upon the expiration of the Nikon Inc.
Nikkor AF or PC Nikkor 1 Year Warranty + 4 Year Extended Service Coverage ~ UkOIlN 1. Mr. 5 = YEARS OF PROTECTION Mrs. Ms. First Name Initial Last Name Street Apt. No. City State Zip Code State Zip Code E-mail 2. Dealer Name City 3. Your Telephone # 6. Lens Model: , 7.
TNX01-01 PLACE STAMP HERE Nikon. NIKKOR LENS ESC REGISTRATION P. O. BOX 173031 DENVER, CO 80217-3031 11 •• 1.11"1111.1'1.111'1.11111.11"11.11111.
IMPORTANT NOTICE: YOU MUST PRESENT THE ATTACHED WARRANTY fORM (PART 1) TOGETHER WITH PROOf-Of-PURCHASE AND PROOf-Of-PURCHASE DATE TO OBTAIN WARRANTY SERVICE.
THIS fORM MUST BE PRESENTED fOR WARRANTY SERVICE I i_ _ This is your Nikon Inc. One Year limited Warranty (valid in the Continental United States, Alaska, Hawaii, Puerto Rico and U.S. Virgin Islands). YO T 14t:rQ·1lMl~ IJmrtFk:t>F-of-PURCHASE AND PROOf-Of-PURCHASE DATE TO OBTAIN WARRANTY SERVICE. This Nikon product is warranted by Nikon Inc. to be free from defects in materials and workmanship for a period of one (1) year from the date of purchase.
Nikon AUTHORIZED SERVICE STATIONS For a list of local Nikon AUTHORIZED SERVICE STATIONS, please visit nikonusa.com and proceed to the Service tab, or call 800 NIKONSV (800 645 6678) toll free.
Retain this Worldwide Warranty with proof-of-purchase for your records I I ______ Nikon ONE YEAR WORLDWIDE AF-S )( VR 5fi-?OO/4-5 RG IF-ED LIMITED WARRANTY . (Excluding the Continental United States, Alaska, Hawaii, Puerto Rico and U.S. Virgin Islands) Welcome to the worldwide family of Nikon owners. Your Nikon equipment has been manufactured to the highest quality standards by NIKON CORPORATION, Tokyo, Japan.
Nikon SERVICE FACILITIES Argentina: Eduardo Udenlo y Cia. SAUEI. Australia: Nikon Australia Pty ltd Austria: Krca Kamera Service Belgium: H. De Beuk,la., & Co. NViSA Brazil: T Tanaka SlA Canada: Nlkoo Canuda Inc. Chile: Villamar ltda. (As of May 2008) Ayacucho 1235, Buenos Aires (1111) Phone: +54-11-48111864 Unit F1, lidcombe Business Park, 3·29 Birnie Avenue, Udcombe NSW 2141 Phone: +61-2-8748-5200 Prater5tr. f:IJIZJ17, A-I020 Wten Phone: +43-1-2180910 Boomsesteenweg 77.
NO PURCHASE NECESSARY TO ENTER OR WIN. Sweepstakes starts 8:00 a.m. (ET) on 1/1/08 and ends 8:00 a.m. (ET) on 4/30/09. Open to legal residents of the 50 United States and D.C., 18 years of age or older as of the date of entry. Enter by registering Nikon product purchase at Nikonusa.com/registration or by postal mail. One winner will be chosen for each calendar month during the Sweepstakes period.
Capture NX 2 offers quick, multifunctional image editing Capture NX 2 has various functions that dramatically extend the photographic expression that is unique to digital imaging. These image editing tips will help you quickly create the images that you desire. Intensifies only the blue sky in the background About Capture NX 2 Trial Version • To use the trial version of Capture NX 2 on this CD-ROM, you need to install it on your computer.
Focus your imagination with powerful, easy-to-use tools Capture NX 2 is easy-to-use software that enables you to make intuitive photo enhancements which are immediately viewable on your monitor. With Color Control Points, Selection Control Points, White/Black/Neutral Control Points and Red-Eye Control Points utilizing U Point Technology, you can quickly adjust images to make them appear exactly as you imagine them, without having to deal with selection tools or layers.
Version de prueba Capture Trial Version Experience how Capture NX 2 can improve your photographs. Experimente la forma en la que Capture NX 2 puede mejorar sus fotograffas. To begin the experience: I Para comenzar la experiencia: 1 Install Capture NX 2 : Instalar Capture NX 2 ~ Insert the trial CD in your computer and follow the on-screen instructions. 2 Start Capture NX 2 : Iniciar Capture NX 2 ~ : Capture NX 2 will start : automatically when ~ installation is complete.
Example o Color Control Points I Puntos de control de color Ejemplo o Make Skies Bluer Are the skies in your photographs not as blue as you remember? Drag the sliders (e or _) to adjust colors in the area or object identified by the color control point. Para cielos mas azules Arrastre los controles deslizadares (e 0 _) para ajustar los colares en el area 0 en el objeto identificado por medio del punto de control de color.
Adjust brightness and contrast. Ajuste el brillo y el contraste. ~-~_--=..:....=..=.=-=---------- 4 - In this example, brightness (B) is reduced to -60 and contrast (C) is raised to +80. Only the blues in the sky are affected. En este ejemplo, el bri/lo (B) se reduce a -60 y el contraste (C) se aumenta a +80. Solamente se ven afectadoslos azules en el cielo.
Click the object you wish to sharpen. Ha a e1ic en el ob'eto al ue desea darle nitidez. ~::":"':""='~~'--'--'------ 3 Changes will be applied only to the area or object identified by the selection control point. Click the flower. Haga dic en la flor. Los cambios se aplicaran solamente en el area u objeto identificado mediante el punta de control de 10 selecci6n.
18208 05816
Bring Your Ideas to Light Nikkor Lenses, Nikon Speedlights and other Accessories for Your Nikon Digital SLR System
Nikkor Lenses Extraordinary image quality is reliant upon exceptional lenses. Nikon offers a stunning variety of Nikkor interchangeable lenses, each of which demonstrates Nikon's unique dedication to optical excellence. Enhanced by exclusive Nikon technologies, Nikkor lenses deliver astonishing image quality. Highlighted here are just a few Nikkor interchangeable lenses from which you can choose. The 10.5mm f/2.
NIKON DIGITAL IMAGING LIMITED WARRANTY THIS IS YOUR NIKON INC. ONE YEAR LIMITED WARRANTY (VALID IN THE CONTINENTAL UNITED STATES, ALASKA, HAWAII AND THE CARIBBEAN ISLANDS). YOU MUST PRESENT THIS FORM TOGETHER WITH PROOF OF PURCHASE AND PROOF OF PURCHASE DATE (BILL OF SALE) TO OBTAIN WARRANTY SERVICE. This Nikon Digital Imaging Product is warranted by Nikon Inc. to be free from defects in material and workmanship for one (1) year from the date of purchase.