
Owner's Manual


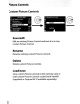

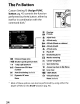


Table Of Contents
- Using the Supplied Manuals
- Quick Start Guide
- Owners Manual
- Two-Button Reset
- Setting Language / Time / Date
- Table of Contents
- Q & A Index
- Supplied Accessories
- Parts & Controls
- Getting Started
- Basic Photography
- Basic Playback
- Image Area
- Image Quality
- Image Size
- Focus
- Release Mode
- ISO Sensitivity
- Exposure
- White Balance
- Image Enhancement
- Flash Photography
- Other Shooting Options
- More Playback Options
- Connecting to Other Devices
- Menu Guide
- Playback Menu - Managing Images
- Shooting Menu - Shooting Options
- Shooting Menu Bank
- Reset Shooting Menu
- Active Folder
- File Naming
- Image Quality
- Image Size
- Image Area
- JPEG Compression
- NEF (RAW) Recording
- White Balance
- Set Picture Control
- Manage Picture Control
- Color Space
- Active D-Lighting
- Vignette Control
- Long Exposure NR
- High ISO NR
- ISO Sensitivity Settings
- Live View
- Multiple Exposure
- Interval Timer Shooting
- Custom Settings - Fine Tuning the Camera
- Setup Menu - Camera Setup
- Format Memory Card
- LCD Brightness
- Clean Image Sensor
- Lock Mirror Up for Cleaning
- Video Mode
- HDMI
- World Time
- Language
- Image Comment
- Auto Image Rotation
- Dust Off Reference Photo
- Battery Information
- Wireless Transmitter
- Image Authentication
- Copyright Information
- Save / Load Settings
- GPS
- Virtual Horizon
- Non-CPU Lens Data
- AF Fine Tune
- Firmware Version
- Retouch Menu - Creating Retouched Copies
- My Menu - Creating a Custom Menu
- Compatible Lenses
- Optional Flash Units
- Other Accessories
- Care / Maintenance
- Troubleshooting
- Error Messages
- Defaults
- Memory Card Capacity
- Specs
- Index
- 24-120mm Lens Instruction Manual
- Software Installation Instructions
- Scans of Software CD-ROMs
- AC Power Cord Specs
- Warranty

nterval
timer
shooting
GuiciesandTips
Help
If
a
[1]
icon
is
displayed at the
bottom
left
corner
of
the monitor, help
can
be
displayed by pressing the
o-n
([1])
button.
lit
button
QUAL
button
Formatting
Memory
Cards
Hold the
~~
(MODE
and
iID)
buttons until a blinking
For
appears in the viewfinder and control panel. Pressing the
~~
buttons again while the
For
indicator
is
blinking will
format the memory card.
Be
sure
to
copy
any
photographs
and
other
data
you
wish
to
keep
to
a computerbefore
proceeding.
Memory cards
can
also be formatted in the
setup menu (pg. 45).
Two-Button
Reset: Restoring
Default
Settings
Camera settings
can
be
restored to default values by
holding the
QUAL
and
~
buttons down together for
more than
two
seconds
(these buttons are
ma
rked
by a green dot). Custom
Settings
are
not
affected.
35