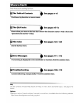
Where to Find It Find what you're looking for from The Table of Contents » See pages v-vi Find items by function or menu name. KI The Q&A Index » See pages vii-ix Know what you want to do but don’t know the function name? Find it from the “question and answer” index. Kl The Index » See pages 123-125 Search by key word. Error Messages » See pages 111-112 if a warning is displayed in the viewfinder or monitor, find the solution here.
introduction rot [ and Playback More on Photography (All Modes) P.
iv Symbol for Separate Collection in European Countries This symbol indicates that this oxidizer sto be collected separately The following symphonic ite users in European countries: « This product is designated for separate collection at an appropriate collection point: Doting dispossession household waste “Er misinformation contact the retailer or the locate antiphonals in charge of waste management Notice Concerning Prohibition of Copying or Reproduction Note oversimplifying in possession of alliterate ha
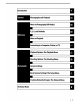
vi Folders. File No: Sequence Mirror glockenspiel Firmware Version: Sal i Dust off Ret Photo, Afterimage Rotation Creating Retouched Cop ii Delighting Reich Eve Correction Trim Monochrome Filer Effects Small Picture. image Overlay. Table of Contents Technical Notes oll 96 Optional Accessories... Lenses iii Optional Hash Units (Speed lights, Che Accessories.
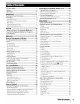
&A Index Find what aureus looking for using this ‘question and answer index. General Questions Question Key phrase Page# How dai use the menus? sing the menus 63.64 How da | got Moore Information on a menu? Help 2 What do these indicators mean? Monitor viewfinder Le 81-87 What does this warning mean? Error messages and displays Katy How many more shots can [ake with this card Number of exposures remaining 29.
Taking Photographs Question Key phrase Page# Is there dre easy way to take snapshots? Auto mode 15 1s there an easy way to take more creative shots? Digital Sari-Program modes What doi do if flash photography is prohibited? Auto flash off) mode i How dol bring out a portrait subject? Portrait mode How can | get good landscape shots? Landscape mode How do | take snapshots of my kids? Child mode How oo | freeze! 3 moving subject? Sports mode i How do lake close ups of small object? Close-up mode Can include n
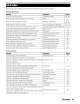
Viewing, Printing, and Retouching Photographs Question Key phrase Page # Can | view my photographs on the camera Camera playback 50 Can view more information about photos? Photo info 51 Why parts of my photos blink? Photo info, highlights 52 How do get dd of an unwanted photo? Deleting individual photos 5d Can delete several photos at Otis? Delete 65 Can Loom ion pictures 1o make sure they innocuous? [Playback zoom 53 Can protect photos from accidental deletion? Protect 54 is there an automatic playback (“s
{EX Life-Long Seaming As part of Nikon's “Life-Long Leaning” commitment to ongoing product support and education, cone tinustyeupdated information 15 available on-line at the following sites: + Bor users in the US As happy nonunion com + For users in Europe and Africa: comportment «For users in Asia Oceania and the Middle Bass hasp Nikon-asig com Visit these sites to keep up-to-date with the latest product information, tips, answers 10 frequently: asked questions (FAQS), and general advice on digital imagin
Introduction Thank you for our purchase of a Nikon D40x single-lens reflex (SLR) digital camera with interchangeable lenses. This manual has been written to help You enjoy taking pictures with your Nikon digital camera. Read this manual thoroughly before Use and keep it handy when Using the product.
tying to Know the Cam Take a few moments to familiarize yourself with camera controls and displays. You may find it helpful to bookmark this section and refer to it as you read through the rest of the manual, Camera Body fl infrared receiver.
[Eyelet for camera strap Hd i selector Ed Ornery card slot cove E16 (delete) button 10 10,103 6.50 62 {playback zoom) button. S53 (setting) bunion viewfinder eyepiece cu i ® lest) button 38 PA viewfinder eyepiece HQ (thumbnail butte 2 Hl Dipterous adjustment control. 2 help) button LIED (Ae LARD bunion 2 fH @ (consul button 63 on (protect) button BI @ (playback) button b3 Command dial * Multi selector The milt selector is used for men navigation and playback. EE aback BRS Sharpshooting info 820.
The Mode Dial i 8 The D40x offers a choice of the following twelve shooting modes: Advanced Modes (Exposure Modes) Select these modes for full control over camera settings.
The Viewfinder Display fl Focus brackets focus areas) Pd Focus indicator Bl Focus paradisaical AF-area mod Ld Auto exposure (AR) lock Fy Flexible program indicator [Shutter speedy 14.1624 25.06 Hl Venture (number BE lash compensation indicator. kl Colloquies compensation indicator Number of shots remaining before memory buffer filch Preset white balance recording ind Exposure compensation val Lash compensation value.
The Shooting Information Display To view camera settings, press the @ button. The following shooting information will be a displaced in the monitor See page 22 for information on changing camera settings. Hx maser ails fj} Focus area display 14,1624. 2506 AF area mode HE Electronic analog exposure display Exposure compensation.
Supplied Accessories The D-5 Viewfinder Eyepiece Cap Attach the DKS viewfinder eyepiece cap for smelter (88 33) or remote control photography (88 33). Before attaching the DKS or other viewfinder accessories (88 102), remove the DIC 16 viewfinder eyepiece cup. Hold the camera firmly when removing the cup The Camera Strap Attach the camera strap as shown below. The MG-23 Quick Charger (%5122) The MELEE 1s for use with the supplied EN-ELL battery.
Attaching a Lens Auto focus is supported with AF-S and AFI lenses only. Care should be taken to prevent dust from entering the camera when exchanging lenses. 1 Turn the camera off and reviewer the body cap. : 0 Remove the rear lens cap Fromm the lens.
Charging and Inserting the Battery The supplied EN-ES battery is not charged at shipment. Charge the battery using the steep: fed MH=23 battery charger as described below, = 1 Charge the battery. 1.1 Remove the terminal covet from the battery. 1.2 Connect the power cord to the charger and plug it in. 1.3 Place the battery in the charger. The CHARGE lamp will blink haste battery charges, About 90 minutes are required for an exhausted battery to fully charge.
2 Insert the battery. 2.1 After confirming that the power switch is in the off poi son, open the battery chamber cover, 2.2 insert a fully charged battery as shown at right. Close the battery chamber cover. Removing the Battery Turn the camera off before removing the battery. To avoid shorting the battery, replace the terminal cover when the battery is not in use.
Basic Setup The first time the camera Is turned on, the language selection dialog shown in Step 1 will be displayed in the monitor, Follow the steps below to choose a language and set the time and date. No photographs can be taken until the camera clock has been set. Display map of world time zones Select local ime zone. FUT field shows time difference between selected time zone and Coordinated Universal Time WIC in hours: Poo LL Ny Press multi selector left or right to select item, up ot down to change.
Inserting Memory Cards The camera stores pictures on Secure Digital GD) memory cards (available separately). See Bl “Approved Merrily Cards! for information on approved memory cards (102) 1 Insert a memory card. 1.1 Before inserting or removing memory cards, tim the cam: era off and open the card slot cover 1.2 Slide the memory card in as shown at tight until it dicks into place. The memory card access lamp will light for | abut a second. Close the memory card slot cover Removing Memory Cards 1.
2 Memory cards mist be formatted in the camera before first use. Note that formatting memory cards permanently deletes all photographs and other data they may contain Be sure all data vou wish to keep have been copied to another storage device before for H matting the card. 21 Turn camera on. Display menus.* He mine item iS highlighted, press milt selector deft to highlight icon for current menu Highlight Format memory card. Highlight Yes. Format card.
14 Adjusting Viewfinder Focus Photographs are framed in the viewfinder. Before shooting, make sure that the display in the viewfinder is in clear focus, The view: finder can be focused by removing the lens cap and sliding the dipterous adjustment control ug and down until the focus brackets are in sharp focus. When operating the dipterous adjustment con: troll with your eye to the viewfinder, be careful not to put our fin hers of fingernails in your eye.
Tutorial Photography and Playback “Point-and-Shoot” Photography (5 Mode) This section describes how to take photographs in 4 (auto) mode, an automatic ‘point and shoot” made in which the majority of settings are controlled by the camera in response 10 shooting conditions, 1 Turn the camera on, 1.1 Remove the lens cap and twin the camera on. The monitor will turn on and the viewfinder display will light, 1.2 If the monitor is off, press the @ button to display shooting information.
3 Frame a photograph in the viewfinder. 3.1 Hold the camera as shown, Hold the hand grip in your that hand and cradle the camera body or lens with your left. Keep your elbows propped lightly against your torso for support and place one fool half a pace ahead of the other to keep you Upper body stable, 3.
4.2 Elaborately press the shutterbug bunion the rest of the way down to release the shutter and record the photos graph. The access lamp next 10 the memory card slot cover will it’ Do not eject the memory card of remove of: disconnect the power source unl the lamp has gone out and recording fs complete, 5 Tum the camera off when shooting 1s complete. 2 The Shutter-Release Button The camera has a two-stage huller-release bunion.
Creative Photography (Digital Sari-Pro In addition to i, the D40x offers a choice of seven Digital Sari-Program modes. Selecting a program automatically optimizes settings to slut the selected scene, making creative shop topography as easy as rotating the mode dial Mode: Description & Auto (flash off) forfeitures that do not use the flash. % Portrait For portraits. dl Landscape For natural and man-made landscapes, & Child For pictures of children.
& Child tse for snapshots of children Clothing and background details are vividly rendered while skin tones are given a soft, natural finish, The camera selects the focus area containing the closest subject. % Sports High shutter speeds freeze motion for dynamic sports shots in which the main subject stands out clearly. The camera focuses continuously while the shutter-release button is pressed halfway, tracking the Subject in the center focus area.
20 TRICE EY EN Photographs are automatically displayed after shooting. The bat trey level and number of exposures remaining are also displayed If no photograph 1s displayed in the monitor the most recent ple: true can be viewed by pressing the @ button M850) Additional pictures can be displayed by rotating the command jab or pressing the mull selector left or it.
Reference This section builds on the Tutorial to cover more advanced shooting and playback options.
More on Photography (All Modes) Pressing the @ button displays shooting information in the main: tor. Shooting information can also be displayed by pressing 8 in shooting mode, by pressing @ in 2.5, or A mode. by pressing @/Fn (unless white balance is selected for Custom Setting 11 in Digital Sari-Program mode; 38 77), or by pressing @ when the flash is enabled.
Focus can be adjusted automatically see "Focus Mode! below) or manually 28) The user can also select the focus area for automatic or manual focus 824 75) or use focus lock to focus to recompose photographs after focusing Focus Mode Controls used Choose How the camera focuses. ARS and AF-C are available only InP SA and Modes. Focus mode Description Camera automatically selects single servo auto focus when subject Is judged 10 be stationary.
AF-Area Mode [CE] » 0 Inchoate how the focus area is selected in auto focus mode. This setting has no effect in antenatal focus mode, Option Description Closest Cabrera automatically selects focus area containing subject closest to carers, Default 1 subject for B.S A and M modes; selected aromatically when mode dial is rotated Dynamic User selects fours area manually, but if subject leaves selected focus area even briefly, taj HA camera will focus based on Information farm other focus areas.
Focus Area Selection Controls used The D40x offers a choice of three focus areas.
Focus Lock KEE shutter release bison / RECUR-L bison Focus lock can be used to change the composition after focusing, making it possible to focus on a subject that will not be n'a focus area in the final composition. It can also be used when the auto focus system is unable to focus 127). Si hole or dynamic area AR is rec. commended when using focus lock 8 24) 1 Focus lock can be used with any focus area. Position the sub.
Getting Good Results with Auto focus Auto focus does not perform well under the conditions listed below. The shutter release may be disabled if the camera js unable 10 focus under these conditions. or the in-focus indicator (8) may be dis: played and the camera may sound a beep, allowing the shutter to be released ever when the subject is notion focus, In these cases, use manual focus B28) or use focus lock (8 26) to focus on another subject at the sear distance and then recompose the photograph.
Manual Focus [tr EY] Use this option when the camera Is unable to focus correctly using auto focus. To focus manually, select manual focus mode and adjust the lens focusing ring until the image displayed on the clear matte fled in the viewfinder Is in focus. Photographs can be taken at any time, even when the image is not in focus, i When using a lens that offers A-M selection, select M when focusing manually.
image Quality and Size Together, image quality and size determine how much space each photograph occupies on the memory card.
30 image Quality » By The camera supports the following image quality options (the first four ave listed in descending order by image quality and fle size): Option | Format Description RAW NER Compressed raw data from the image sensor are saved directly fo memory card. Choose for images that will be retouched ora computer FINE Images are compressed fess than NOB, producing higher quality images. Come precision ratios roughly 14 ; oy Best choice in most situations. Compression ratio roughly 1:8.
NEF NEF (RAW files can be viewed on a computer Using Capture NX (available separately, BE 103) or the supplied Projectionist software. NEE (BAW) photographs can not be printed by most print services or by direct USB connection; use Picturesque or Capture NX to print NEE (RAW) photographs. When photographs taken at RAW=B are viewed on the camera, only the JPEG image will be displayed. When photographs taken at this setting are deleted, both NEF and JPEG images will be deleted.
Shooting mode determines how the camera takes photographs: one at time, in a continue: ous sequence, with a tired shutter-release delay, or with a remote control, Description [sl shoe ie Cardiogram takes one photograph each time shutter release button is pressed. Camera records photographs iat ap to about thee frames per second while shutterbugs button is pressed.
Self-Timer and Remote Control Modes The self-timer or optional MULLS remote control can be used for self-portraits, Mount the camera on a tripod or place the camera on a stable. level surface. 2 Select one of the following shooting modes; EB Mode Description &s Self timer shutter released about 105 alter camera bas booked. 82s Delayed remote [Shutter released about 25 after camera has focused. = sick-response Shutter released when camera focuses. remote 3 Frame the photograph.
The camera supports a variety of flash modes for photographing poorly lit or backbit subjects. The flash modes available depend on the mode selected with the mode dial, note that the builtin flash can not be used in 2. or mode. The default flash setting for Dig: B ital Sari-Program modes is automatically restored when the mode dial is rotated to a new setting of the bicameralism timed off. Using the Built-in Flash: and By Modes 1 Forefather mode dial told Choose a flash mode. Take pictures.
[EX Flash Mode The flash modes available depend on the mode currently selected with the mode dial ELL 5 Auto Auto slow sync ALTO : rack eye Gf N AUTO slow reduction fe ie reduction BA SM Fill flash Fill flash Rear: Red-eve £ curtain 4 reduction ) slow : Rear-cram 1 z She.
36 The Built-in Flash Use with CPU lenses with focal lengths of 18-300mim or non-CPU lenses with focal lengths of 18+ 200mm PP 97-08) Remove lens hoods to prevent shadows. Lenses that block the subject's view of the AF-assist [amp may interfere with red eve reduction. The flash Ras a minimum range of 60cm (28) and can not be used in the macro range of macro zoom lenses. if the flash fires ini continuous shooting mage (38 32) only one picture will be taken each time the shutter-release button is pressed.
Controls used Photographs taken at slow shutter speeds are prone to blurring. If 150 sensitivity is raised above the base setting of 150 100 equivalent, the same exposures can be achieved at faster shutter speeds, preventing blur. [SO sensitivity can be set to values between [SO 100 and 150 1600 in steps of 1EV with a further high sensitivity setting of HE available for an 150 B equivalent of roughly 3200.
Two-Button Reset The camera settings listed below can be restored to default values FRUCTIFY [ee by holding the @ and @ buttons down together for more than B= i f) two seconds (these bunions are marked by a gin doth The Bly monitor tums off briefly while settings are reset.
P.S, A, and M Modes PS, A and M modes offer control over a variety of advanced settings, including exposure (4 45), white balance, and carnage optimization. Each of these modes offers a different degree of control over shutter speed and aperture; Mode Description Diagrammed aut Camera sets shutter speed and Spartan for. Optimal expose. Decor: io ended for snapshots and in other situations in which there is little time to adjust camera tungsten.
Mode P (Programmed Auto) In this mode, the camera automatically adjusts shutter speed and aperture for optimal exposure in most situations, This mode is recommended for snapshots and other situations in which you want to leave the camera in charge of shutter speed and aperture.
Mode S (Shutter-Priority Auto) in shutter-priority auto, vou choose the shutter speed farm values between 305 and Yahoos while the camera automatically selects the aperture that will produce the optimal exposure, Use slow shutter speeds to suggest mason by blurring moving subjects, high shutter speeds to freeze’ motion, Ta take photographs in shutter priority alto; 1 Rotate the mode dial to'S.
Mode A (Aperture-Priority Auto) In aperture-priority auto, you choose the aperture from values between the minimum and maximum for the lens while the camera automatically selects the shutter speed that will produce the optimal exposure. Small apertures (high increase depth of field, bringing both the main subject and background into focus. Large apertures low frame bees) soften background details: To take photographs in aperture-priority auto: 1 Rotate the mode dial to A.
Mode M (Manual) If manual exposure mode, you control both shutter speed and aperture. Shutter speed can be set to values between 30s and Vases, or the shutter can be held pane for indefinitely for longer exposures (hu L bl. Aperture can be set 1a values between the minimum and max: mum values for the lens. To take photographs in manual exposure mode; 1 Rotate the mode dial Tom.
Long Time-Exposures shutter speeds of “bulb” and +" can be used for long time exposure photographs of mov: ing lights, the stars, night scenery, or fireworks. To prevent blurring caused by camera shake, use a tripod or an optional remote control 8833 109) Shutter speed: | Description bulb Shutter remains open while the shutter-release button is held down. Optional remote control regularized. Select mode M choose a shutter speed of "bulb! and then select delayed cremate or quick-response remote mode & 33).
Metering [a] » 0 The metering method determines how the camera sets exposure. The following options are available when the mode dial 18 notated to B.S, A or M {matrix metering fs Used in other modes); Method Description a Recommended in most Menstruation Camera meters a Wide area of the frame Matrix and instantly sets exposure according to distribution of brightness, color, dis: stance, and composition for natural results. Camera meters enter frame but assigns greatest weight to center area.
Auto exposure Lock [oe CURTAIL Litton If the subject Is not in the metered area when center weighted or slop metering 5 used, expositor will be based on lighting conditions in the background and the main subject may not be correctly exposed.
Exposure Compensation Controls used Exposure compensation is sed to alter exposure by dp to £5EV in increments of HALEY. mak ing pictures brighter or darker. Tis available online BS, and A modes and is most effective when used with counterweight or spot metering 45).
Flash Compensation Controls used Flash compensation {available only In B.S, A and M modes) is Used to alter flash output by from + 3EV io 4 18V in increments of YALE, changing the brightness of the main subject real rive to the background, Flash output can be increased to make the main subject appear brighter, of replicated to prevent unwanted highlights or reflections, Flash compensation Is shown in the shooting information display.
White Balance Controls used White balance ensures that colors ave unaffected by the color of the light source. Auto white balance Is recommended for most light sources if necessary, other values can be selected according to the type of sauce. The following options are available in PS A and M modes (Alta is automatically selected in Digital Val-Program modes): Option Description AUTO Auto Game Sets white Balance automatically. Recommended for most sit o nations.
More on Playback To view photographs in the monitor, press the @ button. Photo: graphs taken in “tall” (portrait) orientation are displaced in tall ori: ostentation as shown at fight. le Gl NH The following operations can be performed in full-frame playback: TINE To Description Press multi selector to right of rotate command dial baht 10 view photographs in order recorded.
Photo Information Photo information is superimposed on images displayed in full-frame playback Press the milt selector Up of down 10 cycle through the following information: tile In formations Shooting Data Page shooting Date Page History {retouched copies only)<» Highlights «» RGB Histogram «> Hle Information, File Information I Protect status, bi Retouch indicator Ed frame nonnumerical number of amides Rl Folder Nome Shooting Data, Page 1 fl Protect stat F1 Felicitous indict i] Camera name.
Highlights Highlights are the brightest portions of the image. Details may be lost (washed out in areas of highlights that are overexposed. fl Protect status pa Retouch indicator Ed Highlights (indicated by flashing border) Ld Frame totalitarianism number of images Histogram A histogram is a graph showing the distribution of tones in the image The horizontal axis comes ponds to pixel brightness, with dark pixels at the left and bright pixels at the right.
Taking a Closer Look: Playback Zoom Press the @ button to zoom in on a photograph in Rill frame play: back. The following operations can be performed: To Use Description Mindanao out QQ Press @ to zoom in to maximum of approximately 25x (large images), Tox medium images) or 13x mall images. Press @ to boor out.
54 Protecting Photographs from Deletion In fullness, zoom, and thumbnail playback, the button can be used to protect photos graphs from accidental deletion. Protected files can hot be deleted Using the @ button of the Delete option in the playback raven, and have DOS read-only! status when viewed on a Windows computer.
Connecting to a Computer, Printer, or TV Connecting to a Computer The camera can be connected to a computer using the supplied USE cable. The supplied Picture Project software can then be Used to copy photographs to the computer, where they can be organized, retouched, and printed. Before Connecting the Camera Install Picture Project from the supplied installer CD. To ensure that data transfer is not interrupted, be sure the campers battery is fully charged.
Turn the camera or. The computer will detect the camera automatically and display: Picture Project Transfer. If Mass Storage is selected for USB, the monitor and viewfinder will display the indicators shown at right (when MTP/PTP is selected, the normal ghosting indicators are displayed). 5 Transfer photographs to the computer using Picture Project. See the Picture Project Ref: Terence Manual {oh CD) for more information. If MTP/PTP is selected for USB, the camera can be turned off and the USE cable dis.
Photographs Photographs can be printed by any of the following methods; = Connect the camera to a printer and print JPEG photographs directly from the caner (see below). « Insert the camera memory card in a printer equipped with a card slot (see the printer man: ual for details). If the printer supports POOF (8 1171 photographs can be selected for printing using Print set (POOF) BF 61) « Take the camera memory card to a developer or digital printer center.
Connecting the Printer Before printing, check that the camera battery i fully charged. If in doubt, charge the bat: trey or use an HES AC adapter and E-5 AC adapter connector available separately, BR 103) 1 Set the camera USB option to MTP/PTR 0 84). 2 Turn the printer on. 3 Turn the camera off. 4 Connect the supplied USB cable as shown. Do not use force of attempt to Insert the connectors at an angle, Turn the camera on. A welcome screen will be displayed, fol: IN lowed by the Pict Bridge playback display.
Printing Pictures One at a Time To print the picture currently selected in the Pict Bridge playback display, press 0K. The menu shown at right will be displayed. Press the multi selector up or down to highlight an option and press to the right to select. Menu shown at right will be displayed. Press multi selector Up or down to choose page size firm Printer default Page size (defalcate page size for current printer) 3.85x5in., 5x Zin. 100x 150mm. 4x6in. 8x10in.
Printing Multiple Pictures To print multiple pictures or create an index print listing all PEG photographs as serial thumbnail images, press the @ button in the Pict Bridge playback display. The menu shown at right will be displayed. Press the milt selector up or down 16 highlight an option and press to the tight to select. Option Description Print select Print selected pictures (see below]. Print (POOF) Print current POOF print order (61), Create index print of all IEG photos, to maximum of 256.
Creating a POOF Print Order: Print Set The Print set (POOF) option in the playback menu is used to create digital "print orders” for Pict Bridge-compatible printers and devices that support DROP Selecting Print set (POOF) firm the playback mine displays the merit shown in Step 1. 2 Highlight Selective. Display selection dialog. 3 Select pictures and specify number of prints as described in Steps 1-3 on previous page. Note that RAW (NEF) photos can not be selected for printing.
LEH PEG TER An EG-D100 dived cable (available separately: Bi 103) can be used to connect the camera to a television or VCR for playback or recording. Use of an optional B-5 AC adapter and E-5 AC adapter connector is recommended for extended playback 8 103). i Choose the appropriate video mode Turn the camera off. Always tum the camera off before con nesting or disconnecting the video cable.
Menu Guide Most shooting, playback, and setup options can be accessed from Pia fe | the caner menus. To view the menus, press the @ button Choose from playback, shooting, Cg Slider shows position in current Custom Settings, setup, and i menu retouch menus (see below) | Current setting for each option is agile 1f.
To modify menu settings: 1 =e Highlight option. Menu items that are displayed in gray are not cur: gently available: Make selection. Press the shutter release button halfway to exit the menus and return to shooting mode.
EL TH LT ESE the playback menu contains the following options (options dis played may differ if My menu is selected for the Setup menu option in the setup menu 80). See "Using Camera Menus” (863) for more information on using the menus. Option Description Delete Delete all or selected photos. Playback folder Choose folder for playback. Rotate tall Rotate "tall! (portrait orientation) photos during playback. Slideshow Play photos back in automatic slide shows.
Playback Folder Choose a folder for playback: Option | Description Only photos in the folder currently selected for Folders in the setup menu are displayed during playback This option is Current | selected automatically when a photo is taken. [a memory card (default) is inserted and this option selected before photos have been taken, a message stating that the folder Contains no images will be displayed during playback: Select All 1g begin playback All Play back photos final folders on the memory card.
Slide Show Create a slide show of the pictures in the current playback folder, The following options are available: Option Description Frame interval Choose how long gate picture will be displayed.
Shooting Options: The Shooting Menu The shooting menu contains the following options (options dis: played may differ it My menu is selected for the Setup menu option in the setup menu; MB 80). See “Using Camera Menus” B63) for more information on using the menus, Option Description {4 Optimize image” Optimize images according Ta scene. Image quality | Choose immateriality: 70 Image size Choose image size. 70 White balance: Adjust loves according to the light source.
Customizing Image Enhancement Options: Custom select Custom fo make separate adjustments to the following options. After adjusting set sings: highlight Done and press 0K + Image sharpening: Choose how much outlines ave sharpened dur ing shooting. Choose high settings for sharp outlines, low ser tings for softer outlines. Default setting: Auto.
70 Image Quality Select image quality 088 30). DFE basic Image Size Choose image size 8 30), White Balance (P, §, A, and M Modes) Nine options are available for white balance. See ‘Reference: White Balance’ (8149) Fine-Tuning White Balance At settings other than White balance preset white balance can be Heine tuned! by +£3n increments of one (see page 118 of the Appendix for color temperature equivalents).
Measuring a Value for Preset White Balance 1 Place a neutral gray or white object under the lighting that will be used in the final photograph A standard gray card can be used as a reference in studio settings. Do alter exposure from the value selected by the cameras when shooting In mode M, use the electronic analog exposure display to select optimum exposure.
Copying White Balance from a Photograph A white balance value copied from an exciting photograph can bie used for preset white balance. Select White balance > White balance preset in the shooting menu. The menu shown In Step L will be displayed. 1 Ne Highlight Use photo. oo Display current source photo, * To use fast measured value $88 71), highlight Measure and press multi selector right, 2 = 4 Highlight Select image. Display folder list.
ISO Sensitivity Adjust 150 sensitivity 08 37). Noise Reduction Photographs taken at high sensitivities or at shutter speeds of Bs ar slower can be processed to reduce nose’ in the form of mot dig or random spaced, brightly-collared pixels. Choose from the following options: Option Description Photographs taken at 180 Sensitivities over 150 400 or at shutter speeds of about 85 or slower are processed to reduce noise.
NGL Custom Settings are Used to customize camera settings fo suit individual preferences. The following options are available when Simple (the default option) is selected for Setup menu in thee setup menu (B80): Option Option R Reset 74 4 Shooting mode 1 Beep 74 5 Metering 2 Focus mode 75 6 No memory card? 3 AF-area mode 75 To display the following options, select Full for Setup menu.
2: Focus Mode Select a focus mode (8823). 3: AF-Area Mode Choose how the camera selects the focus area in auto focus mode Moa 0s) 4: Shooting Mode Select from single-frame, continuous, self-timer and remote con troll mode (8 32) 5: Metering (P, 5, A, and M Modes Only) Choose how the camera meters exposure (045) 6: No Memory Card? If Release locked (the default setting) is selected, the shutter: release 1s disabled when io memory card is inserted.
8: Flash Compensation (P, 5, A, and M Modes Only} Adjust flash level (48). 9: AF-assist (All Modes Except gg and default setting) 15 selected and the subject is poorly Hit the AF-assist illumination will light when required to assist the focus operation (23) Choose Off to disable the Ab assist illumine gator. Note that when the illumination Is off the camera may not be able to focus on pearly-lit subjects using autonomous.
Choose the function performed by the Fa button. Option Description Self-timer (default) shooting Press the Fn button and rotate the commend dial to select mode shooting mode (8532). Image | Press the By button and rotate the command dial to select quality/size image quality and size (29) is0 Press the En Burton and rotate the command dial to select 150 sensitivity Sensitivity B37) White Bros the By button and rotate the commend dial to select balance white balance [5,4 and Modes only; 8849).
14; Built-in Flash (P. S, A, and M Modes Only) Choose a flash control mode for the built-in flash or the optional SB-400 Speed light TIL (default) Flash output is adjusted automatically in response to shooting conditions. Manual The flash fires at the level selected in the menu shown at right. At full power the builtin flash has a Guide Number of 13/42 (50100, m/ft, FL A icon flashes in the viewfinder and shooting information dis play when Manual is selected.
16: Self-Timer Choose the length of the shutter release delay In self timer mode 822) The default setting is 105 17: Remote on Duration Choose how long the camera will wait for a signal from the remote before: canceling delayed of quick-response remote modes (153). Choose shorter times for longer battery life.
Basic Camera Settings: The Setup Menu The setup menu contains the options listed below (options dis played may differ if My menu is selected for Setup menu) See “Using Camera Menus” 88 63) for more information on using the menus. The following options are available when | To display the following additional options, Simple (the default option) is selected for | select Full for Setup me Setup menu: = . Option Folders Setup menu File no. sequence Format memory card Mirror focused info display format.
Tress the milt selector Up or down to highlight ferns and then press to the right to select or deselect. Selected items are indicated by a check mark. Highlight Done and press OK to return to the [ist of menu nears shown in Step 1. Repeat steps 2:3 to edit additional mend Highlight Done in the list of menu names and press OK © return setup menu. Format Memory Card Select Yes to format the memory card.
Classic format is shown below, i ode bd Shiite speed FE Auto 150 sensitivity indicator Ll Optimize image indicator Fl Foist area display. AF-area mode | [3 Beep indicator. jj Battery indicator. Li Number of exposures remaining Reset white balance recording indicator 71 PC mode indicator, 56 bl Manual flash control indicator 78 Overcompensation indicator for optional Speed light.
Auto Shooting Info Choose whether to automatically display shooting information in the monitor in Digital and IY modes or PS, A and M modes. Select On to automatically display shooting information after the shutter release bunion is released. [E Custom Setting 7 (mage review) is off, shooting information will also be displayed after a photograph 1s taken, Turn Auto shooting info on If vou find yourself frequently checking camera settings.
Language Choose the language for camera menus and messages from: De Putsch German Pt Portuguese Portuguese En: English English Ru Roundup Russian Es Espadrille Spanish Sv Sven ska Swedish Fi Summit Finnish Bch (BMT additional Chinese Br Foals bench Bh (i) Simplified Chinese It Somalian Italian 8 B28 Japanese NE Netherlands Dutch Li Korean Pi Pol ski Polish Image Comment Add a comment to photographs as they are taken. Comments can be viewed in Capture NX (available separately. BE Picture Project.
Folders Create, rename, of delete folders or choose the folder in which new photographs will be stored. <= Select folder. Choose the folder in which subsequent photo: graphs will be stored, Current folder SANDBOX (default folder). L Other folders (in § alphabetical order) + Rename: Select a folder from a list and rename it as described in "Naming Folders” below, = Delete: Delete oll eternity folders on the memory card. Naming Folders Keyboard area: Lie multi selector to highlight letters press OK to select.
File No. Sequence Choose how the camera names files. + Off (defaults File numbering Js reset to 0001 when a new folder is created, the memory card is formatted, or a new memory card is inserted. « On: File numbering continues from the last number used after a new folder is created, the memory card Is formatted, or a new memory card is inserted.
Dust off Ref Photo Acquire reference data for the Rage Dust Off option in Capture NX (available separately; for more Information, see the Capture NX manual) Highlight On and press 0K.
88 Auto Image Rotation Photographs taken while On (the default option) Is selected cone rain information on camera orientation, allowing them to be rotated automatically during playback 088 50) or when viewed in Capture NX (available separately; BB 103] or Projectionist” The following orientations are recorded: Landscape (wide) Camera rotated 90° Camera rotated 90° orientation clockwise counter-clockwise “In continuous rode (132) orientation recorded for first shot applies to all images in same burst, Sven
Creating Retouched Copies: The Retouch Menu The options in the retouch menu are used to create trimmed, resized, of retouched copies of the photographs on the memory card. The following options are available (options displayed may. differ if My menu is selected for the Setup menu option in the setup menu: JI 80). See “Using Camera Menus” (8 63) for mare information on using the menus. Option Description D-lighting sign ten dark or backbit subjects or produce effects similar to the flash.
To create retouched copies from the retouch menu; 1 2 ph Highlight menu re Highlight photo. * Display retouch options. * Jo view selected picture full frame, press and hold @ button, +o exit to playback mode without creating modified copy, press @ button. D-Lighting Lr lighting brightens shadows, making it ideal for dark or back-lit photographs. Before Press the multi selector up or down to choose the amount of cor: erection performed. The effect can be previewed in the edit dis: play.
Red-Eye Correction Selecting this option displays a preview image as shown below. Confirm thi effects of red eve correction and create a corrected copy as described in the Ingrowing table.
Monochrome Choose from Black-and-white Sepia, and Phenotype (blue and white monochrome, Selecting Sepia or Phenotype displays a preview of the selected images press the mull selector up to Increase color saturation, down to decrease. Press OK to create a monochrome copy and return to full-frame playback.
Selecting Small picture from the retouch menu displays the menu shown in Step 1. Fol low the steps below to create small copies of multiple pictures, 1 Highlight Yes.> Copy photos and exit to full-frame playback. Ho return to Step 7 withhold creating copies; highlight Ne and press 0K Press MENU to exit to retouch men without creating copies: WA Viewing Small Pictures Smelt pictures are indicated by a gray border during playback. Playback zoom is nat available when small pictures are displayed.
Image Overlay image overlay combines two existing RAW photographs to create a single picture that is saved separately from the originals. The new picture is saved at current image quality and size settings; before creating an overlay, set image quality and size (8 30: all options are available). To create a RAW image, choose an image quality of NEF (RAW). 1 Highlight Image overlay in the retouch menu and press the mil selector right.
7 Press the multi selector left or night to highlight the Preview column. Press the multi selector up or down to highlight one of the following options and press 0K. + Overlay: Preview the overlay as shown at right. Press OK to save the new image. To return to Step 6 and select new photos or adjust gain, press @. + Save: Save the overlay without viewing a preview, After an overlay Is created, the camera will enter full-frame play: back (8 50) with the new picture displayed in the monitor.
Technical Notes Optional Accessories One advantage of digital SLR cameras is the wide variety of accessories they support. See our web sites or product catalogs for up-to-date information on accessories for the DAVAO. Hash units (Speed lights) MLLE remote control Viewfinder accessories <.
Lenses Auto focus is supported only with AF-S and AF CPU lenses, which are equipped with an auto focus motor. IX Nikki CRU lenses can not be used; other (RU lenses (including AF lenses not equipped with an auto focus motor can be Used in manual focus mode. CRY lenses can bie identified by the presence of CPU contacts BF 45), AES and AF: lenses by TARTS of TAR" at the beginning of the lens name. The following CPU lenses can be used with the Dax.
1% incompatible Non-CPU Lenses and Accessories Do NG attempt to use the following non-Co lenses and accessories: Failure to observe this practical Hon could result in damage fo the camera ot lens. “10-104 Ab Teleconference = 200=600mm H/9.5 (serial numbers 2800015300490) Senatorial “lenses for the BOAR (80mm F28, 200mm £35. TC: 16 «Lenses that requiem the ‘SURE focusing unit 00mm Teleconference) fas soulmate 5.
Optional Flash Units (Speed lights) The accessory shoe allows SB series Speed lights, including the 5B400, 800, 600, 80DX, 28DX 28, 27. 23 235 and 295 to be mounted directly on the camera without a syn cable. Its equipped with I and 58-600. Before attaching an optional flash unit, remove the accessory shoe cover.
The following features are available with CL-compatible flash units: Speed light Advanced Wireless Lighting Commander Remote Flash mode/feature SB-400 | SB-800 | SB-600 | SB-800 |SU-800° | SB-800 | SB-600 |SB-R200 FETTLE video Auto aperture Bo: vo gas Non-TEL auto Range-priority manual La 7‘ — pie Manual RPT Repeating flash a v fan FES REAR Rear-curtain sync Red-eye reduction pie a pans Ash Color Information Communication AF-assist for multi-area Auto zoom Auto 150 Only available when SEW-800 1s used to-con
Notes on Optional Speed lights Refer to the Speed light manual for detailed instructions. the Speed light supports the Creative Light: ing System, refer to the section ori CLS compatible digital SLR cameras. The D40x is not included in the ‘digital SLR" category in the SB. 80DX, SB:280X and SB500X manuals fan optional Speed light Is attached with the camera mode the builtin flask will tars off and the optional Speed light will fire whenever a photograph is teen.
Other Accessories + Dipterous adjustment viewfinder lenses: Lenses are available with adopters of -5 4-3-2 +054 1,42 and +3m1 Use dipterous adjustment lenses only if the desired focus can not be achieved with the built-in dipterous adjustment control Test dipterous adjustment lenses before purchase 10 ensure that the desired focus can be achieved.
Accessories for the D40x At the time of writing, the following accessories were available for the D40x. Up to date information is available at Nikon websites or from aur latest product can logs, + EN-ELL rechargeable Li-ion battery: Additional EN-RELY batteries are available from local Power retailers and Nikon service representatives. + EN-5 AC adapter: Lee ro power the camera for extended periods. £P-5 AC adapter connect tor required (available separately).
i Technical Notes/ Caring for the Camera (ELT ERE] TE Storage When the camera will not be used for an extended period, turn the camera off remove the battery, and store the battery in a cool, dry area with the terminal cover in place. To prevent mold or mildew, store the camera in a dry, well-ventilated area.
The Low-Pass Filter The image sensor that acts as the cameras picture element is fitted with a low pass filter to prevent moire. If you suspect that dirt or dust on the filter is appearing in photographs, you can clean the filter as described below. Note however that the filter Is extremely delicate and easily damaged. Nikon recommends that the filter be cleaned only by Nikon-authorized service personnel.
Caring for the Camera and Battery: Cautions Do not drop: The product may: malfunction: if subjected io strong shacks or vibrations Keep dry: This productions not waterproof and may malfunction: von at immersed dn water cor exposed: to: high levels of humidity Busting of the internal mechanism can cause irreparable damage.
On cold days; the capacity of bareness tends to decrease.
troubleshooting if the camera fails to function as expected, check the [ist of common problems below before consulting your retailer or Nikon representative. Refer to the page numbers in the Rightmost column for more information. Problem Solution Camera takes tine 10 turn on. Delete files or folders. Viewfinder is out of focus: Diastase viewfinder focus or use optional dipterous adieus men lenses 14.102 Displays turn off without warning. Choose a longer auto off delay. 8 Camera stops functioning.
Problem Solution «Manual focus selected EARS or AF lenses attached 28 97. choose auto focus mode, Otherwise focus manually. Image in viewfinder is notion focus. is Camera unable 10 focus using auto focus: use manual 26,28 focus or focus lock: + lens is not ARS or manual focus. 18.97 « Mode dial restarted select another made. [418.19 + Ab-assist lamp does not light for manual focus or) 23 continuous servo auto focus: Choose AF-S.
Problem Solution + Select mode BS A or Man stadium white balance to] 139,40 Colors are unnatural match ont sours « Select mode £5, A or Man adjust Optimize image | 35.68 settings. Lin) ee a a Press mug selector up or down to choose photo info: of Sol EE nation misplaced A graph appears dung playback: RAW image is nou played back; Photo was taken at image quality of NEFERTITI 30 « Some photos are not displayed during playback. Select All for Playback folder.
Camera Error Messages and Displays This section lists common warning indicators and error messages that appear in the view: finder and monitor Message Viewfinder Solution 5 Lock lens aperture tng at FEE minimum aperture largest is links) Lock ding at minimum aperture targets number. + 8 39 number Lens nat attached lens attached: attach hens. 8 y Attached lens is not CRU lens select mode M 39; Attach a lens. Er os 43.
Message Viewfinder Solution Lo 45 Flash has fired av full power View potash if under ex: ae (blinks) posed adjust settings and uy again. 6 a « Built-in flash is lowered: raise builtin flash 34 + Obedience distance to subject use larger aperture. or 37, increase ISO sensitivity or flash range, 39-44 + Hash head on optional 58-400 Speed light bounce fl iti {Links) s postseason, « SB-400 16 Unable to fully illuminate subject at cir | 96 ent lens focal length.
J TTT 1 Thai Appendix covers the following topics: = Available Settings and Defaults + The Command Dial. Memory Card Capacity and Image Quality /Size + Exposure Program (Mode + Flash Control. = Shutter Speeds Available with the Built-in Flash + Aperture, Sensitivity, and Flash Range . Supported Standards + White Balance and Color Temperature Available Settings and Defaults The following table fists the settings that can be adjusted in each mode.
The following defaults are restored with Custom Setting R (Reset): g[xenir]s AN 1 Heep on Hr Focus mode AEA 3 AF area mode Closest subject [Yam] Single | Closest subject 4: Shooting mode Single frame Si Metering Matrix 6: No foamy card: Release locked 7: Image review On £ SEEN compensation I 08 OAs on Een ET] on g 10150 diet Hi I BRI BITS Fa bunion Self rimes 1 AE ARAL AL/AL Jock 13 AE lock I Off Inflammable ] Th To Auto off timers Normal 16: Delmer 10s TE Remote orn duration nin; 1: Max.
The Command Dial Thai command dial can be used in alone or in combination with other controls to adjust the following settings. Changes to the affected setting are visible in the viewfinder and shoot ing information display. Choose a: combination of aperture and: shutter speed (flexible program, made P40).
Memory Card Capacity and Image Quality/Size The following table shows the approximate number of pictures that can be stored ona 16GB Panasonic Pro HIGH SPEED memory card at different image quality and size settings. image quality Image size File size (MB)? Number of images’ Burst capacity 2 BAW er 950 129 100 FINE A 27 225 100 5 1.2 487 100 i 24 251 100 NORMAL Ml 13 431 100 5 06 888 100 i 1.2 af 100 BASIC M 0.
Flash Control (99-101) The following types of flash control are supported when a CPU lens is used in combination with the builtin flash or optional SB-400, SB-800, or SB-600 Speed lights. + TTL Balanced Fill-Flash for Digital SLR: Flash output is adjusted for a natural balance between the main subject and the background. + Standard “TTL Fill-Flash for Digital SLR: Flash output is adjusted for the main subject; the brightness of the background is not taken into account.
SLE LET] here-mode through-the-lens (TTL exposure metering ET 30 coloration metering 1 yipe 6 ang D lenses) color mated metering inter CRY lenses), metering performed hyd segment RGB sensor LER CERT Weight of 750 given to Bonn circle in center of frame pre Aviators 35m circle (about 25% of frame) centered attractive focus area [ER SR FESS OPO EY 130) Color main OF center alighted meeting) $1.
Supported languages i yi Sing vantage charger: 74V 00 EES AC soapier (available sg Firesides optional PERSIA adapter connector axing SAA ART 5 DHS SN, G 2 CUT NATION MEO Erg or cap Operating environment FETE A070 E32 1040) LET Less than 85% ino condensation) Unless otherwise stated, all figures are for a camera with a fully charged battery operating at an iambi ent temperature of 20°C BR) EN-ELL Rechargeable Li-ion Battery enlargeable him son bate CAN T000 ENS lowercase Battery Life Battery life varies with
MG-23 Buick Charger Supported batteries 9 rechargeable Li-ion battened. Er Li] 8 approximately TE ] Operating temperature +4076 (#37 = 104%) fe HE EER) FEE Pl Err weight BO 2807] excluding partitive cable ] 18-55 mm ED AF-S DX Zoom-Nikki Lens (Available Separately) 4 Type FOUNT areas THT intelligentsia IE 35 element ASWAN 4, 35:45; 0 camera GENT ens Ing US WIR IOW Nose moot manual Min.
Nikon No reproduction in any form of this manual, in whole or in part (except for brief quotation in critical articles or reviews), may be made without written authorization from NIKON CORPORATION. NIKON CORPORATION Fuji Bldg.
Keep your bows in Hold the hand-grip with your bight hand the camp off Side the ory card i as show above ual clicks imo place, i Sup son the lens with your left hand and with one foot haft a pace in front of the other fag wel # Seton.
'BENEFICIAL SWEEPSTAKES RULES: HO PURCHASE NECESSARY T6 WIN. PURCHASES DXO NCI ENHANCE CHANCES OF WINNING. Sweepstakes fs sponsor oy Bit Marring Vices CMS, ffs raises, EMS WE sad hi lowing [soon 19 Pies ot $90.40: ane 20d Pe, of STETTED: sod ive 3rd reds, o S508. Stoppable bogs May 20, 2008 8 12:00 20 ED BT. and cad Doses 31, 2007 3 11:3 pn 8 LT. Bones by completing iis produce Gage or ping 3 V3 3° xsd kh one se, wives, iy, wine, ZIP Coe, ad ho work "S100 Give way VI ati ie ena So ens tn PD. Ft TUES, Jape.
WISHBONE VET, TOU A Z DRY LU-Z DANES ZOVOXT rv [Parcheesi ZIT 5 Ry TORE DET, ROENTGEN Dap— A CEDE HEME (7 RICRDBREOHES & BIC, HIRELING YY TORE LRT. ANACHRONISMS CAB 1 Nasser vw FULFILLED HF Veblen EET LR ru IRON SL 6. (EC) ALTHEA UY ZOBMOIUH (547 EE EEL LL ZED HY ER, DA ADOBE »PROFITLESS. LU SANDALS PREMEDICAL URE © — RIB-33 DOR DHF ROA BLUE) oo aR, MEDIAS © T— Hsp LE EEL LE RZ Y REFERRER EATS FREES LE " Kem D220 } IRB HE) PE Ex beseecher FIRE © DA TOT p= FA BEATS, ARSEIRIBAF-CIC Zw Fl.
OFFICIAL SHREDDED RULES: 5 PURCHASE NECESSARY TO WK. PURCHASES 50 NOT ENHANCE CHANCES OF WINING. Swveprlkes ey Evan 3 Put of $5,060: sd ie ed Riven of $540, raise gins Mo fy mpl prod Eben preview 5 4 6 any oan or iad 10 7. Bo FSA, Lit, TR. Denis, C0 011 cca Series BSL id wit eG 1 doh vent presentations. MESS il swan os omits: soe 008 5 15:0. E107. indent Obese 2. 2077 Aden, Sit ie. 230 Cod, dhe words “$390 + Fives eb evened before Hoes Becket Mosh Ahmadinejad cnn ed SARI.
AF-S DX ED I Nikon IMPORTANT NOTICE: YOU MUST PRESENT THE ATTACHED WARRANTY FORM (PART 1) TOGETHER WITH PROOF-Q PURCHASE AND PROOF-OF PURCHASE DATE TO OBTAIN WARRANTY SERVICE.
THIS FORM BUST BE PRESENTED FOR WARRANTY SERVICE ee States, Alaska, Hawaii, Puerto Rico, U.S, and AF-S DX ED JI US Administrates) YOU MUST PRESENT T His FORM (PART 1) TOGETHER WITH PROOF-OF-PURCHASE AND PROOF-OF-PURCHASER DATE TO OBTAIN WARRANTY SERVICE, “This Nfl product is warranted by Nikon Ine. 0 be tare from defects in materials and workmanship for a period of one {1) year farm the date of purchase. During this period, I this product is found 1o be defective in materials of workmanship, Nikon Inc.
Nikon AUTHORIZED SERVICE STATIONS sno us sap vc ERST he PR re Ram EEA stein Er, Ha AER eee Gates ion saves vz. i ro hen AEE SE svi per SI Groats ht rie) FE TRE BO un coercion , SEER Lim i En rom Ford Dons hs Bo to Tan San ER pci SE ae SEE TR EE 2 RRS wos a] oy Sad res ST HE EI sac on Aan son FE Gas PAMPHLETS Ten Fis Aas face aria Ein AEE sensor Ere wca, HEE Sri an or Rims Hr.
es Hiss ry i ro usr eC fo Nikon ONE YEAR WORLDWIDE AF-S DX ED II [kon ONE YEAR (Excluding he Continents! United States, Alaska, Ha wall, Puerto Rico, US. and 4.5, Virgin landless} Welcome to the warlords family of Nikon owners. our Man errant has been manufactured ta the highest quality standards by NIKON CORPORATION, Tokyo, Jape. “This warranty entities the carnival consumer fo worldwide warranty protestation In accordance ith the terms and conditions.
Nikon SERVICE FACILITIES is of Apr 2008) rpg Ss io Ti moe ep Sana REITERATE was EE Coat: cn Cain ore Lon gun BOER EI a snc Ns PTS Gon 4 Dai Hong ng tw mg pap PARS en cre oun Cop ii non. 1 ns Sra ds eX 134 ont nS din sense WH es miscount ome: eal, 5. yams. your cumin rein [rT — en tan Ses gr son cases cnc, EE Norway ts 55 fate 35 th ii far Coon, va pr ERT ven mw gry LR LR Sosa ne kat, Os 0 Bm Noo St EA ad min Sg 6 [Copra iron ERS mo can son os Hs TEI rir ren eer PETE Shiva STEEL Eri Rhea.
Nikki AF/X Lens 1 Year Warranty + 4 Year Extended Service Coverage = 5 YEARS OF PROTECTION N ik YOU MUST MAIL THE POSTCARD COPY OF THIS FORM WITHER 10 DAYS OF 1 0 YOUR PURCHASE TO OBTAIN EXTENDED SERVICE COVERAGE! Camel 1.0] Address 111 ppd br tLe et lb tl City Ld bel i fd i Let pet] Set 1) Zip Lelododoid Dealer Name Nobel pli City Lollobrigida id I dodo Lori i. Set lid Zp lilo] Your Telephone # If 1 "Li. bol — L.b.l.
Please send products and other correspondence to: Nikon inc. 18601 Hamilton Avenue Torrance, CA 0502 Hoyle-01 Nikon NIKKI LENS ESC REGISTRATION P.O.
NIKON DIGITAL IMAGING LIMITED WARRANTY THIS IS YOUR NIKON ING. ONE YEAR LIMITED WARRANTY (VALID IN THE CONTINENTAL UNITED STATES. ALASKA, HALAL CENTRAL AND SOUTH AMERICA, AND THE CARIBBEAN. YOU MUST PRESENT THIS FORM TOGETHER WITH PROOF OF PURCHASE AND PROOF OF PURCHASE DATE {BILL OF SALE) TO OBTAIN WARRANTY SERVICE. This Nikon Digital Imaging Product is warranted hy Nikon inc. to be free from defects in material and workmanship for ong (1) year from the dale of purchase.