Nikon The Nikon Guide to Digital Photography with the DIGITAL CAMERA (E:
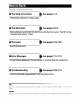
Where to Find It Find what you're looking for from: See pages v-vi The Table of Contents Find items by function or menu name. See pages vii-ix The Q&A Index Know what you want to do but don't know the function name? Find it from the "question and answer" index. I~The/ndex See pages 123-125 Search by key word. I~ Error Messages It See pages 111-112 If a warning is displayed in the viewfinder or monitor, find the solution here.
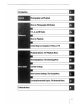
Introduction Photography and Playback ore on Photography (All Modes) , ,A, and MModes re on Playback onnecting to a Computer, Printer, or TV Playback Options: The Playback Menu oting Options: The Shooting Menu Basic Camera Settings: The Setup Menu Creating Retouched Copies: The Retouch Menu chnical Notes
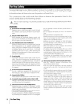
For Your Safety To prevent damage to your Nikon product or injury to yourself or to others, read the following safety precautions in their entirety before using this equipment. Keep these safety instructions where all those who use the product will read them. The consequences that could result from failure to observe the precautions listed in this section are indicated by the following symbol: Ji\ This icon marks warnings. To prevent possible injury, read all warnings before using this Nikon ~ product.
LL. Use appropriate cables When connecting cables to the input and output jacks, use only the cables provided or sold by Nikon for the purpose to maintain compliance with product regulations. LL.CD-ROMs CD-ROMs containing software or manuals should not be played back on audio CD equipment. Playing CDROMs on an audio CD player could cause hearing loss or damage the equipment. Lt. LL. Observe caution when using the flash Do not operate the flash with the flash window touching a person or object.
Symbol for Separate Collection in European Countries This symbol indicates that this product is to be collected separately. The following apply only to users in European countries: • This product is designated for separate collection at an appropriate collection point. Do not dispose of as household waste. • For more information, contact the retailer or the local authorities in charge of waste management.
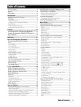
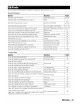
Table of Contents For Your Safety Notices Q&A Index ii iii vii Introduction .........••......•••....•.•..•..•.•...•....•..........1 Getting to Know the Camera 2 First Steps 8 Attaching a Lens 8 Charging and Inserting the Battery 9 Basic Setup 11 Inserting Memory Cards 12 Adjusting Viewfinder Focus 14 Tutorial .....•......•••..•••.••.••...............•.......•..••••...•15 "Point-and-Shoot" Photography e~ Mode) 15 Creative Photography (Digital Vari-Programs) 18 Basic Playback 20 Reference ....•..•.........
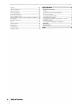
Folders File No. Sequence Mirror Lock-Up Firmware Version Dust Off Ref Photo Auto Image Rotation Creating Retouched Copies: The Retouch Menu D-Lighting Red-Eye Correction Trim Monochrome Filter Effects Small Picture Image Overlay vi ITable of Contents 85 86 86 86 87 88 89 90 91 91 92 92 92 94 Technical Notes •..••.••••••.••.....•.•.•••......•....•••....•.
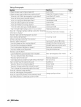
ClIA Index Find what you're looking for using this "question and answer" index.
Taking Photographs Question Key phrase Is there an easy way to take snapshots? Auto mode Is there an easy way to take more creative shots? Digital Vari-Program modes What do I do if flash photography is prohibited? Auto (flash off) mode How do I bring out a portrait subject? Portrait mode How can I get good landscape shots? Landscape mode How do I take snapshots of my kids? Child mode How do I "freeze" a moving subject? Sports mode How do I take close ups of small objects? Close-up mode Ca
Viewing, Printing, and Retouching Photographs Question ''\~1111 Can I view my photographs on the camera? Camera playback Can I view more information about photos? Photo info IU~~ Why parts of my photos blink? Photo info, highlights How do I get rid of an unwanted photo? Deleting individual photos Can I delete several photos at once? Delete Can I zoom in on pictures to make sure they're in focus? Playback zoom Can I protect photos from accidental deletion? Protect Is there an automatic playb
~ Life-Long Learning As part of Nikon's "Life-Long Learning" commitment to ongoing product support and education, continually-updated information is available on-line at the following sites: • For users in the USA.: http.llwww.nikonuso.coml • For users in Europe and Africa: http./lwwweurope-nikon.comlsupport • For users in Asia, Oceania, and the Middle East http.//www.nikon-osio.
Introduction Thank you for your purchase of a Nikon 040 single-lens reflex (SLR) digital camera with interchangeable lenses. This manual has been written to help you enjoy taking pictures with your Nikon digital camera. Read this manual thoroughly before use, and keep it handy when using the product. To make it easier to find the information you need, the following symbols and conventions are used: This icon marks cautions, information that should be read before use to prevent damage to the camera.
Getting to Know the Camera Take a few moments to familiarize yourself with camera controls and displays. You may find it helpful to bookmark this section and refer to it as you read through the rest of the manual.
Eyelet for camera strap 7 Multi selector * Memory card slot cover 12 liD (delete) button 20, 54 Memory card access lamp 12 Power connector cover for optional AC adapter connector 103 Battery-chamber cover latch 10 Battery-chamber cover 10, 103 Tripod socket Monitor 6, 50, 82 (playback zoom) button 53 ~D~ (setting) button 22 • (reset) button 38 (thumbnail) button 52 ? (help) button (menu) button 63 (playback) button 20, 50 e DK-16 viewfinder eyepiece cup Viewfinder eyepiece Diopter adjustment control ED (A
The Mode Dial • The D40 offers a choice of the following twelve shooting modes: Advanced Modes (Exposure Modes) Select these modes for full control over camera settings. P- Programmed auto: 40 A-Aperture-priorityauto: S-Shutter-priorityauto: 41 M-Manual: 43 42 Point-and-Shoot Modes (Digital Vari-Programs) Selecting a Digital Vari-Program automatically optimizes settings to suit the selected scene, making creative photography as simple as rotating the mode dial.
The Viewfinder Display Focus brackets (focus areas) 14, 16,24,25,26 Focus indicator 16, 26 Focus area display 14, 16,24,25,26 AF-area mode 24 Autoexposure (AE) lock 46 Flexible program indicator 40 39-44 Shutter speed Aperture (f/-number) 39-44 Flash compensation indicator 48 47 Exposure compensation indicator Number of exposures remaining 15, Number of shots remaining before memory buffer fills 32, Preset white balance recording indicator Exposure compensation value Flash compensation value PC connection
The Shooting Information Display To view camera settings, press the ~ button. The following shooting information will be displayed in the monitor. See page 22 for information on changing camera settings.
Supplied Accessories The DK-5 Viewfinder Eyepiece Cap Attach the OK-S viewfinder eyepiece cap for self-timer 33) or remote control photography ( 33). Before attaching the OK-S or 102), remove the OK-16 viewfinder other viewfinder accessories eyepiece cup. Hold the camera firmly when removing the cup. The Camera Strap Attach the camera strap as shown below. @ The MH-23 Quick Charger 122) The MH-23 is for use with the supplied EN-EL9 battery.
First Steps Attaching a Lens Autofocus is supported with AF-S and AF-I lenses only. Care should be taken to prevent dust from entering the camera when exchanging lenses. 1 Turn the camera off and remove the body cap. Remove the rear lens cap from the lens. 2 Keeping the mounting index on the lens aligned with the mounting index on the camera body, position the lens in the camera's bayonet mount and rotate the lens in the direction shown until it clicks into place.
Charging and Inserting the Battery The supplied EN-EL9 battery is not charged at shipment. Charge the battery using the supplied MH-23 battery charger as described below. 1 Charge the battery. 1.1 Remove the terminal cover from the battery. 1.2 Connect the power cord to the charger and plug it in. 1.3 Place the battery in the charger. The CHARGE lamp will blink as the battery charges. About 90 minutes are required for an exhausted battery to fully charge. 1.
2 Insert the battery. 2.1 After confirming that the power switch is in the off posi- = tion, open the battery chamber cover. 2.2 Insert a fully charged battery as shown at right. Close the battery chamber cover. Removing the Battery Turn the camera off before removing the battery. To avoid shorting the battery, replace the terminal cover when the battery is not in use.
Basic Setup The first time the camera is turned on, the language selection dialog shown in Step 1 will be displayed in the monitor. Follow the steps below to choose a language and set the time and date. No photographs can be taken until the camera clock has been set. 2 1 ~ Select language. 4 3 Display map of world time zones. * Select local time zone. * UTe field shows time difference between selected time zone and Coordinated Universal Time (UTC), in hours.
Inserting Memory Cards The camera stores pictures on Secure Digital (SO) memory cards (available separately). 1 Insert a memory card. 1.1 Before inserting or removing memory cards, turn the camera offand open the card slot cover. 1.2 Slide the memory card in as shown at right until it clicks into place. The memory card access lamp will light for about a second. Close the memory card slot cover. Front Removing Memory Cards 1. Confirm that the access lamp is off. 2.
2 Memory cards must be formatted in the camera before first use. Note that formatting memory cards permanently deletes all photographs and other data they may contain. Be sure all data you wish to keep have been copied to another storage device before formatting the card. 2.1 2.2 Display menus. * Turn camera on. * If menu item is highlighted, press multi selector left to highlight icon for current menu. 2.3 2.4 ~ Highlight 11'. Position cursor in setup menu. 2.6 2.
Adjusting Viewfinder Focus Photographs are framed in the viewfinder. Before shooting, make sure that the display in the viewfinder is in clear focus. 1 Remove the lens cap and turn the camera on. 2 Slide the diopter adjustment control up and down until the focus brackets are in sharp focus. When operating the diopter adjustment control with your eye to the viewfinder, be careful not to put your fingers or fingernails in your eye. ~~ I . .
Tutorial Photography and Playback IIPoint-and-Shoot" Photography (AS Mode) This section describes how to take photographs in A~ (auto) mode, an automatic "pointand-shoot" mode in which the majority of settings are controlled by the camera in response to shooting conditions. 1 Turn the camera on. 1.1 Remove the lens cap and turn the camera on. The monitor will turn on and the viewfinder display will light. 1.2 If the monitor is off press the ~ button to display shooting information.
3 Frame a photograph in the viewfinder. 3.1 Hold the camera as shown. Holding the Camera Hold the handgrip in your right hand and cradle the camera body or lens with your left. Keep your elbows propped lightly against your torso for support and place one foot half a pace stable. ahead of the other to 3.2 Frame a photo in the viewfinder with the main subject positioned in any of the three focus areas.
4.2 Smoothly press the shutter-release button the rest of the way down to release the shutter and record the photograph. The access lamp next to the memory card slot cover will light. Do not eject the memory card or remove or disconnect the power source until the lamp has gone out and recording is complete. 5 Turn the camera off when shooting is complete. The Shutter-Release Button The camera has a two-stage shutter-release button.
In addition to~, the D40 offers a choice of seven Digital Vari-Program modes. Selecting a program automatically optimizes settings to suit the selected scene, making creative photography as easy as rotating the mode dial. Mode Description @ Auto (flash off) For pictures that do not use the flash. ~ For portraits. ~ .~ ~ ~ ~ Portrait Landscape Child Sports Closeup Night portrait For natural and man-made landscapes. For pictures of children.
.~Child Use for snapshots of children. Clothing and background details are vividly rendered while skin tones are given a soft, natural finish. The camera selects the focus area containing the closest subject. ~Sports High shutter speeds freeze motion for dynamic sports shots in which the main subject stands out clearly. The camera focuses continuously while the shutter-release button is pressed halfway, tracking the subject in the center focus area.
Basic Playback " . Photographs are automatically displayed after shooting. The battery level and number of exposures remaining are also displayed. If no photograph is displayed in the monitor, the most recent picture can be viewed by pressing the G button 50). Additional pictures can be displayed by rotating the command dial or pressing the multi selector left or right. To end playback and return to shooting mode, press the shutterrelease button halfway.
Reference This section builds on the Tutorial to cover more advanced shooting and playback options.
The Shooting Information Display Pressing the ~ button displays shooting information in the monitor. Shooting information is also displayed when the ~II~ button is pressed (shooting mode only), the @/Fn, 0, or ~ (P, 5, and A modes only) buttons are pressed, and immediately after the camera is turned on. The display format depends on the option selected for Info display format in the setup menu 81). The ~II~ button can be used to change the settings shown in the shooting information display.
Focus . Focus can be adjusted automatically (see "Focus Mode;' below) or manually (~28). The user can also select the focus area for automatic or manual focus (~ 24, 25) or use focus lock to focus to recompose photographs after focusing 26). m Focus Mode lonlrols used o ~D~ t aI " Choose how the camera focuses. AF-S and AF-C are available only in P, S, A, and M modes.
AF-Area Mode Choose how the focus area is selected in autofocus mode. This setting has no effect in manual focus mode. • Option [_] Description (Io~est subject D Camera automatically selects focus area containing subject closest to camera. Default for P, 5, A, and M modes; selected automatically when mode dial is rotated to A~, tlJ, 7, !iii, .~, 0 r ~. • User selects focus area manually, but if subject leaves selected focus area even briefly, [- [].
Focus Area Selection Multi selector The D40 offers a choice of three focus areas. At default settings, the camera chooses the focus area automatically or focuses on subject in the center focus area, but the focus area can also be selected manually to compose photographs with the main subject positioned at either side of the frame. 1 At default settings, the focus area is selected automatically in A~, @, 7, lI.I, . ~, ~, P, 5, A, and M modes.
Focus Lock Shutter-release button/AE-L/AF-L button Focus lock can be used to change the composition after focusing, making it possible to focus on a subject that will not be in a focus area in the final composition. It can also be used when the autofocus system is unable to focus (~27). Single or dynamic area AF is recommended when using focus lock ~ 24). 1 Position the subject in the selected focus area and press the shutter-release button halfway to initiate focus.
~ Getting Good Results with Autofocus Autofocus does not perform well under the conditions listed below. If the camera is unable to focus 26) to focus on another subject at the using autofocus, use manual focus (~ 28) or use focus lock same distance and then recompose the photograph. There is little or no contrast between the subject and the background (e.g., the subject is the same color as the background). The subject is dominated by regular geometric patterns (e.g., a row of windows in a skyscraper).
Manual Focus " Controls used Use this option when you wish to adjust focus manually or when using a manual focus lens. To focus manually, select manual focus mode and adjust the lens focusing ring until the image displayed on the clear matte field in the viewfinder is in focus. Photographs can be taken at any time, even when the image is not in focus. ~ The Electronic Range Finder If the lens has a maximum aperture of f/S.
Image Quality and Size Together, image quality and size determine how much space each photograph occupies on the memory card. Larger, higher quality images can be printed at larger sizes but also require more memory, meaning that fewer such images can be stored on the memory card. Image Quality and Size Large file size JPEG Fine :c ~. ::::T A 3" I:» u:::a .
Image Quality Controls used The camera supports the following image quality options (listed in descending order by image quality and file size): Option Format RAW NEF Description Compressed raw data from the image sensor are saved directly to memory card. Choose for images that will be retouched on a computer. Images are compressed less than NORM, producing higher-quality images. Compression ratio: roughly 1:4. FINE NORM JPEG (default) BASIC Best choice in most situations.
D NEF (RAW)/RAW+B Capture NX (available separately; ~ 103) or the supplied PictureProject software are required to view NEF (RAW) images on a computer. NEF (RAW) photographs can not be printed by most print services or by direct USB connection; use PictureProject or Capture NX to print NEF (RAW) photographs. When photographs taken at RAW+B are viewed on the camera, only the JPEG image will be displayed. When photographs taken at this setting are deleted, both NEF and JPEG images will be deleted.
Shooting Mode Controls used Shooting mode determines how the camera takes photographs: one at a time, in a continuous sequence, with a timed shutter-release delay, or with a remote control. I [§] (default) ~ Continuous (burst mode) ~105 Self-timer 'i 25 'i Camera takes one photograph each time shutter-release button is pressed. Camera records photographs at up to about 2.
Self-Timer and Remote Control Modes The self-timer or optional ML-L3 remote control can be used for self-portraits. 1 Mount the camera on a tripod or place the camera on a stable, level surface. 2 Select one of the following shooting modes: Mode Description Shutter released about las after camera has focused. Delayed remote Shutter released about 2 s after camera has focused. Qu ick-response Shutter released when camera focuses. remote ~10s Self-timer ~2s ~ 3 Frame the photograph.
Using the Built-in Flash • The camera supports a variety of flash modes for photographing poorly lit or backlit subjects. The flash modes available depend on the mode selected with the mode dial; note that the flash can not be used in ~,\1), or ~ mode. The default flash setting for Digital VariProgram modes is automatically restored when the mode dial is rotated to a new setting or the camera is turned off. Using the Built-in Flash: A~, :i, .~, ~ and ~ Modes 1 Rotate the mode dial to A~, :i, .~, ~, or~.
~FlashMode The flash modes available depend on the mode currently selected with the mode dial. ~ A~,~,.~,~ Auto slow sync Auto Auto+ red-eye reduction Off Auto slow Off sync+ red~eye reduction Fill flash C~.)L.(Q ~ ~.~ !.,.:.,., ~ @ic: YK\ Slow sync+ red-eye reduction • S,M P,A Fill flash Red-eye reduction m •• ~ REAR ,. . i=t Rearcurtain+ slow sync Red-eye reduction Rear-curtain sync Slow sync * SLOW is displayed after command dial is released. Flash modes are described below.
ra The Built-in Flash Use with CPU lenses with focal lengths of 18- 300 mm or non-CPU lenses with focal lengths of 18200mm (~97-98). Remove lens hoods to prevent shadows. Lenses that block the subject's view of the AF-assist lamp may interfere with red-eye reduction. The flash has a minimum range of 60cm (2ft.) and can not be used in the macro range of macro zoom lenses. If the flash fires in continuous shooting mode (~ 32), only one picture will be taken each time the shutter-release button is pressed.
ISO Sensitivity (gontrols useH Photographs taken at slow shutter speeds are prone to blurring. If ISO sensitivity is raised above the base setting of ISO 200 equivalent, the same exposures can be achieved at faster shutter speeds, preventing blur. ISO sensitivity can be set to values between ISO 200 and ISO 1600 in steps of 1EV, with a further high sensitivity setting of HI 1 available for an ISO equivalent of roughly 3200.
Controls used: ~ button + CI button Two-Button Reset The camera settings listed below can be restored to default values by holding the ~ and CI buttons down together for more than two seconds (these buttons are marked by a green dot). The monitor turns off briefly while settings are reset. Custom Settings are not affected.
P, S, A, andMMod s P, 5, A, and M modes offer control over a variety of advanced settings, including exposure ( 45), white balance, and image optimization. Each of these modes offers a different degree of control over shutter speed and aperture: Mode Description p Programmed auto m40) A Camera sets shutter speed and aperture for optimal exposure. Recommended for snapshots and in other situations in which there is little time to adjust camera settings.
Mode P(Programmed Auto) In this mode, the camera automatically adjusts shutter speed and aperture for optimal exposure in most situations. This mode is recommended for snapshots and other situations in which you want to leave the camera in charge of shutter speed and aperture. To take photographs in programmed auto: 1 Rotate the mode dial to P. 2 Frame a photograph, focus, and shoot.
Mode S(Shutter-Priority Auto) In shutter-priority auto, you choose the shutter speed from values between 30s and1,4,ooos while the camera automatically selects the aperture that will produce the optimal exposure. Use slow shutter speeds to suggest motion by blurring moving subjects, high shutter speeds to "freeze" motion. To take photographs in shutter-priority auto: 1 Rotate the mode dial to S.
Mode A(Aperture-Priority Auto) In aperture-priority auto, you choose the aperture from values between the minimum and maximum for the lens while the camera automatically selects the shutter speed that will produce the optimal exposure. Small apertures (high f/-numbers) increase depth of field, bringing both the main subject and background into focus. Large apertures (low f/-numbers) soften background details. To take photographs in aperture-priority auto: 1 Rotate the mode dial to A.
Mode M(Manual) In manual exposure mode, you control both shutter speed and aperture. Shutter speed can be set to values between 30s and 1/4,ooos, or the shutter can be held open for indefinitely for longer exposures (bu L b). Aperture can be set to values between the minimum and maximum values for the lens. To take photographs in manual exposure mode: 1 Rotate the mode dial to M. 2 Rotate the command dial to choose a shutter speed (see the illustration at left, below).
Long Time-Exposures ll Shutter speeds of "bulb and "__ can be used for long time-exposure photographs of moving lights, the stars, night scenery, or fireworks. To prevent blurring caused by camera shake, use a tripod or an optional remote control (~33, 103). 11 Shutter speed Description bulb Shutter remains open while the shutter-release button is held down. Optional remote control required.
Exposure _ Metering €ontrols used The metering method determines how the camera sets exposure. The following options are available when the mode dial is rotated to p, 5, A, or M (matrix metering is used in other modes): Method Description II Matrix Recommended in most situations. Camera meters. a wide area of the frame and instantly sets exposure according to distribution of brightness, color, distance, and composition for natural results.
Autoexposure Lock AE-LIAF-L button If the subject is not in the metered area when center-weighted or spot metering is used, exposure will be based on lighting conditions in the background and the main subject may not be correctly exposed. This can be prevented by using autoexposure lock. 1 Select mode P, 5, or Aand choose center-weighted or spot metering (exposure lock has no effect in mode M).
Exposure Compensation €ontrols used Exposure compensation is used to alter exposure by up to ±5 EV in increments of 1/3 EV, making pictures brighter or darker. It is available only in P, S, A, and M modes and is most effective when used with center-weighted or spot metering (~45). As a rule of thumb, positive compensation may be needed when the main subject is darker than the background, negative values when the main subject is brighter than the background.
Flash Compensation Controls usetl Flash compensation (available only in P, 5, A, and M modes) is used to alter flash output by from -3 EV to + 1 EV in increments of '/3EV, changing the brightness of the main subject relative to the background. Flash output can be increased to make the main subject appear brighter, or reduced to prevent unwanted highlights or reflections. Flash compensation is shown in the shooting information display. Normal flash output can be restored by setting flash compensation to ±O.
White Balance Controls used White balance ensures that colors are unaffected by the color of the light source. Auto white balance is recommended for most light sources; if necessary, other values can be selected according to the type of source. The following options are available in P, S, A, and M modes (Auto is automatically selected in Digital Vari-Program modes): Option Description Auto Camera sets white balance automatically. Recommended for most situations.
More on Pia, ck Viewing Photographs on the Camera e To play photographs back, press the button. The most recent photograph will be displayed in the monitor. Photographs taken in "tall" (portrait) orientation are displayed in tall orientation as shown at right.
Photo Information Photo information is superimposed on images displayed in full-frame playback. Press the multi selector up or down to cycle through the following information: File InformationBShooting Data Page 1BShooting Data Page 2 B Retouch History (retouched copies only)BHighlightsBRGB HistogramBFile Information.
Highlights Highlights are the brightest portions of the image. Details may be lost ("washed out") in areas of highlights that are overexposed. 54 Protect status Retouch indicator 89 Highlights (indicated by flashing border) Frame number/total number of images Histogram A histogram is a graph showing the distribution of tones in the image. The horizontal axis corresponds to pixel brightness, with dark pixels at the left and bright pixels at the right.
Taking a Closer Look: Playback Zoom Irjj Press the. button to zoom in on a photograph in full-frame playback. The following operations can be performed: .0 To Use View other areas of image View other images Cancel zoom View menus Display shooting information e I Rotate command dial to view same location in other images at current zoom ratio. Return to full-frame playback.
Protecting Photographs from Deletion In full-frame, zoom, and thumbnail playback, the ED button can be used to protect photographs from accidental deletion. Protected files can not be deleted using the 8 button or the Delete option in the playback menu, and have DOS "read-only" status when viewed on a Windows computer. Note that protected files will be deleted when the memory card is formatted (~ 13,81).
Connecting to aComputer The camera can be connected to a computer using the supplied USB cable. The supplied PictureProject software can then be used to copy photographs to the computer, where they can be organized, retouched, and printed. Before Connecting the Camera Install PictureProject from the supplied installer CD. To ensure that data transfer is not interrupted, be sure the camera battery is fully charged.
4 Turn the camera on. The computer will detect the camera automatically and display PictureProject Transfer. If Mass Storage is selected for USB, the monitor and viewfinder will display the indicators shown at right (when PTP is selected, the normal shooting indicators are displayed). 5 Transfer photographs to the computer using PictureProject. See the PictureProject online help for more information.
Printing Photographs Photographs can be printed by any of the following methods: • Connect the camera to a printer and print JPEG photographs directly from the camera (see below). • Insert the camera memory card in a printer equipped with a card slot (see the printer manual for details). If the printer supports DPOF 117), photographs can be selected for printing using Print set (DPOF) 61). • Take the camera memory card to a developer or digital printer center.
Connecting the Printer Before printing, check that the camera battery is fully charged. If in doubt, charge the battery or use an EH-5 AC adapter and EP-5 AC adapter connector (available separately; 103). 1 Set the camera USB option to PTP 84). 2 Turn the printer on. 3 Turn the camera off. 4 Connect the supplied USB cable as shown. Do not use force or attempt to insert the connectors at an angle. Connect the camera directly to the printer; do not connect the cable via a USB hub or keyboard.
Printing Pictures One at a Time To print the picture currently selected in the PictBridge playback display, press OK. The menu shown at right will be displayed. Press the multi selector up or down to highlight an option and press to the right to select. up or down to choose page size from Printer default Page size (default page size for current printer), 3.SxS in., Sx7 in., 100xlS0mm, 4x6in., 8xl0in., Letter, A3, or A4, then press OK to select and return to print menu. No.
Printing Multiple Pictures To print multiple pictures or create an index print listing all JPEG photographs as small thumbnail images, press the GIl button in the PictBridge playback display. The menu shown at right will be displayed. Press the multi selector up or down to highlight an option and press to the right to select. Option Description Print select Print selected pictures (see below). Print (DPOF) Print current DPOF print order Index print 61).
Creating a DPOF Print Order: Print Set The Print set (DPOF) option in the playback menu is used to create digital "print orders" for PictBridge-compatible printers and devices that support DPOF. Selecting Print set (DPOF) from the playback menu displays the menu shown in Step 1. 2 1 Highlight Select/set. Display selection dialog. 3 Select pictures and specify number of prints as described in Steps 1- 3 on previous page. Note that RAW (NEF) photos can not be selected for printing. ~~~=I Display options.
Viewing Photographs on TV An EG-Dl 00 video cable (available separately; 103) can be used to connect the camera to a television or VCR for playback or recording. Use of an optional EH-5 AC adapter and EP-5 AC adapter connector is recommended for extended playback ( 103). 1 Choose the appropriate video mode ( 83). 2 Turn the camera off. Always turn the camera off before connecting or disconnecting the video cable. 3 Connect the video cable as shown.
Menu Guide Using Camera Menus Most shooting, playback, and setup options can be accessed from the camera menus. To view the menus, press the button. e Slider shows position in current menu Choose from playback, shooting, Custom Settings, setup, and retouch menus (see below) If //?// icon is displayed, help for the current item can be viewed by pressing CD button Menu Playback Q Shooting ~ Custom Settings 1J Setup @1 Retouch ~ Current setting for each option is shown by icon L . .
To modify menu settings: 1 Bj~ 2 Highlight icon for current menu. Display menus. 3 ~ Select menu. 4 ~ 5 Highlight menu item. Position cursor in selected menu. 6 ~ Display options. 8 ~ 7 Highlight option. Menu items that are displayed in gray are not currentlyavailable. Make selection. Press the shutter-release button halfway to exit the menus and return to shooting mode. The monitor will turn off.
Playback Options: The Playback Menu The playback menu contains the following options (options displayed may differ if My menu is selected for the CSM/Setup menu option in the setup menu; 80). See "Using Camera Menus" 63) for more information on using the menus. Option Delete Playback folder Rotate tall Slide show Print set (DPOF) Description Delete all or selected photos. Choose folder for playback. Rotate "tall" (portrait-orientation) photos during playback. Play photos back in automatic slide shows.
Playback Folder Choose a folder for playback: Option Description Only photos in the folder currently selected for Folders in the setup menu are displayed during playback. This option is Current selected automatically when a photo is taken. If a memory card (default) is inserted and this option selected before photos have been taken, a message stating that the folder contains no images will be displayed during playback. Select All to begin playback. All Play back photos in all folders on the memory card.
Slide Show Create a slide show of the pictures in the current playback folder. The following options are available: Option Frame intvl Start Description Choose how long each picture will be displayed. Start slide show. The following operations can be performed during a slide show: To Use ~ ~ Skip back/skip ahead View photo info G Pause slide show Description Press multi selector left to return to previous frame, right to skip to next frame. Change photo info displayed. Pause slide show.
Shooting Options: The Shooting Menu The shooting menu contains the following options (options displayed may differ if My menu is selected for the CSM/Setup menu option in the setup menu; 80). See "Using Camera Menus" 63) for more information on using the menus. Option Optimize image* Image quality Image size White balance* ISO sensitivity Noise reduction Description Optimize images according to scene. Choose image quality. Choose image size. Adjust colors according to the light source.
Customizing Image Enhancement Options: Custom Select Custom to make separate adjustments to the following options. After adjusting settings, highlight Done and press OK. • Image sharpening: Choose how much outlines are sharpened during shooting. Choose high settings for sharp outlines, low settings for softer outlines. Default setting: Auto. · Tone compensation: Control contrast. Lower settings prevent loss of detail in highlights under harsh lighting or in direct sunlight.
Image Quality Select image quality ( 30). Image Size Choose image size ( 30). White Balance (P, S, A, and M Modes) Nine options are available for white balance. White Balance" ( 49). • See "Reference: Fine-Tuning White Balance At settings other than White balance preset, white balance can be "fine tuned" by ±3 in increments of one (see page 118 of the Appendix for color temperature equivalents).
Measuring a Value for Preset White Balance 1 Place a neutral gray or white object under the lighting that will be used in the final photograph. A standard gray card can be used as a reference in studio settings. Do alter exposure from the value selected by the camera; when shooting in mode M, use the electronic analog exposure display to select optimum exposure.
Copying White Balance from a Photograph A white balance value copied from an existing photograph can be used for preset white balance. Select White balance> White balance preset in the shooting menu. The menu shown in Step 1 will be displayed. 1 2 ~ ~ Highlight Use photo. .,. * To use last measured value 3 Display current source photo. 71), highlight Measure and press multi selector right. ~ 4 ~ Highlight Select image. t Display folder list.
ISO Sensitivity Adjust ISO sensitivity 37). Noise Reduction Photographs taken at high sensitivities or at shutter speeds of 1s or slower can be processed to reduce "noise" in the form of mottling or randomly-spaced, brightly-colored pixels. Choose from the following options: Option Off Description Noise turns off reduction at ISO sensitivities of 1600 or less. Minimal noise reduction is still (default) performed when ISO sensitivity is set to HI 1.
Custom Settings Custom Settings are used to customize camera settings to suit individual preferences.
2: Focus Mode Select a focus mode 23). 3: AF-Area Mode Choose how the camera selects the focus area in autofocus mode ( 24). 4: Shooting Mode Select from single-frame, continuous, self-timer, and remote control mode ( 32). 5: Metering (P, S, A, and M Modes Only) Choose how the camera meters exposure ( 45). 6: No Memory Card? If Release locked (the default setting) is selected, the shutterrelease is disabled when no memory card is inserted.
8: Flash Level (P, 5, A, and M Modes Only) Adjust flash level ( 48). 9: AF-assist (All Modes Except ~ and ~) If On (the default setting) is selected and the subject is poorly lit, the AF-assist illuminator will light to assist the focus operation in single-servo AF (AF-S or single-servo AF selected in AF-A autofocus mode). Choose Off to disable the AF-assist illuminator. Note that when the illuminator is off, the camera may not be able to focus on poorly-lit subjects using autofocus.
11 : ~/Fn Button Choose the function performed by the Fn button. (default) Shooting mode Image quality/size ISO sensitivity White balance Press the Fn button to select self-timer mode ( 33). Press the Fn button and rotate the command dial to select shooting mode ( 32). Press the Fn button and rotate the command dial to select image quality and size 29). Press the Fn button and rotate the command dial to select ISO sensitivity (~37).
14: Built-in Flash (P, 5, A, and M Modes Only) Choose a flash control mode for the built-in flash or the optional SB-400 Speedlight. TTL (default): Flash output is adjusted automatically in response to shooting conditions. Manual: The flash fires at the level selected in the menu shown at right. At full power, the built-in flash has a Guide Number of 18/59 (ISO 200, m/ft., 20°C/68°F). A ~ icon flashes in the viewfinder and shooting information display when Manual is selected. .
16: Self-Timer Choose the length of the shutter-release delay in self-timer mode 33). The default setting is lOs. 17: Remote On Duration Choose how long the camera will wait for a signal from the remote before cancelling delayed or quick-response remote modes 33). Choose shorter times for longer battery life. The default setting is one minute.
Basic Camera Settings: The Setup Menu The setup menu contains the options listed below (options displayed may differ if My menu is selected for CSM/Setup menu. See "Using Camera Menus" ( 63) for more information on using the menus. The following options are available when To display the following additional options, Simple (the default option) is selected for select Full for CSM/Setup menu: CSM/Setup menu: Option ======::::::::::::=================== Option Folders 85 CSM/Setup menu 80-81 no.
3 Press the multi selector up or down to highlight items and then press to the right to select or deselect. Selected items are indicated by a check mark. 4 Highlight Done and press OK to return to the list of menu names shown in Step 1. Repeat steps 2-3 to edit additional menus. 5 Highlight Done in the list of menu names and press OK to return setup menu. Format Memory Card Select Yes to format the memory card. Note that this permanently deletes all photographs and any other data the card may contain.
Classic format is shown below.
Auto Shooting Info Choose whether to automatically display shooting information in the monitor in Digital Vari-Program (A~, @, 7,~, .~, ~, ~, and ~ modes or P, S, A, and M modes. Select On to automatically display shooting information after the shutter-release button is released. If Custom Setting 7 (Image review) is off, shooting information will also be displayed after a photograph is taken. Turn Auto shooting info on if you find yourself frequently checking camera settings.
Language (LANG) Choose the language for camera menus and messages from: De En Es Fi Fr It NI PI Spanish Pt Portugues Ru PyCCKHM Sv Svenska Finnish ~ French r~ $)( (r~{*) Simplified Chinese Deutsch English Espanol Suomi German Fran~ais English Italiano Italian Nederlands Dutch Polski Polish B f1' etJ3Z Portuguese Russian Swedish (~~)Traditional Chinese B*~g Japanese e1~ Korean Image Comment Add a comment to photographs as they are taken.
Folders Create, rename, or delete folders or choose the folder in which new photographs will be stored. • Select folder: Choose the folder in which subsequent photographs will be stored. Current folder NCD40 (default folder) Other folders (in alphabetical order) · New: Create a new folder and name it as described in "Naming Folders;' below. · Rename: Select a folder from a list and rename it as described in "Naming Folders;' below. · Delete: Delete all empty folders on the memory card.
File No. Sequence Choose how the camera names files. · Off (default): File numbering is reset to 0001 when a new folder is created, the memory card is formatted, or a new memory card is inserted. • On: File numbering continues from the last number used after a new folder is created, the memory card is formatted, or a new memory card is inserted. If a photograph is taken when the current folder contains a photograph numbered 9999, a new folder will be created and file numbering will begin again from 0001.
Dust Off Ref Photo Acquire reference data for the Image Dust Off option in Capture NX (available separately; for more information, see the Capture NX manual). 1 Highlight On and press OK. The message shown at right will be displayed. 2 With the lens ten centimeters (four inches) from a well-lit, featureless white object, frame the object so that it fills the viewfinder and then press the shutter-release button halfway.
Auto Image Rotation Photographs taken while On (the default option) is selected contain information on camera orientation, allowing them to be 50) or when viewed in rotated automatically during playback Capture NX (available separately; 103) or PictureProject.
Creating Retouched Copies: The Retouch Menu The options in the retouch menu are used to create trimmed, resized, or retouched copies of the photographs on the memory card. The following options are available (options displayed may differ if My menu is selected for the CSM/Setup menu option in the setup menu; 80). See "Using Camera Menus" ( 63) for more information on using the menus. Option Description ~ D-lighting* Brighten dark or back-lit subjects or produce effects similar to the flash.
To create retouched copies from the retouch men u: 1 ~ 2 Highlight menu item. 3 ~ Highlight photo. * ~ Display selection screen. 4 {!J Display retouch options. * Photos can also be highlighted using command dial. To view selected picture full frame, press and e hold button. tTo exit to playback mode without creating modified copy, press G button. D-Lighting D-lighting brightens shadows, making it ideal for dark or back-lit photographs.
Red-Eye Correction Selecting this option displays a preview image as shown below. Confirm the effects of redeye correction and create a corrected copy as described in the following table. Note that red-eye correction may not always produce the expected results and may in very rare circumstances be applied to portions of the image that are not affected by red eye; check the preview thoroughly before proceeding. Red-eye correction is available only with photographs taken using the flash.
Monochrome Choose from Black-and-white, Sepia, and Cyanotype (blue and white monochrome). Selecting Sepia or Cyanotype displays a preview of the selected image; press the multi selector up to increase color saturation, down to decrease. Press OK to create a monochrome copy and return to full-frame playback. Filter Effects Choose from the following options. After adjusting filter effects as described below, press OK to copy the photograph and return to full-frame playback.
Selecting Small picture from the retouch menu displays the menu shown in Step 1. Follow the steps below to create small copies of multiple pictures. 1 2 ~ Highlight Choose size. 3 Display options. 4 ~ Highlight desired picture size. S 6 ~ ~ Display selection screen. 8 ~ Select pictures (tyj 65). Selected pictures are marked with ~ icon. 9 ~ Make selection and return to previous menu. Highlight Select images. 7 ~ 10 ~ Highlight Yes. * ~ Confirmation dialog displayed.
Image Overlay Image overlay combines two existing RAW photographs to create a single picture that is saved separately from the originals. The new picture is saved at current image quality and size settings; before creating an overlay, set image quality and size 30; all options are available). To create a RAW image, choose an image quality of NEF (RAW). 1 Highlight Image overlay in the retouch menu and press the multi selector right.
7 Press the multi selector left or right to highlight the Preview column. Press the multi selector up or down to highlight one of the following options and press OK. • Overlay: Preview the overlay as shown at right. Press OK to save the new image. To return to Step 6 and select new photos or adjust gain, press G. • Save: Save the overlay without viewing a preview. After an overlay is created, the camera will enter full-frame playback ( 50) with the new picture displayed in the monitor.
Technical Notes Optional Accessories One advantage of digital SLR cameras is the wide variety of accessories they support. See our web sites or product catalogs for up-to-date information on accessories for the D40.
Lenses Autofocus is supported only with AF-S and AF-I CPU lenses, which are equipped with an autofocus motor. IX Nikkor CPU lenses can not be used; other CPU lenses (including AF lenses not equipped with an autofocus motor) can be used in manual focus mode. CPU lenses can be identified by the presence of CPU contacts ( 45),' AF-S and AF-I lenses by "AF-S" or "AF-I" at the beginning of the lens name. The following CPU lenses can be used with the D40.
Incompatible Non-CPU Lenses and Accessories The following non-CPU lenses and accessories can NOT be used: • TC-16A AF Teleconverter • Non-AI lenses • Lenses that require the AU-l focusing unit (400 mm fl4.5, 600 mm fl5.6, 800 mm fl8, 1200 mm fill) • Fisheye (6mm fl5.6, 8mm fl8, OP 10mm fl5.6) • Old-model 21 mm fl4 • K2 rings • ED 180-600 mm fl8 (serial numbers 174041-174180) • ED 360-1200mm fill (serial numbers 174031-174127) • 200-600 mm f/9.
Optional Flash Units (Speed lights) The accessory shoe allows S8-series Speedlights, including the S8400,800,600, 80DX, 28DX, 28, 27, 23, 22S, and 29S to be mounted directly on the camera without a sync cable. It is equipped with a safety lock for Speedlights with a locking pin, such as the 58-800 . and 58-600. Before attaching an optional flash unit, remove the accessory shoe cover. The built-in flash will not fire when an optional Speedlight is attached.
The following features are available with CLS-compatible flash units: 5peedlight Flash mode/feature i-TTL 2 Auto aperture 2 AA Non-TTL auto A Range-priority manual GN Manual M Repeating flash RPT Rear-curtain sync REAR Red-eye reduction @ Flash Color Information Communication AF-assist for multi-area AF 2 Auto loom Auto 150 Advanced Wireless Lighting Remote Commander 58-400 58-800 58-600 58-800 5U-800' 58-800 58-600 58-R200 - ,(3 ,(6 ,(6 ,(3,4 - ,(3 ,(:> - ,(7 ,(7 ,(:> ,(8 ,(:> - ,(:> ,(8 ,(7 ,
Notes on Optional Speedlights Refer to the Speedlight manual for detailed instructions. If the Speedlight supports the Creative Lighting System, refer to the section on CLS-compatible digital SLR cameras. The D40 is not included in the "digital SLR" category in the SB-80DX, SB-28DX, and SB-50DX manuals. If an optional Speedlight is attached with the camera in A~, 7,liiI, .~,~,~, or ~ mode, the built-in flash will turn off and the optional Speedlight will fire whenever a photograph is taken.
Other Accessories • Diopter adjustment viewfinder lenses: Lenses are available with diopters of -5, -4, -3, -2, 0, +0.5, + 1, +2, and +3 m- 1. Use diopter adjustment lenses only if the desired focus can not be achieved with the built-in diopter adjustment control (-1.7 to +0.5 m- 1). Test diopter adjustment lenses before purchase to ensure that the desired focus can be achieved.
Accessories for the D40 At the time of writing, the following accessories were available for the 040. Up to date information is available at Nikon websites or from our latest product catalogs. • EN-EL9 rechargeable Li-ion battery: Additional EN-EL9 batteries are available from local Power sources Body caps retailers and Nikon service representatives. • EH-S AC adapter: Use to power the camera for extended periods. EP-5 AC adapter connector required (available separately).
Caring for the Camera . Storage When the camera will not be used for an extended period, turn the camera off, remove the battery, and store the battery in a cool, dry area with the terminal cover in place. To prevent mold or mildew, store the camera in a dry, well-ventilated area.
The Low-Pass Filter The image sensor that acts as the camera's picture element is fitted with a low-pass filter to prevent moire. If you suspect that dirt or dust on the filter is appearing in photographs, you can clean the filter as described below. Note, however, that the filter is extremely delicate and easily damaged. Nikon recommends that the filter be cleaned only by Nikon-authorized service personnel.
Caring for the Camera and Battery: Cautions Do not drop: The product may malfunction if subjected to Cleaning: When cleaning the camera .body, use a ?Iower to strong shocks or vibration. gently remove dust and lint, then wipe gently with a s.oft, dry cloth. After using the camera at the beach or seaside, Keep dry: This prod~ct is not waterproof, and ~ay malfunc- wipe off any sand or salt using a cloth lightly dampened in tion if immersed In water. or exposed to .
On cold days, the capacity of batteries tends to decrease. Be sure the battery is fully charged before taking photographs outside in cold weather. Keep a spare battery in a warm place and exchange the two as necessary. Once warmed, a cold battery may recover some of its charge. Continuing to charge the battery after it is fully charged can impair battery performance. Batteries may leak or explode if improperly handled.
Troubleshooting If the camera fails to function as expected, check the list of common problems below before consulting your retailer or Nikon representative. Refer to the page numbers in the right-most column for more information. Problem ~ Solution 20,65 Camera takes time to turn on. Delete files or folders. Viewfinder is out of focus. Adjust viewfinder focus or use optional diopter adjust14,102 ment lenses. Displays turn off without warning. Choose a longer auto off delay.
Problem Solution tJj 28,97 Image in viewfinder is not in focus. • Manual focus selected: if AF-S or AF-Ilens is attached, choose autofocus mode. Otherwise focus manually. • Camera unable to focus using autofocus: use manual focus or focus lock. • Lens is not AF-S or AF-I: use manual focus. AF-assist illuminator does not light. • Mode dial rotated to ~ or~: select another mode. 4, 18-19 • AF-assist lamp does not light for manual focus or 23 continuous-servo autofocus. Choose AF-S.
Solution ~ Press multi selector up or down to choose photo information displayed. 51 Photo was taken at image quality of NEF+ JPEG. 30 Problem Flashing areas appear in images Shooting data appear on images A graph appears during playback RAW image is not played back. • Some photos are not displayed during playback Select All for Playback folder. Note that Current will • Message displayed stating that no automatically be selected when next photo is taken. images are available for playback.
Camera Error Messages and Displays This section lists common warning indicators and error messages that appear in the viewfinder and monitor. Message Lock lens aperture ring at minimum aperture (largest f/number). Lens not attached. Attach a lens. Initialization error. Turn camera off and then on again. This battery cannot be used. Choose battery designated for use in this camera. Battery level is low. Complete operation and turn camera off immediately. Shutter release disabled. Recharge battery.
Message - - Flash is in TIL mode. Choose another setting or use a CPU lens. Viewfinder ~ (blinks) ~/11l (blinks) ~ (blinks) Solution ~ Flash has fired at full power. View photo; if underex- 20,45, 48,50, posed, adjust settings and try again. 76, 78 34 99 • Built-in flash is lowered: raise built-in flash. • Flash head on optional SB-400 Speedlight is in bounce-flash position. • SB-400 is unable to fully illuminate subject at current lens focal length.
Appendix , The Appendix covers the following topics: • Available Settings and Defaults t'l11 3 · The Command Dial.........................................................................................................................................................
The following defaults are restored with Custom Setting R (Reset): A~ I @1:l1~1·~1 ~ I ~~ I ~ I I s I A p I M On AF-A 1: Beep 2: Focus mode 3: AF-area mode 4: Shooting mode 5: Metering 6: No memory card? n 7: Image review 8: Flash level 0 3 9: AF-assist V'l tD 10: ISO auto ::s ~ 11 : ~/Fn button 12: AE-UAF-L 13: AE lock 14: Built-in flash 15: Auto off timers 16: Self-timer 17: Remote on duration IDynamicl Single I Closest subject Closest subject Single frame Matrix Release locked On S a.
The Command Dial The command dial can be used in alone or in combination with other controls to adjust the following settings. Changes to the affected setting are visible in the viewfinder and shooting information display. Exposure Choose a combination of aperture and shutter speed (flexible program, mode P; 40). Choose a shutter speed (modes 5 and M; ~+g ~ Set aperture (mode A; 42). Set aperture (mode M; 43). I.Ep• • • • • • • 1 41,43). Set exposure compensation (modes P, S, and A 47).
Memory Card Capacity and Image Quality ISize The following table shows the approximate number of pictures that can be stored on a 512 MB Panasonic Pro HIGH SPEED memory card at different image quality and size settings. Buffer capacityl, 2 File size (MB) 1 Number of images 1 5.0MB 65 5 137 100 L 2.9MB 100 1.6MB 235 FINE M 100 0.8MB 503 S 1.5MB 260 100 L 444 100 M OBMB NORMAL 839 100 OAMB S 100 OBMB 503 L 100 OAMB 755 BASIC M l.2k 100 0.2MB S 5.8MB3 4 58 -/L RAW+BASIC 1.
Flash Control (~99-101) The following types of flash control are supported when a CPU lens is used in combination with the built-in flash or optional S8-400, S8-800, or S8-600 Speedlights. • i-TTL Balanced Fill-Flash for Digital SLR: Flash output is adjusted for a natural balance between the main subject and the background. • Standard i-TTL Fill-Flash for Digital SLR: Flash output is adjusted for the main subject; the brightness of the background is not taken into account.
White Balance and Color Temperature Approximate color temperatures for each white balance setting are given below (values may differ from color temperatures given by photo color meters): Fine tuning White balance AUTO Auto :;;~, Incandescent ~ Fluorescent* .;~~ Dir. sunlight ~ Flash & Cloudy -a~,.
Specifications • 1,S04x 1,000 (Small) Focus-area selection Lens servo • Auto ocus (AF): Instant single-servo AF (AF-S); continuous-servo AF (AF-C); auto AFSIAF-C selection (AF-A); predictive focus tracking activated automatically according to subject status • Manual focus (M) AF-assist ISO sensitivity (Recommended Exposure Index) 200-1600 in steps of 1EV with additional setting one step over 1600 Technical Notes/Specifications 1119
hree-mode through-the-Iens (TIL) exposure metering o color matrix metering II (type G and 0 lenses); color matrix metering II (other CPU nses); metering performed by 420-segment RGB sensor eight of 75% given to 8-mm circle in center of frame Meters 3.5-mm circle (about 2.5% of frame) centered on active focus area 0-20EV (3D color matrix or center-weighted metering) 2-20EV (spot metering) CPU coupling Digital Vari-Program (A~ auto, @ auto/no flash, :Z portrait, ~ landscape, .
Supported languages Power source Less than 85% (no condensation) Unless otherwise stated, all figures are for a camera with a fully-charged battery operating at an ambient temperature of 20°C (68°F). EN-EL9 Rechargeable Li-ion Battery fII!!I~e-c"'h-ar-g-ea"'bllll!llle~l~it~hi-u-m~-i-on""ba-t-te-ry---- ------------- 7.4V/1 OOOmAh ========:::::;:;=======::;:::;========== Approximately 36x56x 14mm (1.4x2.2xO.6in.) 51 g (1.8oz.
MH-23 Quick Charger AC 100-240V, SO/60Hz ;;:;:;:;:;:;:;:;:;::=============== OC 8.4V/0.9A ;;;;;:;:::::;::::::;:;::;;;:::;:=:;=========== EN-EL9 rechargeable Li-ion batteries Approximately 90 minutes ========================= ============================== 0-+40°C (+32-104 OF) Approximately 82.5x65x28mm (3.2x2.6x 1.1 in.) Approximately l.8m (Sf!. 11 in.) 80g (2.8 oz.), excluding power cable 78-55 mm f/3.5-5.
Symbols 3D color matrix metering II. See Metering 420-segment RGB sensor. See Metering; White balance @ (aperture) button, 2,43 @ (auto/flash off mode), 4, 18 .
Format memory card (setu p menu), 13,81 H Help, 3,112 Highlights, 52 Histogram, 52, 92 Hue, 69 I ~D~ (setting) button, 3, 22 Illuminator.
USB (setup menu), 55,84 V Video cable, 62, 103 Video device, 62 Video mode (setup menu), 62,83 VIDEO OUT, 2, 62 Viewfinder,S, 14, 16, 102, 111112 accessories, 102 focus, 14 indicators,S, 111-112 Viewing photographs. See Playback W ~ (white balance indicator), 6, 49,70-72 White balance, 49,70-72.
t
Nikon No reproduction in any form of this manual, in whole or in part (except for brief quotation in critical articles or reviews), may be made without written authorization from NIKON CORPORATION. NIKON CORPORATION Fuji Bldg.
Care should be taken to prevent dust from entering the camera when the lens or body cap is removed. Keeping the mounting index on the lens aligned with the mounting index on the camera body, position the lens in the camera's bayonet mount and rotate the lens in the direction shown until it clicks into place. Confirm that the package contains the items listed below. Purchasers ofthe lens kit option should confirm that the package also includes a lens.
CD Hold the hand-grip with your right hand Keepyour{ elbows in Before inserting or removing memory cards, turn the camera off and open the card slot cover. Slide the memory card in as shown above until it clicks into place. Support the lens with your left hand ® Stand with one foot half a pace in - - - - - . . ; front of the other Frame a photo in the viewfinder with the main subject positioned in any of the three focus areas. Memory cards must be formatted in the D40 before first use.
Click Yes. YouMveent",edthelolowi-lgfoldeJ~lCSm C:\P1ogAmFkIWll:cn\PichlePto;ect This section describes how to install PictureProject and copy photographs to a computer. PictureProject can also be used to view, edit, and organize photographs. See the PictureProject Reference Manual (on CD) for more information. Vie~ingthePicturePr~ectRe~rence~anual ~~~~~~~~~~~~~~~~~~ 1 Start the computer and insert the silver reference CD. 2 Double-click the CD icon.
Click Yes. JPEG photographs can be printed directly from a camera connected to a PictBridge printer (RAW /NEF photographs can not be printed by direct USB connection). See page 57 of Guide to Digital Photography for details. Click Quit. Set the USB option in the camera setup menu to PTP The PictureProject In Touch Updater installer will start. Follow the on-screen instructions to complete installation.
Nikon PictureProject 1.7 Reference Manual / Referenzhandbuch Manuel de reference / ~:i!;=.FOO / 'f7 ~r) I :Pl~ffl~ 586101(81) *** 6M552881 -Windows® is either a registered trademark or a trademark of Microsoft Corporation in the United States and I or other countries. Macintosh® is trademarks of Apple Computer, Inc. Copyright ©2004-2006 Nikon Corporation. All Rights Reserved.
1. 0 2. [l Mrs. Mr. TN001-01 4. U Miss Last Name Ms. Initial 3. First Name Apt. No. Street City ZIP Code State E-mail Address: Your date of birth: / Month Marital status: I. n Register ONLINE at www.prodregister.com/nikon Year 2. [J Single Married Date of purchase: / / Month Day Year Model purchased: (i.e. CoolScan IV) Serial number: Dealer name: Price paid: (exdudinl( tax) .00 $ From what type of store did you purchase this produc!'? 1. 2. 3. ~ 4.
Please send products and other correspondence to: First-Class Postage Required Nikon fne. f300 Walt Whitman Rd. Melville, NY 11747 Attn: Marketing Services Department Post Office will not deliver without proper postage.
01. 02. 03. 04. 05. n Shop hy Catalog/Mail 0 0 Shop via the Internet Member of Frequent Flyer Program [ I Donate to Charitable Causes 0 Own a Compact Disc Player ... Please fold here. Please check all that apply to your household. 06. [ J 07. 0 08. Ll 09 IJ 10. n Have a Dog Have a Cat Own a Wireless/Cellular Phone Subscribe to an Online/Internet Service 11. 0 Own an Apple/Macintosh Computer 12. [ I Own a CD-ROM Drive 13.
AF-S OX 18-55/3.5-5.6G ED n IMPORTANT NOTICE: YOU MUST PRESENT THE ATTACHED WARRANTY FORM (PART 1) TOGETHER WITH PROOF·OF·PURCHASE AND PROOF·OF· PURCHASE DATE TO OBTAIN WARRANTY SERVICE.
Retain thisWorldwide Warranty with proof of purchase for your records AF-SOX 18-5513.5-5.6G ED I[ Nikon ONE YEAR WORLDWIDE LIMITED WARRANTY (Excluding the Continental United States, Alaska, Hawaii, Puerto Rico, U.S. and U.S. Virgin Islands) Welcome to the worldwide family of Nikon owners. Your Nikon equipment has been manufactured to the highest quality standards by NIKON CORPORATION, Tokyo, Japan.
Nikon AUTHORIZED SERVICE STATIONS ARIZONA Phoenix Camera Repair inc. 3232 North 16th Street Phoenix, AZ85016 Principal-Ernest H. Weegan (602) 277-1811 COLORADO Metro Camera Service Inc. 425 N. Federal Blvd. Denver, CO 80204 Principal-James Todd Amos (303) 934-2471 Tucson Camera Repair 742 West Limber Lost Tucson, AZ85705 Principal-Betty Cookson (520) 887-1841 Rocky Mountain Camera Repair 240 Broadway Denver, CO 80203 Principal-Richard E. Carson (303) 744-3459 CALIFORNIA Nikon Inc.
AF-S OX 18-55/3.5-5.6G ED II This is your Nikon Inc.tOne Year Limited Warranty (valid in the Continental United" States, Alaska, Hawaii, Puerto Rico, U.S. and u.s. Virgin Islands). YOU MUST PRESENT THIS FORM (PART l)TOGETHERWITH PROOF-OF-PURCHASE AND PROOF-OF-PURCHASE DATETO OBTAIN WARRANTY SERVICt:. . This Nlkon product is warranted by Nilcon Inc.: to be free from defects in materials and workmanship for a period of one (1) year from the date of purchase.
Nikon SERVICE FACILITIES Argentina: Eduardo Udenio y Cia. S.A.C.I.F.1. Australia: Maxwell Optical IndustriesPtyLtd. (As of April 2006) Ayacucho1235,BuenosAires(1111) Phone: +54·11-48111864 Unit 4 Northbank Industrial Park 20·36 Nancarrow Avenue, Meadowbank, NSW 2114 Phone: +61-2·93.90-0200 Austria: Krca Kamera Service Praterstr. 6012117, A·1020Wien Phone: +43·1-2180910 Belgium: H. De Beukelaer & Co. N.V.lS.A. Boomsesteenweg 77, B·2630 Aartselaar Phone: +32-3-870-5900 Brazil: T.
Please send products and other correspondence to: PLACE STAMP HERE Nikon Inc. 19601 Hamilton Avenue Torrance, CA 90502 NIKKOR LENS ESC REGISTRATION P. O. BOX 173031 DENVER, CO 80217-3031 H9Y01-01 II •• 1.11 .....1.1.11 111 ...1•• 11.11 ... 111111 •• II. I. 1.
YOU MUST MAIL THE POSTCARD COpy OF THIS FORM WITHIN 10 DAYS OF YOUR PURCHASE TO OBTAIN EXTENDED SERVICE COVERAGE!!! Name 1 ---1.1 ---1.----1.----L----L----L----I----I----L----L----L----L---L.---L.----L----L----L---L.---L.---L.----L1 ---11 -.1-. 1 _ ..L..!-.1-.---11 ---11 ---I--.l-.-.I-.-.I-.-.I-.---J 1-. Address City I 1 I Dealer Name 1 ---1.----1.----L----L----L----I----I----L----L----L---L---L.---L.---L.---L.---L.---L.---L.---L.---L-1-.1-. 1 -.I-.!-.1-. 1 -.L.. 1 -.L.. 1 -.L..!-.L..-.L..-.L..-.L..-.L.
THIS IS YOUR NIKON INC. ONE YEAR LIMITED WARRANTY (VALID IN THE CONTINENTAL UNITED STATES, ALASKA, HAWAII, CENTRAL AND SOUTH AMERICA, AND THE CARRIBEAN). YOU MUST PRESENT THIS FORM TOGETHER WITH PROOF OF PURCHASE AND PROOF OF PURCHASE DATE (BILL OF SALE) TO OBTAIN WARRANTY SERVICE. This Nikon Digital Imaging Product is warranted by Nikon Inc. to be free from defects in material and workmanship for one (1) year from the date of purchase.