
Owner's Manual
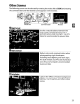


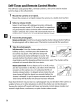
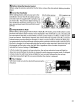

Table Of Contents
- Quick Start Guide
- Users Manual
- Reference Manual (Supplied on CD-ROM)
- Using This Manual
- Table of Contents
- Parts & Controls
- Getting Started
- Basic Photography
- Creative Photography (Scene Modes)
- More on Photography
- Shooting in P, S, A, & M Modes
- Live View - Framing Photographs in the Monitor
- Recording and Viewing Movies
- Shooting with Special Effects
- More on Playback
- Setup / Menus
- Connection to a Computer
- Printing Photographs
- Playback on a TV
- Compatible Lenses
- Optional Accessories
- Memory Card Compatibility
- Care / Maintenance
- List of Available Settings
- Troubleshooting
- Error Messages
- Specs
- Index
- Scans of CD-ROMs
- Warranty

Self-Timer and Remote Control Modes
The self-timer and optional ML-L3 remote control
(CD
67)
can
be used
to
reduce
camera shake or for self-portraits.
1
Mount
the camera on a tripod.
Mount
the camera on a
tripod
or place the camera on a stable, level surface.
2 Select a release mode.
Select
~
(self-timer), g
25
(delayed remote), or g(quick-
response remote) mode
(CD
28;
note
that
if
no operations
are performed for
about
a minute after a remote control
mode
is
selected,
the
camera will automatically return
to
single frame, continuous, or
quiet
shutter-release mode).
6---------------
3 Frame
the
photograph.
Remote
control
mode:
Check focus by pressing the shutter-release
button
halfway.
No photograph will be taken even
if
the
button
is
pressed all
the
way down.
4 Take
the
photograph.
Self-timer
mode:
Press
the shutter-release
button
halfway
to
focus, and then press the
button
the
lE
rest
of
the way down. The self-timer lamp will
start
to
blinkand a beep will begin
to
sound. Two
'--------'-..L-L-----'--''--..LL-~~
seconds before
the
photo
is
taken, the lamp will
stop blinking and the beeping will become more rapid. The shutter will be
released ten seconds after the
timer
starts.
Remote
control
mode:
From a distance
of
5 m (16ft.) or
less,
aim
the
transmitter on
the
ML-L3 at either
of
the infrared
receivers on the camera
(CD
2,
3)
and
press
the ML-L3
shutter-release button.
In delayed remote mode, the self-
timer
lamp will
light
for
about
two
seconds before the
shutter
is
released. In quick-response remote mode, the self-
timer
lamp will flash after the shutter
has
been released.
Note
that
the
timer
may
not
start or a photograph may
not
be taken
if
the camera
is
unable
to
focus or in
other
situations in which the shutter
can
not
be released.
Turning
the
camera
off
cancels self-timer and remote control release modes and
restores single frame, continuous, or
quiet
shutter-release mode.
30