
Owner's Manual
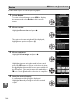
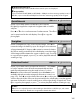

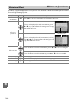


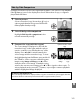

Table Of Contents
- Quick Start Guide
- Users Manual
- Reference Manual (Supplied on CD-ROM)
- Using This Manual
- Table of Contents
- Parts & Controls
- Getting Started
- Basic Photography
- Creative Photography (Scene Modes)
- More on Photography
- Shooting in P, S, A, & M Modes
- Live View - Framing Photographs in the Monitor
- Recording and Viewing Movies
- Shooting with Special Effects
- More on Playback
- Setup / Menus
- Connection to a Computer
- Printing Photographs
- Playback on a TV
- Compatible Lenses
- Optional Accessories
- Memory Card Compatibility
- Care / Maintenance
- List of Available Settings
- Troubleshooting
- Error Messages
- Specs
- Index
- Scans of CD-ROMs
- Warranty

187
u
Create copies that reduce the effects of perspective taken from
the base of a tall object.
Use the multi selector to adjust
perspective (note that greater amounts of perspective control
result in more of the edges being cropped out).
The results can
be previewed in the edit display.
Press J to copy the
photograph, or press K to exit to playback without creating a
copy.
Perspective Control
G button ➜ N retouch menu
Before After