
Owner's Manual
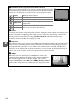


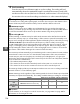

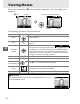

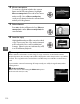

Table Of Contents
- Quick Start Guide
- Users Manual
- Reference Manual (Supplied on CD-ROM)
- Using This Manual
- Table of Contents
- Parts & Controls
- Getting Started
- Basic Photography
- Creative Photography (Scene Modes)
- More on Photography
- Shooting in P, S, A, & M Modes
- Live View - Framing Photographs in the Monitor
- Recording and Viewing Movies
- Shooting with Special Effects
- More on Playback
- Setup / Menus
- Connection to a Computer
- Printing Photographs
- Playback on a TV
- Compatible Lenses
- Optional Accessories
- Memory Card Compatibility
- Care / Maintenance
- List of Available Settings
- Troubleshooting
- Error Messages
- Specs
- Index
- Scans of CD-ROMs
- Warranty

y
112
4 Choose an option.
To create a copy that includes the current
frame and all following frames, highlight
Choose start point in the edit movie menu
and press J.
Select Choose end point
create a copy that includes the current frame
and all preceding frames.
5 Delete frames.
Press 1 to delete all frames before (Choose
start point) or after (Choose end point) the
current frame.
6 Save the copy.
Highlight Ye s and press J to save the edited
copy.
If necessary, the copy can be trimmed
as described above to remove additional
footage.
Edited copies are indicated by a f
icon in full-frame playback.
D Trimming Movies
Movies must be at least two seconds long. If a copy can not be created at the current
playback position, the current position will be displayed in red in Step 5 and no copy will be
created.
The copy will not be saved if there is insufficient space available on the memory
card.
To prevent the camera from turning off unexpectedly, use a fully-charged battery when
editing movies.
A The Retouch Menu
Movies can also be edited using the Edit movie option
in the retouch menu (0 176).