
Owner's Manual

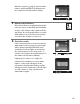
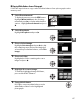

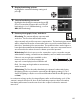

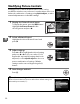
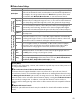
Table Of Contents
- Quick Start Guide
- Users Manual
- Reference Manual (Supplied on CD-ROM)
- Using This Manual
- Table of Contents
- Parts & Controls
- Getting Started
- Basic Photography
- Creative Photography (Scene Modes)
- More on Photography
- Shooting in P, S, A, & M Modes
- Live View - Framing Photographs in the Monitor
- Recording and Viewing Movies
- Shooting with Special Effects
- More on Playback
- Setup / Menus
- Connection to a Computer
- Printing Photographs
- Playback on a TV
- Compatible Lenses
- Optional Accessories
- Memory Card Compatibility
- Care / Maintenance
- List of Available Settings
- Troubleshooting
- Error Messages
- Specs
- Index
- Scans of CD-ROMs
- Warranty

85
t
When the camera is ready to measure white
balance, a flashing L (D) will appear in
the viewfinder and information display.
5 Measure white balance.
Before the indicators stop flashing, frame the
reference object so that it fills the viewfinder
and press the shutter-release button all the
way down.
No photograph will be recorded;
white balance can be measured accurately
even when the camera is not in focus.
6 Check the results.
If the camera was able to measure a value for
white balance, the message shown at right
will be displayed and a will flash in the
viewfinder for about eight seconds before
the camera returns to shooting mode.
To
return to shooting mode immediately, press
the shutter-release button halfway.
If lighting is too dark or too bright, the
camera may be unable to measure white
balance.
A message will appear in the
information display and a flashing ba
will appear in the viewfinder for about eight
seconds.
Return to Step 4 and measure
white balance again.