
Owner's Manual


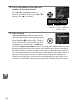


Table Of Contents
- Quick Start Guide
- Users Manual
- Q&A Index
- Table of Contents
- For Your Safety
- Notices
- Introduction
- Basic Photography and Playback
- Live View
- Recording and Viewing Movies
- P, S, A, and M Modes
- User Settings: U1 and U2 Modes
- Release Mode
- Image Recording Options
- Focus
- ISO Sensitivity
- Exposure/Bracketing
- White Balance
- Image Enhancement
- Flash Photography
- Other Shooting Options
- More on Playback
- Connections
- Menu Guide
- The Playback Menu: Managing Images
- The Shooting Menu: Shooting Options
- Custom Settings:Fine-Tuning Camera Settings
- Reset Custom Settings
- a: Autofocus
- b: Metering/Exposure
- c: Timers/AE Lock
- d: Shooting/Display
- d1: Beep
- d2: Viewfinder Grid Display
- d3: ISO Display and Adjustment
- d4: Viewfinder Warning Display
- d5: Screen Tips
- d6: CL Mode Shooting Speed
- d7: Max. Continuous Release
- d8: File Number Sequence
- d9: Information Display
- d10: LCD Illumination
- d11: Exposure Delay Mode
- d12: Flash Warning
- d13: MB-D11 Battery Type
- d14: Battery Order
- e: Bracketing/Flash
- f: Controls
- The Setup Menu: Camera Setup
- The Retouch Menu:Creating Retouched Copies
- My Menu/Recent Settings
- Technical Notes
- Scan of CD-ROM
- Lens Warranty
- Camera Warranty

152
t
Multiple Exposure
Follow the steps below to record a series of two or three exposures in a single
photograph.
Multiple exposures can be recorded at any image quality setting, and
make use of RAW data from the camera image sensor to produce colors noticeably
superior to those in software-generated photographic overlays.
❚❚ Creating a Multiple Exposure
Multiple exposures can not be recorded in live view.
Exit live view before proceeding.
Note that at default settings, shooting will end and a multiple exposure will be
recorded automatically if no operations are performed for 30 s.
1 Select Multiple exposure.
Press the G button to display the menus.
Highlight Multiple exposure in the
shooting menu and press 2.
2 Choose the number of shots.
Highlight Number of shots and press 2.
The dialog shown at right will be displayed.
Press 1 or 3 to choose the number of
exposures that will be combined to form a
single photograph and press J.
A Extended Recording Times
For an interval between exposures of more than 30 s, select On for the Image review
(0 200) option in the playback menu and extend the monitor-off delay for image review
using Custom Setting c4 (Monitor off delay, 0 215). The maximum interval between
exposures is 30 s longer than the option selected for Custom Setting c4.
If no operations are
performed for 30 s after the monitor has turned off during playback or menu operations,
shooting will end and a multiple exposure will be created from the exposures that have been
recorded to that point.
(P, S, A, and M Modes Only)
G button