
Owner's Manual
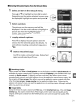
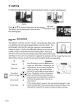
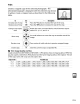
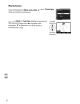
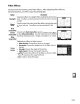
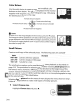
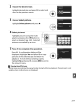
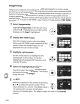
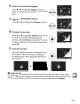

Table Of Contents
- Using the Supplied Manuals
- Quick Start Guide
- Owners Manual
- Two-Button Reset
- Set Language / Time
- Table of Contents
- Q & A Index
- Supplied Accessories
- Parts & Controls
- Getting Started
- Basic Photography & Playback
- Focus
- Image Size & Quality
- Release Mode
- Using the Built-In Flash
- ISO Sensitivity
- P, S, A, and M Modes
- Exposure
- White Balance
- Picture Controls
- Active D-Lighting
- Multiple Exposure
- Using an Optional GPS Unit
- More Playback Options
- Connecting to Other Devices
- Menu Guide
- Compatible Lenses
- Optional Flash Units
- Other Accessories
- Care / Maintenance
- Troubleshooting
- Error Messages
- Defaults
- Memory Card Capacity
- Specs
- Index
- Corrections to Manual
- Software Installation Instructions
- Scan of Software CD-ROM
- AC Power Cord Specs
- Warranty

2 Choose the desired size.
Highlight
desired size and press @
to
select and
return
to
the
previous menu.
II
"
SmJII
Picture
(hoole
Ilze
[jjj
640~480
l".A~
~
l6Ox120
3 Choose Select picture.
Highlight
Select picture and press
~.
4 Select pictures.
Highlight
pictures using
the
multi
selector and press
the
~1Sl
button
to
select
or
deselect (pg. 160). Selected
pictures are marked by
an
icon.
@ ."
E{18l
button
S
Press
®
to
complete
the
operation.
Press
@.
A confirmation dialog will be
displayed;
highlight
Yes
and press @
to
copy
pictures at
the
selected
size
and return
to
playback.
To
exit
without
creating copies,
highlight
No and press
@,
or
press
MENU
to
exit
to
the
retouch menu.
B Viewing Small Pictures
Small pictures are indicated by a gray border
during
full-frame playback. Playback zoom
is
not
available when small pictures are displayed.
217