[ra.
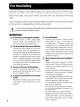
For Your Safety To prevent damage to your Nikon product or injury to yourself or to others, read the following safety precautions in their entirety before using this equipment. Keep these safety instructions where all those who use the product will read them.
A Batteries are prone to muskeg when fully discharged, To avoid damage 1 the misconduct, be sure to temerity the battery when no charge remains When tha satiety is not in use, attach the terminal cover and store ia cao pace immediately after use, of when the prod wt is used on battery power for an ox tended prior, the battery may become hot.
No par: of the manuals! included with this duct may be reproduced, transitioned, taf scribes. stored in retrieval system, or barista into any language in any dons, by any means, without Nikon's prior written permission. Nikon reserves the right to change the specifications of the hardware and software described in these manuals at eny time and without prior foe, Notices for Customer sin the USA.
Symbol dor Separate Collection in European Countries This symbol indicates that this prods The following apply only 10 Users in + THs Drogue [20 nor dispose of as household + For more informatics, contact the series or the local authorities in charge of waste management, is 10 be collided separately.
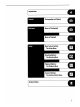
vi EEE et For Your Safety Notices. TABOO Lil na enchilada i Getting to Know the Camera, First Steps Attaching 2 Len: 8 Inserting Memory Cards 10 Adjusting Viewfinder Focus 2 Photographically and Playback rides Basic Photography Basic Playback. Reference Using Camera Menus Nefertiti Mote on Photography ini dus Choosing a Shooting Mode.. image Quality and Size. image Quality . 28 Image Siz 150 Sensitivity White Balance. Optimizing Images. Color Space. Focus Focus Mod 51 Focus Lock.
Taking a Closer Look: Playback Zoom. 103 9% | Protecting Photographs Lethargic; More on Piaster iris Viewing Photographs. Single-image Playback Photo informational. Viewing Multiple Images. from Deletion. , 104 Thumbnail Playback... 102 | Mendeleev Individual Photographs...e. 105 Viewing Photographs on TV.. . 106 Connecting to a Computer . 167 Printing Photographs. . 110 Setup 115 Basic Camera Settings: L115 Format Auto Image Rotation. 119 LCT Brightness. Recent Setting: 119 Morin Lack-LP USB Sw Video Mode.
viii Take Test Shots Before taking pictures on important occasions for example, at weddings or before taking 6 caner with you 07 AI, tke 3 test Shot to ensure that the camera 1s functioning really.
Thank you for your purchase of a Nikon [3200 single-lens reflex (SLR) digital camera with interchangeable fe This martial has been written to help you enjoy taking pictures with your Nikon digital camera. Read this manual thoroughly before use, and keep it handy when using the product. The documentation for this product also includes: the manuals listed below.
Getting to Know the Came Take a few moments to familiarize yourself with camera controls and displays. You may find it helpful to bookmark this section and refer to it as you read through the rest of the manual, Camera Body Accessory shoe: Built-in flash: Wi 76 Flash pop-up button: 78.
AF-assist Nominator: [58 {Self-timer lamp: Bf 831 [Red-eye reduction lamp; BE 771 Sub-command dial Eyelet for camera strap: JB ¢ Depth-of-field preview button: 62 FUN button: 3} 170 Battery-chamber cover: Battery-chamber cover latch: 211 + “Tripod socket Destiny aq) Moist 0 BUSH WoR PORE a Shutter-release button: Jl 20 2h {exposure mode) button: Mi 62 [rag (format) button: 14] EP (exposure 5 compensation) button 872 (reset) button: #97} WL (mage quality/size} button: (reset) button: Bi 97} Mode dial lock re
Camera Body (continued) Viewfinder eyepiece: Bis3,00, 181 © (delete) button: [22,105 [3 (format) button: B14] @ (bracketing), button: #43, 73° @ (playback) button: {many} button: [24 € thumbnail} button [F102 © {protect} button 104 12 help) button: 2a @ (enter) button: 8 24 [ {payback zoom} button: F103] URDU DL MOM 0) Bugging pinpoint © Ult selector « Viewfinder eyepiece cup Dipterous adjustment control: ie, 181 Metering selector S61 @ (AELFRIC lock) button: 56,70 Main command disk 1 170 HE-ON) Button: B12
Control Panel Ei} Color temperature indicator... gs Shutter sped Exposure compensation value Flash compensation value. 150 sensitivity White balance fine-tuning oor temperature, of preset nurturer Bernard of shots in bracket sequence. 7 Nuremberg of intervals xy Focal length (nor-CAU 94 E Flash sync indicator.
Eid Advanced Focusing Screen Display han the background is bright, the native orris area J 531 is highlighted in black, When whe background is dark tve fours ares is Highlighted briefly in red as needed [o stasis contrast with the background (Sari-Brite” focus areas), making it easier 10 identify whe selected fours area. The viewfinder is also equipped with on-demand gid lines.
Db Attaching.a Lens Care should be taken to prevent dust from entering the camera when the lens 5 is removed. 8 After confirming that the camera is off, remove £ the rear lens cap and camera body cap. keeping the mounting index ion the lens aligned with the mounting index on the camera body, position the lens in the cameras bayonet mount. Being careful not to press the lens-release button, rotate the lens counterclockwise until it clicks into place.
f 1 | bottom of the cover | Attach Attaching the Camera Strap Tor remove the <0 the strap as shown below.
sdmsisiiuoppnponi EOF 0 Nike-authorized 1 Charging and Inserting the Battery The supplied EN-Else battery is not charged at shipment, ing the supplied MG-184 quick charger as described below. 1 Charge the battery. 1.1 Connect the power cons to the charger and plug tin. “hare the battery us 1.2 Place the battery in the charger. The CHARGE lamp will blink is the battery charges. About two and a quarter hours are required for an exhausted battery to fully charge. 1.
2 Insert the battery 21 After confirming that the cameras off, open the battery chamber cover, 1.2 insert a fully charged battery a$ shown at right. Close the battery chamber cover. misdo send-Suondhpoaul 0s 1 E-ELe Rechargeable Li-ion Batteries.
Basic Setup The language option: in the setup menu is automatically highlighted the first time menus are displayed. Choose a language and set the time and date.
Display DATE menu. ine zero, highlight Daylight Saving Time and press mulls 35 mui] selector dime Lo highlight On and press mui selector right, 7 13 Press multi Selector left of right to select item, up or down to change. SEWS Isaac np £2 Re tum to WORLD TIME menu. fot to setup menu. EB using Camera Menus gauge option is only Highlighted automatically ihe first me menus are dismayed. Camera Menus” 8 24-25) for information on orm patine.
Sam sid populations 14 Inserting Memory Cards Photographs are stored on Compact Flash emery cards (available separately) 1 Insert a memory card 1.1 Turn the camera off before inserting or re moving memory cards, Unlatch (0) and open {D) the memory card cover. 1.2 Insert the card as shown at right. The eject button will pop up and the! memory card access lamp will light for about a second, Close the ornery card sot cover, ("inserting Memory Cards Confirm that the memory card 1 in the orients son shown.
Removing Memory. Cards T Confirm that the access lamp is off 2 fiat the camera off ard pes ise memory card slot cover 3 Press the eject button to partially erect the card (T8, The card can then be removed by hand @n Doting push on the memory card while pressing the eject intro.
Adjusting Viewfinder Focus Photographs are framed in the viewfinder. Before shooting, make sure that the display In the viewfinder is in clear focus. 1 Re rove the lens cap and tat the camera on. 2 Rotate the dipterous; adjustment control unt! the focus brackets are displayed in sharp focus when the shutterbug button is pressed halfway.
Tutorial: Photography and Playback rer Photography This section describes how! to take pictures at default sexting. 1 Turn the camera on Tt Remove the lens cap and ten the camera on. The control panel will wm on and the display in the viewfinder wif light. The ammonia remains off during shooting 12 Check the battery: level in the viewfinder or control parcel. Bm, — Battery fully charged Tall} — battery partially discharged. Tenn sectary. Ready Lily char «3 sear bat C5 Cm Shatter lease disabled.
Aydeibireqy seg —jemmy © Adjust camera settings This tutorial describes how to take photographs at the default settings listed in the table below, using a type G or D lens.
23 Rotate the focus-mode selector unlit clicks § inch place pointing to $ {single-servo auto focus). At this setting, the camera will focus automatically when the shutter-release button is pressed halfway, Pictures dan only be taken when the camera is in focus 24 FY Rotate the metering selector to {83 {matrix metering). Matrix metering uses informs son from all refashion the frame to:determine exposure, producing optimal results for the entire frame. AZ icon appears in the viewfinder. 3 Frame a photograph .
Gainsborough Chatelaine; © Focus Press the shutter release button halfway to focus, [the camera is able 10 focus on the subject in the tier focus area, 4 beep will sound and the in focus indicator (9 will appear in the viewfinder §f The focus indicator blinks, the camera was unable to focus using autocratic. Focus will lock while the shutter-release button is pressed halfway.
Take the photograph Smoothly press the shutterbug button the || 3 test of the way down to release the shutter and | record the photograph. The access lamp next | to the card slot cover will light. Dio not eject the memory card of remove or disconnect the power source until the lamp has gone out and recording is complete.
singers CY Lp Basic Playback Press the @ button © view photographs. The mast 03 recent photo will be displayed in the monitor; adj oral pictures can te displayed by passing the milt selector left or right. To end playback and rectum to shooting mode, press the shutter-relapse button half Deleting Unwanted Photographs To delete the photograph currently displayed in the monitor, press the @ button. & confirmation dialog will be displayed. Press the @ button again ww delete the image and return to playback.
Reference SR Iris section builds on the Tutorial to cover more advanced shorting and playback options.
Using Camera Menus Most shooting, playback, and setup options can a] be accessed farm the carers menus. To view the © rems, press the @ button.
To modify menu settings: od Tie Highlight option + Menu items that are displayed in gray are resignedly availability « Wren formatting emery cards and in thee cases in which user confirmation is required, a selection can only be mads with the center of the uit seignior of by Make selection pressing the @ bunion. A message to this effect will appear in the display. Exiting the Menus.
Reference: More on Photography fo C} 2 Shooting Fr Shooting mode determines how the camera takes photographs: one at a time, in a continuous sequence, with a timed shutter-release delay, or with the minor raised to enhance shutter response and minimize vibration Lod s Single frame @ Continuous low speed Camera takes one photograph each time shutter-release BUTTON (§ pressed; Access lamp will light while photo Is recorded: next shot can be taker in immediately if enough space remains in memory buffer While s
splays in the view shutter-relese bunion 1s pressed, This boomer s updated | as photographs are transferred to the memory card and | rote meaty becomes available in the buffer. 101st dis. played, the ornery buffer is full and shooting will slow.
32 Pu SEND afelii—eiusisiey 9 Image Quality and Size Together, image quality and size determine how much space each photograph occupies on the memory card. Image Quality The camera supports the following beige quality options {sifted in descending larder by image quality.and file size): DIL S403 10MM TE (TAS S610 312 saved: Res (0 The Lemon NEF Nikon Electronic Port QUES), PEG [Record EG ranges 514 Commission alo of roughly 1A PEG Normal [Record F700 mages a A Compression Ta 0 roughly 116.
The Image Quality Menu Highlight mage Quality in the ghosting menu and press the multi selector to the right. Highlight the desired option and press the multi defector to the right. The shooting menu will be displayed. The QUA Button Press the QUA button and rotate the main command [§ dial unit the desired setting is displayed in the con troll panel (note that Raw Compression and JPEG Compression can only be adjusted from the shooting menu).
The JPEG Compression Menu The JPEG compression menu offers the following options for JPEG images: [= Size Priority {images are compressed 10 produce relatively uniform le (default) varies with scene recorded, Optimal Quality Optimal mao quality. File size varies with scene recorded. The effects of these options are most pronounced with high (50 sensitivity (833), Highlight JPEG Compression in the shooting bent and press the milt selector to the right.
The RAW Compression Menu The following options are available for NEF (RAW) images: NEF {Raw) (defaulter) Comp. NEF {NEF images are compressed by about 40-500 swath THe drop i war (Raw) lit. Recording rime i reduced. NEF images are not comprised. 1 Highlight Raw Compression in the shooting menu and press the milt selector tithe right. 2 Highlight the desired option and press the multi selector to the right. The shooting: menu will be displayed. The selected option applies to all subsequent NEF {RAW) images.
AZ pu Kjjenh bewitch— BRONCHUS ©’ 32 Image Size Image size is mastered in pixels. Smaller sizes produce smaller files, making them suited to distribution via e-mail or inclusion in web pages. Conversely, the larger the image, the larger the size at which it can bie printed without becoming noticeably “grainy” Chase image size according 10 the space available on the remarry card and the task at hand. Large Gem (19.36% 17.
M50 sensitivity "is the digital equivalent of film speed. The higher the 50 sensitive ity. the fess light needed to make an exposure, allowing higher shutter speeds or snarlier apertures. 150 sensitivity can be set between valuesiroughly equivalent to 150 100 and 150 1600 In steps equivalent w HEY. Where ti sensitivity is a priority, 180 sensitivity can be further Increased over $0 1600.
High trons E139) This: ap jon can be used to red memory buffer. cal 0 sensitivities over (501 20, noise reduction performed. of 400 ar more (this reduces the 2 noise reduction 4 scarify High ISO NR on wont of ted for Custard Setting bi (150 Auto), the camera will dty from the value selected by the user t help ensure SLURP EXPOSURE rust cart be selected firm 150 200, 400, 806, and 1600).
White Balance The color of light reflected from an object varies with the color of the light source. The human brain is able to adapt 10 changes in the carol of the light source. with the result that white objects appear white whether seen in the shade, direct sunlight, or under incandescent lighting. Unlike the fim used in film cameras, digital cameras can mimic this adjustment by processing images according to the color of the light source.
White balance can be set using the White Balance option In the shooting menu or by pressing the WB button and rotating the main command dial. The White Balance Menu 1 Highlight White Balance in the shooting menu and press the multi selector to the right. Highlight the desired option and press the milt selector to the ght. Selecting Choose Color Temp, displays 2 menu of colon temperatures 8 38), Preset a preset white balance menu GF 39), other options a fine-tuning dialog B37).
Sine-Tuning White Balance At settings other than E¥ (Choose Color Temp.) and PRE (Preset), white balance can be ‘fine tuned" to compensate for variations in the color of the light sauce or to Introduce a deliberate “war” or “cold” cast into an image.
Paused oa causeless © 28 Choosing a-Color Temperature Chase a setting of [8 (Choose Color Temp.) to select the color temperature from thirty-one predetermined undervaluing from 2500K ta 10,000K in increments of roughly 10 mired {rote that the desired results will not be obtained with flash or fluorescent fighting). Color temperature can be selected in the white-balance menu or with the WB button and sub-command dial. The White Balance Menu Selecting Choose Color Temp.
Preset White Balance Preset white balance is used to record and recall custom white balance settings for shooting under mixed lighting of to; compensate for light sources with a strong color cast, Two methods are available for nesting preset white balance: Ld Direct neutral gray or white ob measurement final photograph and white balance is measured by camera (40). Copy from [White balance is copied frm fate on memory card Bg 42) br whit bar existing (acne value is copied from Nikon Capture 4 version 4.
Busied BIA Ones \ CJ Measuring a Value for White Balance white balance can be measured with reference tm a neutral gray object. The new value for white balance is automatically stored in preset d-0 1 Place a neutral gray or white object under the lighting that wilt be used in 2 we the final photograph. A standard gray card can be used as a reference in studio settings. Press the WB button and rotate the main come rand dial until PRE is displayed in the control panel.
5 if the camera was able to measure @ value for white balance, Leda wil flash in the control panel and the viewfinder will show a flashing Gad for about three seconds before the camera returns to shooting made, i lighting is too dark or too bright, the camera may be unable to measure white balance. A flashing mad will appear in the control panel and viewfinder for about thee seconds. Return to Step 4 snd measure white balance again.
Preset White Balance Options Selecting Preset in the White Balance menu (FF 35) displays the menu of white-balance presets shown in Step 1; To display options for a selected preset Y i} Silicate Highlight desired preset.
White Balance Bracketing White balance bracketing creates multiple images each time the shutter is released, “bracketing” the current white balance setting J 35). Only one shot is required to complete the bracketing sequence. White balance bracketing is recommended when shooting under mixed lighting ar experimenting with different white balance settings. White balance bracketing is not available at white balance settings of [8 (Choose Color Temp.
4 Compose a photograph, focus, and shoot. Each shot will be processed 10! create the number of copies specified in the bracketing program, and each copy will have a different white balance. Modifications to white balance are added to the white balance adjustment made with white balance fine wining.
‘sebum Buizivndo—musisgo J To select an image optimization option: 1 Highlight Optimize Image in the shooting menu $f 124) and press the multi selector to the right. wo displayed. Highlight the desired option and press the multi selector to the right. If Custom is selected, a menu of custom options will be displayed 88 49).
Adjusting Contrast: Taine Compensation As photographs ate saved to the memorialized, they are processed 10 adjust the distribution of teens in the image, enhancing contrast.
Controlling Vividness: Saturation Saturation controls the vividness of colors. ante [ROOTER BGS CHURLISH SLOG 6 ble Fx be results, use type G or [len —_ Normal (default) Normal vividness. Misapprehended for most situations.
Choosing Customer linage Optimization Options Choosing Custom in the Optimize Image menu J 45) displays the menu shown in Step 1. Make selection. Repeat steps 1-410 adjust other options. z i Highlight Dane. Return to shooting men, Saber BURIIRU0O3uBIIH = 49.
Color Space The options in the Color Space menu determine the gamut of colors available for color reproduction. Choose a colon space according to how photographs w be processed on leaving the camera, Jo 3 pe Choose for photographs that wil be printed of used ‘as 15, with no pl further modification.
“This section describes the options that control how your camera focuses: focus mode, focus-area selection, and AF-area mode. Focus Mode Focus mode is contradicted by the focus mode selector on the front of the camera.
52 A The AF-ON Button For th purpose of fot, ON button his the sear halfway. Appreciative Focus Tracking lease bu Fl a1—AF-€ Mode Priority. (§1 148) if Focus is or Custom Meting a1 (AF-C Mode Priority), photographs can LIKEN IN CONTINUOUS S81v0fy wham the camera is in focus, Note their regardless of the ed, focus wi when the in focus indicator is dismayed a2—AF-5 Mode Priority (R148) lets 52 (AF-S Mode Priority}, photographs can be tin focus. Nita that reg f ihe fours indicator is displayed.
Focus. Area Selection At default settings, the D200 offers a choice of eleven focus areas that together cover a wide area of the frame. The focus area can be selected manually, allow: ing photographs to be compassed the main subject positioned almost anywhere in the frame, or autocratically 10 ensure that the subject goosestep to the camera is always in focus regardless of where it is framed (closest-subject priority; 8 54.
EYE-Area Mode AF-area mode determines how the focus ares is selected in auto focus mode. To select the AF-area mode, rotate the AF-area mode selector. The select ed mode is shown by an icon in the control panel {see below).
Focus Zone Selection When {ra} (single-area AF) or Bed aerodynamic AF) is selected for AF-area made 8 54), the user can select from normal of wide focus areas (only normal focus areas are available when (CO) group dynamic-area or (ml) doses subject priority AF Is selected for AF-area mode). [I Description j Normal Frame |, _ . User cart select from eleven focus areas; caner focuses on se ow frees) cus area.
Highlight option. Make selection. “To choose focus zone size using the FUN. button and sub-command dial: 1 Select Focus Area Frame for Custom Setting £4 {FUN. Button; 3% 170) mans dial, Wide focus zones are used when || i 2 Press the FUN. button and orator the sub-corn{7 2 § WIDE Is displayed in the control panel. | Focus Lock Ford lock can bie used to change the composition after focusing, making it possible to focus on a subject that will note in a focus area in the final composition.
2 Neck that the in-focus indicator (8) appears in the viewfinder, Single-servo AF Focus will lock automatically when the in focus indicator appears, and remain locked until you move your finger from the shutter-release button. Focus can also be locked by pressing the AFLAME button (see below). Continuous-servo AF Press the RAVER-Lbutton to lock both focus and expose. Focus will remain locked while the AE AFL button is pressed, even if you later remove your finger from the shutter-release button.
i The assist lump gator enables the camera to focus even when the subject is poorly lit. The camera must be in focus mode § (single-savor autocross, an AF-Nikki lens must be attached, and the center focus area or focus area group mustiness selected or doses subject priority in effect. If these conditions are met and the subject is poorly lit, the fumigator will light automatically to assist the auto focus operation when the shutter-release button is pressed halfway.
Rider the conditions described above, the optional SB-800 and 58-60C Speed lights and SEW-800 wireless Speed light commander will provide active AF illumine nation for the fallowing faces areas: ae earn] 34mm f= 35-70mm fe be 71-105 mm He wwe ¢ With other Speed lights, the camera AF assist Terminator will be used.
Manual Focus Manual focus is available for lenses that do not support auto focus (non-AF Nikki lenses) or when auto| focus does nat produce the desired results (3 59) To focus manually, set the focus-mode selector 10 M ¥ and adjust the lens focusing ring unfit the image dis“5 played on the clear mane field in the viewfinder is in focus.
Metering The metering method determines how the camera sets exposure: ethos Es RGB sensor sets exposure based on variety of information farm al reach of frame. With type or D lens, camera uses 30 color matrix metering i for natural results even when frame is dominated by bright (white of yellow) or dark (black or dark green) colors.
Underexposure Exposure mode determines how the camera sets shutter speed and aperture when adjusting exposure. Four modes are available: programmed auto (PY), shut = enterprising auto (8), aperture-priority auto (A), and manual (M) » Depth-AF-Field Preview ssi Tio preview the effects of aperture, press and hold the depth-of-fiend preview button.
Deprogramming In this mode, the camera automatically adjusts shutter speed and aperture according to a builtin program 195) for optimal exposure in most situations. This mode is recommended for snapshots and other s ta leave the camera in charge of shutter speed and aperture. Adjustments can program, exposure compensation (89 72), and auto ex be made using flexible posture bracketing $8873).
Shutter-Priority Auto fry shutter-priority auto, you choose the shutter speed while the camera auto manically selects the aperture that will produce the optimal exposure. Shutter speed can be set to values between 30s and Yahoos. Use slow shutter speeds to suggest mason by blurring moving objects, high shutter speeds to “freeze” motion.
Neb-CPU Lenses Exposure made A aperture-privrity auto} is automatically selected when a non-CPU lens is am ached. The exposure made indicator will blink ia the nitrate panel and & will ba displayed in the viewfinder 4 changing discommode Mode S I£ yu defect shut Man then select dare with the shutter speed, tha shirker-speed display will flash and the shutter can not be reseal Rotate the: main command dial wo select 2 different shatter speed before shorting.
: aperture-Priority Auto In aperture-priority auto, you choose the aperture while the camera autocratically selects the shutter speed that will produce the optimal exposure. Small apertures (high ff numbers) increase depth of field, bringing both the main subject and background into focus. Liege apertures (low fl-numbers) soften back ground details and let more light into the camera, increasing the range of the flash and making photographs less susceptible to blurring.
IF the maximum aperture of the lens has been specified using the Non-CPU Lens Data tern in shooting menu 93) when a Nan-CPU Ens Is attached, the current will be displayed i+ the control panel and viewfinder, minded to the nearest full stop. Otherwise the aperture displays wilt show only the number of stops (FF, with imprimatur ap overture displayed as AFL) and the F-number must be read prof the Ens aperture sing.
D 1 Press the &5k button and rotate the main com Mi Manual In manual exposure mode, you cartoon both shutter speed and aperture. Shutter speed can be set to values between 30s and Vases, or the shutter can be held open for indefinitely for longer exposures few Lb). Aperture can be set to values between the minim urn and maximum values for the lens. Using the electronic analog exposure display in the viewfinder, you can adjust exposure according © shooting conditions and the task at hand.
Electronic Analog Exposure Displays Al shutter speeds other than baw & b, the electronic analog exposure displays in the core | + | troll panel and viewfinder show whether the photograph would be under or | posed at current settings. Depending on elongation chosen for Custom Setting b3 (BV | Step.
Auto exposure lock When center-weighted metering is used, an area in the center of the frame i assigned the greatest weight when determining exposure. Similarly, when spot metering is used, exposure is based upon lighting conditions in the selected focus area, If the subject is not in the metered area when the picture is taken, exposure wif be based on lighting conditions in the background, snd the main + subject may be under or overexposed.
Adjusting Shutter Speed and Aperture — | while exposure lack is in effect, the following settings can be changed without altering the metered value for Exposure: Ti | metering method Gan not be changed whi | teeing take wife ct when the lock is released), sure locks i effect ranges 10 me EY Metered fern In Spat metering, exposure wil be locked at the value metered in a 3mm (0.12in; circle centered an the selected focus area.
Exposure Compensation To obtain the desired results with certain subject compositions, it may be necessary to use exposure compensation ta alter exposure from the value suggested by the camera. As a rule of thumb, positive compensation may be needed when the main subject is darker than the background, negative values when the main subject is brighter than the background.
Expo: and Flash Bracketing in exposure bracketing, the camera varies exposure compensation with each shay, while in the case of flash bracketing, flash level is varied with each shot TTL and, with the optional 55-800 Speed light, auto aperture flash control modes only). Only one photograph is produced each time the shutter is released, meaning that several shots (up 10 nine) are required to complete the bracketing se quince.
| 4 Compose a photograph, focus, and shoat. She camera will vary exposure and/or flash level shot-by-shot according to the bracketing program selected. Modifications to exposure are added ro those made with exposure compensation $f 72), making it possible to achieve exposure compensate son values of mores than SEV, While bracketing is In effect, a bracketing progress indicator will be dis played in the control panel.
+ Expos tire Bracketing. The caners mores expire by varying Tauter speed and operative (programmed auto), aperture (shutter priory auto), or shutter speed (aperture-prority alto, manual exposure mode). When On is selected for Customer Setting bi: ISO Taut, the camera will nationalistically vary 150 sensitivity for captious exposure whe the limits of the car era exposure System are exceeded.
Flash Photography Using the Built-in Flash The D200 is equipped with a Guide Number 12/39 flash (150 100, m/f) that can be used not only when natural lighting is inadequate, but also to fill in shadows and backbit subjects of to add a catch fight 10 the subject's eyes. The built-in flash supports the following types of flash contra: 1-171 Balanced Filo-Flash for Digital SLR: Speeding emits series of nearly invisible pref lashes) (monitor flashcards) immediately before rain flash.
Flash Sync.Modes The camera supports the following flash sync modes: LE ate CY Front-curtain syn For most situations. nn Pictogram wy auto modes, shutter speed will automaker ally be set) to values between Yen and Ass (fea 6 Yas when Using optional Speed light with Aun £7 High Speed Sync 88160). Sb Red-eye reduction preshrank lights for approximately Gne second bear main dash.
| Using the Built-in Flash To use the builtin flash: Choose a metering method GB 61). Select ma trio or center-weighted metering to activate TILT Balanced Fill-Flash for Digitalis. Standard TTL Flash for Digital SLR Is activated automatically when spot metering is selected. Press the flash pop-up button. The built-in flash will pop up and begin charging. When the flash is fully charged, the flash-ready indicator will fight.
4 Press the shutter-lease button halfway and check exposure (shutter speed and aperture). The shutter speeds and apertures available when the built-in flash is raised are listed below, er flat Set automatically by camera (SE-Yas) | Set automatically | 63 Vale selected by User (e305) by camera [64 Set automatically by Camera (sees) | Value selection by | 66 Value selected by set (Vo 305)" user 5 unit for slow shyster speed is set Using Custom Setting e (Flash Shutter Speed; 167).
Deborah yseid—orubiaey 80 Flash Exposure Compensation Flash exposure compensation can be used to increase or reduce flash output from the level chosen by the camera's flash control system, Flash output can ie increased to make the main subject appear brighter, or reduced 10 prevent unwanted highlights or reflections. As a rule of thumb, positive compensation may be needed when the main subject is darker than the background, negative compensation when the main subject is brighter than the background.
FV:Losck This feature is used to lack flash output, allowing photographs to be recomposed without changing the flash level This a h output is appropriate to the subject even when the subject is not positioned in the center of the frame. Flash output is adjusted automatically for any changes in ISO sensitivity or paperer. Souse FY lock Select FY Lock or FY Lock/Lens Data for Cursor Setting f4 (FUN. Button; 3 170). 2 Press the flash pop-up button to therapist flash.
6 Press the southeastern Burton the rest of the way down to shoot. If desired, additional pic . trues can be taken without releasing FV lock. 7 Crass the camera FUN. button to release Fv lock. and confirm that the FY lock icons and are no longer displayed in the control panel and viewfinder, Using FV Sock with Optional Speed lights comic. | FV lack Is also flatlet with SB-600, 58-600, and SB-R200 Speed lights (available sea: 1 stately. Set the Speed light to TTI.
Self-Timer Mode The self-timer can be used to reduce camera shake or for self-portraits. 1 fount the camera on a triad (recommended) or place the camera on a stable, level surface, Press the shooting mode dial lock gene and rotate the shooting mode dial 1 select &) (self timer mode). Frame the photograph and focus. Ifautefocus is in effect, be sure not to block the fens when activating the self-timer. In single-servo auto cus $351).
Image Overlay and Multiple Exposure The following options are available for combining multiple exposures in a single frame: « Image overlay: two existing RAW photographs are combined to form a single picture which is saved separately from the originals. The originals must be on the same memory card. « Multiple exposure: a series of two to ten exposures Is recorded as a single photo graph.
5 Press the multi selector up or down to select a value for gain between 0.7 and 20. The default value is 1.0; selecting 0.5 cuts gain in half, while selecting 20 doubles gain. The effects of gain are visible in the preview image. Press the multi selector left or right to highlight image 2.
sadism waning pu Gauguin SBeu—srimsis) © Multiple Exp, To create a multiple exposure: Highlight Multiple exposure in the shooting menu (§8 124) and press the multi selector to the right Tress the multi selector up or down tw highlight Huber of Shots and press the multi selector ta the right Press the multi selector up or down to choose the number of exposures that will bie combined ta form a single photograph. Press the multi se elector ta the right to return to the multiple expo Sure mine.
Press the mull selector up of doer 10 highlight Bone and press the multi selector ta the right. A icon will be displayed in the control panel Frame a photograph, focus, and shear. In can tenuous high-speed or continuous kw-speed rode #8 26), the camera will record all exposures in a single burst.
(Hadar; SBR Mitsubishi dpa poe eo insipidity Exchanging Memory Cards Do rot remove of replace the memory card while recording a multiple exposure.
Interval Timer Photography The D200 is equipped to take photographs automatically at preset intervals.
AudeiBotoyg Ubu [EAI Venusian © flash bracketing is active while 4 Highlight Start at the bottom of the interval timer menu and press the multi selector up of down to select On, then press the @ Burton, The first series of shots will be taken at the specified starting time. Shooting will continue at the selected interval until all shots have been taken.
During Shouting — Dunn Intervals timer photography, te [TTI icon in tha control panel wil bin. Immediately creche the exterior shooting interval begins, the shutter speed display will show the number of intervals remaining, and the aperture display will show the number of shots remaining in the sent interval.
Bricklayer 4 BULL [RAID DURING © Interrupting Interval Timer Photography woe SSE To interrupt intern timer photography, highlight Start at the bottom of the cervical timer men and press the milt lactose up or down writ Done is displayed, the: the @ button innervate timer photography will also bie interrupted + A wa button reset is performed GB 97L Menu Reset is selected in the shooting menu 127).
Non-CPU Lenses By specifying lens data {lens focal length and maximum aperture), the user can gain access to a variety of CPU lens functions when using a non-CPU lens.
2 Highlight Focal Length and press the multi selector to the right. 3 Select the group to which the lens belongs farm 6-45, 50-180, 200-4000 and press the multi selector to the right. Select the lens focal length {in mm) and press the multi selector to the right. The FUN Button 1 Select FV Kilocycles Data for Custom Setting 14 (FUN. Button; 81 170). Pesto fig UON Press the FUN, button and rotate the main command dial.
Specifying Maximum Aperture Lens maximum aperture can be specified sing the Non-CPU Lens Data option in the shooting menu or by pressing the FUN. button and rotating the subhuman dial. The following f-numbers are available: = 1214182252833, 354,455, 22 The Non-CPU Lens Data Menu 1 Highlight Maximum Aperture in ‘the Non CPU Lens Data menu and press the multi selector to the right. Select the number corresponding fo the mak mum lens aperture and press the mutt selector To the right The FUN.
Using a GPS Unit rein and Magellan GPS units that conform to version 2.01 or later of the National Marine Electronics Association MEATINESS protocol can be connected to the camera's ten-pin remote terminal using an MC-35 GPS adapter cord {avail vie separately, BB 182), allowing information on the camera’ current position (0 bse recorded when photographs are taken.
o-Button Reset default values by holding the QUA and £2 buttons down together for mere than wo seconds {these buttons are marked by a green dot). The cgntrofpanels win off briefly while settings are reset.
gp ER recce: More on Playback Viewing Photographs Single-image Playback © To play photographs back, press the @ button. The JHB most recent photograph will be displayed in the § TRITON, To end playback and return to shooting made, press the ® button or press the shutter-release button halfway, To view camera menus (8 24), press the @ but Using the Ult Selector any time when the my orbs ae on when shoo! ies displayed.
Photo Information Photo information is superimposed on mica dd in single-image playback, There are up to eight pages of infantryman for caliphate. Press the much selector down to cycle through photo information as follows: (Histogram, Basic Information, File Information, Shooting Eats Page 1), (Shooting Data Page 2), {GPS Data), (RGB Histogram), and (Highlights). Press the mul selector unto cycle though photo information in reverse order. Basic information i Protect status 04 [Folder number/frame. number...
Highlights” fl Protect status Bl mage nightgowns (areas of mag hat may bie over ex: posed) are marked by a flashing border! fi Current channel Folder mainframe number 135 Displayed ony If Highlights is selected for Display mode 8 “a. Highlights con be displayed separately foe carol channel, Press mild selector eft or sight while pressing @ button © ox through channels 5 follows: RES (al char ris 3 R rod) 2 6 {green 5 B (blue) RGB.
Sudetenland a Bulimia-— BIB Niamey CF 1p onl Viewing Multiple Images: Thumbnail Playback To display images in "contact sheets” of four or pine images, press the € button and rotate the main command dial. The following operations can be performed while thumbnails are displayed 3 Press © bulled and forefoot main Cor to charge the number of images displayed as follows: single image e>four thumbnails <3 nine thumbnails sale image.
Taking a Closer Look: Playback Zoom Press the @ button to roam in on the image dis played in single-image playback or on the image currently highlighted tn this lowing operations can be performer while zoom is in eff brat playback. The foil Cancel/resume; (@ [Press @ fo cancel zoom ond rein to single zoom, OF Lina playback Press again 10 zoom image 1. Press @ bunion to display frame showing area currently zoomed in.
Protecting Photographs from Deletion In full-frame, zoom, and thumbnail playback, the € button can be used to pro~ text photographs from accidental deletion. Protected files can nat be deleted using the @ button or the Delete option in the playback menu, and have DOS “read-only” status when viewed on a Windows computer.
Deleting Individual.Photographs To delete a photograph displayed in single-image or zoom playback, or the photograph highlighted in thumbnail playback, press the @ bunion. Once deleted, photographs can nat be recovered. 1 Display the image or highlight it in the thumbnail ist. 2 Press the @ button. A confirmation: dialog will gee be displayed. To delete the photograph, press the @ button again.
Viewing Photographs on TV The supplied EG-D100 video cable cane used to connect the camera to a television or VCR for playback or recording: 1 Select the appropriate video mode from the Video Mode menu 117). 2 Turn the camera off. Always tun the camera off before connecting or disconnecting the video cable. 2D Open the cover protecting the video-out and [1 DC-in connectors.
Connecting to a Computer The supplied USE cable can be used ti connect the caner to a computer. Once the camera is connected, the supplied software can be used to copy photographs to the computer, where they cah be browsed, viewed, and retouched. The camera can also be used with Nikon Capture 4 version 4.4 or later (available separately}, which supports batch processing and more advanced image editing options and can be used to control the camera directly from the computer.
Connecting the USB-Cable 1 2 3 and ¥ 03 GURISENDS—S3UBIABY © FY Turn the computer dn and wait far it to start up. Turn the camera off, Connect the UCCELLO USE cable showdown. Connect the camera directly to the computer; do not connect the cable via 3 USB hub or keyboard. Tum the camera on. If Mass Storage is selected for US BF L will be displayed in the control panel and viewfinder, and the PC mode indicator will flash (if PP is selected, the camera displays will not change).
I PYP 1s selected for USB ER 1247), the camera can be wired off and the USE cabin disconnected once transfer is complete. if the USB option in the camera setup menu is still at its default setting of Mass Storage, the camera must first be removed from the system as described below. Windows XP Home Edition/Windows XP Professional Click the ‘Safely Remove Hardware! won (8 in the taskbar and select Safely remove USB Mass Storage Device from the menu that ap pears.
Printing Photographs Photographs can be printed by any of the following methods: + Connect the camera 10 4 printer and print photographs directly from the camera (110), Insert the memory card in a printer equipped with @ card slot {see the printer manual for headstall. if the printer supports POOF {8 202), photographs can be selected for printing using Print Set (8 139) + Take the memory card 1o a developer or digital print center.
Connecting the Printer 1 Set the USB option in the setup menu to PTR en 2 Turn the printer on, 3 Turn the camera off and connect the supplied USE cable as shown. Do not use force or at tempt lo insert the connectors at an angle. Connect the camera directly to the printer; do not connect the cable via a USE hub. Turn the camera on.
sideboard Buliuyig-s3ui938u © curt printer can be selects 112 ! Printing Pictures One teatime To print the photograph selected in th Bridge playback display, press and release the @ button, The menu shown at right will be displayed. Press the milt selector up or down to oilcan option and press to the right w select. Start i have been priced, p Printing display will be shown when pri described above or wm car ive for current pi Page Size ©) 3:5xSin, 5x7in., Khaki, 100 mmx 150 mm, 4x6in.
“Option | i [a Hen shown at tight wil be displayed. Press multi elector up or down to highlight Crop prior photo Hor printing) or No Cropping, thee press mui seer 7 to sight. Crop Ring cop is selected, dialog shown at right wil be dis dyadic; rotate main command dial to choose size oF fop and use mull selector to choose position of 0p.
Printing Selected Photographs Choosing Print Select in the Pict Bridge menu (ser above) displays the menu Shawn in Step 1. Scroll through pictures. To display cur+ Select current picture and set number rent picture full screen, press @ button.” © © of prints to 1. Selected pictures marked by £ icon. * To pint potash in print larder created with Print Set 8 139) select Print Drop in be modified as described on Specify number of prints (up to 99).
The setup menu contains the following options, See “Using the Menus” 88 24) 3 for more information on using the menus, Format LCD Brightness Mirror Lock up Mode World Time Comment Art image Rotation Recent Settings USE Dust Battery Info Firmware Version Eves of fl i Below of by optional MB-D200 battery pack reties » Using the Multi Selector. The focus select | The milt selector can be used at any time wain ihe monitors or. + lock switch any takes effect when the monitor s off.
Format Memory cards must be formatted before first use. For matting memory cards is lase an effective way of deleting all pictures an the card. Selecting Format displays the following options. Press the multi selector up or down hit an option and then press Format memory cart Message shower at AAT displayed while formatting i in progress. Do not turn the comers off remove the batteries or memory card, or plight the AC adapter {available separately) until formatting is complete ‘and setup men s displayed.
This option is used to lock the mirror In the up position to allow inspection of cleaning of the Joe-pass filter that protects the image sensor. See "Technical Notes: for the Camera” (88 185) era is powered by an optional MB-D200 battery pack using AA batteries. Use a fully-charged EN-Else battery or an optional AC adapter.
donas. Language Choose the language for camera menus and messages from: an ear fists Se Bch (ooo Cine | af EE Cheer i retie Ti Suntanned 1D7ch Se ee 3) Image Comment Add brief text comments to photographs as they are tak en. Comments can be viewed when the photographs are displayed using the supplied software ar Nikon Capture 4 version 4.4 or later (available separately). The first twee letters of the comment are also visible on Shooting Data Page 2 in the photo information display (8 100).
Auto image Rotation Photographs taken while On {the default option) is se; elected contain information on camera orientation, allows: ing them to be rotated automatic 9B) or when viewed in compatible Nikon: soft following orientations are recorded, Cape wide) Camera totaled 50° orientation clockwise * in continuous mode BR 2 nation recorded for Ast shot applies 1 al images in same burst, eves if camera fermentation is changed during shooting Camera orientation is nor recorded when Off is selector.
120 Customizing the Recent Settings Ens recent nesting. ; 3 Select the menu from the shafting ar fourteen most recently se rectifier Delete Recent Settings > Yas © ¢ To create a personalized menu of shooting and Custom Settings options: 1 Stater Lock Mani > No to unpack te Recent Se tings menu. existing +: Se tings menus.
uss Before connecting the camera to a computer via USE #8 107}, select the appropriate USB option as determined by the computer operating system and whether the camera is being controlled from Nikon Capture 4 version 44 or later (available separately) or photographs are being trans: erred to the computer using the supplied: software: Operating system Winnows XP Home Edition Windows XP Professional WBC OS X Windows 2000 Professional Windows Millennium Edition (ie) { Chocs Mass Storage Windows 58 Send Edition
3 With the lens ten centimeters (ford inches) from a bright, featureless white object, frame the object so that nothing else is visible in the viewfinder and press the shutter release button: halfway. In auto focus mode, faces will automatically be set to infinity; In manual focus mode, set focus to infinity manually before pressing the shutter-release button.
Battery info View information on the EN-Else rechargeable Li-ion bat trey currently inserted in the camera Current battery level as a percentage. Nuremberg of times shutter has been release with current battery since bat trey was last charged. Note tilt camera may sometimes release shutter without recording photograph; i example when measuring value for resat white balance. ve Neva] cay showing Battery se. J (New) dedicates that artery per Chang.
hooting Options: The Shooting Menu The shooting menu contains the following options. See "Using the Menus 24) for more information on using the menus, Shooting Menu Bank ‘Menu Reset Folders Fla Naming Optimize image Color Space image Quality image Size JPEG Compression Raw Compression White Balance Long Exp.
Shooting Menu Bank Alt shooting menu options are stored in one of four banks, Charges to settings inane bank have no effect on the oth ers. To store a particular combination of frequently-used. settings, select one of the four banks (the default bank is bank A} and set the camera ta these seeings. The new settings will be stored In the bank even when the camera is turned off, and will be restored the next time the bank is selected.
Renaming Shooting Mer Banks 1 Highlight Rename and press multimedia selector to the right. List of shooting menu banks Willie displayed. Highlight the desired bank and press the milt selector to the right. Key hoard area: Use multi selector we highlight letters, press center of multi selector to select. Ham me ares: Marne appears here. To move cursor, press @ but on and use multi selector.
Menu Reset Toy restore default settings for the current shooting mine bank (48 125), highlight Yes and press the multi selector a the right (select No to exit wi without changing settings). The following settings are aff Filo naming SC maize Image Not Color space ERGS Im; ity JPEG Normal Triage size! Tin JPEG compression Fon RAW compression NEF (Rows) hie balance Alto Cong BoM On Normal 50 sensitivity [ ng reset (0.0, est all banks.
nus Servos SL © doss 12g: 2nd less than $99 mages Folders Select the folder in which subsequent images will be stored. Din tog shown at fight tor ip or down to chose number for new folder. Press much selector t right To create naw folder and return to shorting menu. Subsequent photographs will be stored in new folder [57 oF existing Tilers will Br displayed: piss oul select tor up or sows to Highlight folder, press w right to defect el return to shooting menu.
File Naming Photographs are saved using file names consisting of *DSC_ tor _Schooled by a four-digit file number and a three-letter extension {e.g, The File Naming option is used to change the DSC” parson of the file name, Crass the multi selector to the right to display the dialog shown below, ng menu without changing the file iamb ame prefix, press @ saved using the tew fle naming rule. rerun 10 the shooting menu.
Bo Image Size Image size can be selected from Large, Medium. and Small. See ‘Reference: Image Quality and Size’ 8 32). JPEG. Compression Choose whether to compress JPEG images to a fixed size or to vary file size for improved image quality. See “Refer & magnificence Quality and Size” E30). Raw Compression Choose whether to compress NEF (RAW) images. See Ref Terence: image Quality and Size” @ 51) White Balance Nine options are available for white balance.
Long Exp. NR Select On to reduce noise” in the form of randomly-spaced, brightly-collared pixels in photographs taken at shutter speeds of 85 or slower, Nisei reduction off; camera functions normally (default) camera " Photos taken at shutter spreads of abut 85 of slower fre accessed lo reduce poise, increasing recording time by shout 50-1000 ard halving number afterimage cane: stored in memory buffer, Using processing, Job ar blink sin displays. ext protozoan ibe taken when fab nr is no longer displayed.
132 ISO Sensitivity 50 sensitivity can be increased from the default value (100). 18 sensitivities over 1600 are nly available when Custom Setting b1 {ISO Auto} is off. See "Reference: Sensitivity 050 Equivalency)” 88 331. image Overlay Create a new image by superimposing two existing RAW photographs. The RAW photographs must have been cre: ate using the D200 and be on the same memory card. See Reference: Image Overlay and Multiple Exposure (8 Cf 84).
Playback Options: The Playback Menu The playback menu contains the following options. See “Using the Menus’ 3 24) for mare information on using the menus. 133-134 Playback Folder 135 Sade Show 735-136 image 37-138] Print Set 136-140; Mode idl Review ial 47 Rotate Tall 142 the playback menu is only displayed if there is a ornery card in the camera. Delete The delete menu contains the following options. All Deere all photographs.
Deleting Selected Photographs: Selected Choosing Selected displays the photographs in the folder or folders selected in the Playback Folder menu 1 135) as small thumbnail images, I ” ] Highlight image. (a view highlighted | * Select highlighted image. Selected image full screen, press @. Release to age marked by icon. return to thumbnail ist) Repeat steps 1 and 2 to defect additional pictures. To deselect picture, highlight and press center of milt selector. To exit without deleting pictures, press @button.
Playback Fonder Choose a folder for playback. [iE ND200 bo All maces in all folders created by cameras 5 Tie Design Rie for Camera File System (DCF—all Nikon digits cameraman most other makes of digital carnelian be visible during plays Current rly Ages 1 Coder currently selected using Folders Pinion in shaming rer are displayed during playback Slide Show To play images back one after the o “skidded show highlight Start in the slide show menu amid press the milt selector right.
Nassau sus YI ney 136: The following operations can be performed during a slide show. Press much selector left to return to previous frame, right to; in to next fame. Go forward or oe © ack one frame | { ns FON Ip It select low 10 change photo info dis ew photo Info ) Press mul selector up or down to change pho info df oo A perfecta during slide show.
Hide Image photographs. Hidden images are visible only in the Hide mage menu, and can only be deleted by formatting the memory card, Hide or reveal selected photographs Selectness All? Reveal 3 Hydrologist Hiding Selected Photographs: Select/Set. Choosing Select/Set displays the photographs in the folder or folders selected in the Playback Folder menu (Jf 135) aé small thumbnail Ea ; A Highlight image. (To view highlighted Select highlighted image. Selected image full screen press @.
Asi EAs SL © dma 138 Revealing All Photographs: Deselect All Choosing Deselect Ali? displays the confirmation dialog shown at right. Press the multi selector up or down to highlight an option, then press the § button to make a selection. « Yes: reveal all images in the folder of folders selected In the Playback Folder menu (85 135). The monster will briefly show the message "Deselect All Done! and then the playback mean will be displayed.
Print Set Print Set is used to create a dial “print order” that lists the photographs (0 be printed, the number of copies, and the information to be included on each print. This information is stored on the memory card in Digital Print Order Format {POOF The card can then be removed firm the @ camera and used to print the selected images printed on any BPOE-com palatable device Lead Select/Set i Select photographs for pruning Deselect All Limo all Pages fom print order Enif version 2.
Modifying the Print Order; Select/Set Choosing Select/Set displays the photographs in the folder or folders selected in the Playback Folder menu $8 135) as small thumbnail images, Highlight image. (To view highlighted millage full screen, press @. Release to return tc thumbnail ist} Press @ button and press milt] selector up {or down to specify number of prints {up [5 Le Beo 991, or press center of milt defector 10 select image and set number of prints fo 1, Selected images are marked by £ icon.
Display Mode To choose the information listed in the phat-information display {8 99), highlight the desired caption and press the multi selector tight. A we appears next trisected rems; to deselect, highlight and press the multi selector To the right. To return to the playback men, highlight Done and press the multi selector to the right. [EE So ~ Description Data Shooting data appears in photo information display.
After Delete Choose whether the following or previous picture is displayed after an image is deleted. Show Next! Description Toweling mage 5 displayed or highlighted thumbnail st, IF defeated! image was fast frame in memory, previous frame taut) {ef Li be displayed of Highlighted ee RFE ag 1s Gels ted. pintos rage splayed or Pigheaded in Tum D poo ofl Ts. ff deleted image was rst fame in merry, following fame wal be displayed or highlighted.
[T1223 13: (0 Custom settings are user to fine-tune variety of Barrera settings fo suit the user's preferences, creating combinations! of settings that differ from the factory defaults in effect at the time your camera was purchased. In addition to Custom Settings C (Bank Select) and R (Menu Reset), settings in the Custom Settings menu.
Tne following Custom Settings are available: Castor Setting ©, Bark Select Custom Setting Bank 146 R Meo Reset TT Ruse Custom Ratting Men 147 3 Auto focus a1 [AEC Made Priority AF-C Mode Priority Selection a2 | AF-S Mode Priority 15-5 Mode Priority Selection a3 [Focus Area Frame Focus Area Frame Selection a4 | Group Dynamic AF Patter Selection in Group Dynamic AF a5 {Lock-On Focus Tracking with Lock-On a [AF Activation 7 Activation of [AF Area lamination (AF Area lamination a8 [Focus ren Focus Area Selectio
© Bracketing/Flash Custom Setting 1 [Flash Sync Spade Flash Synge Speed Setting 3 Flash Shutter Speed Slowest Speed When Using Flash <3 Built Flash Builtin Flash Mods | |e modeling Flash Preview Button Activates Modeling Flash {|S Auto BT Set Hutu Bracketing Set { Mode Biting | Auto Bracketing in M Exposure Node | |e Rasta BHT Order Tito Bracketing Order © eB} Auto BKT Selection Auto Bracketing Selection Method _ f Controls [BBR ID Lent Button Multi-Selector Center Button 168 Multi-Selector When Multi-Gel a
Custom Setting. custom Setting Bank Custom Settings are stored in ene of four tanks, Changes to settings in ane bank have na effect on the others, To store a particular combination of frequently-used settings, select one of the four banks and set the camera to these settings. The new settings will be stared in the bank even when the camera is muted off, and Will be restored the next time the bani is selected.
Custom Setting at: AF-C Priority Selection This option controls whether photographs can be taken whenever the shutter-release button is pressed (release 5 priority) or only when the camera is iri focus (focus priority; in continuous-servo AF E option | i Description FPS Rate, (default) FPS Rate Phosphor Can be (ken Sven WHEN C Amen 1s ROT IN Cuss. 10 Combings Mode, +AF_ frame rate slows for improved focus i subject i dark of low contrast, 10108 Can Oly be taken whet in focus indicator 15 Splayed.
Custom Setting ad: Pattern Selection in Group Dynamic AF This option controls how faces areas are grouped in group dynamic-AF (54) and whether the camera gives prior: ity to the subject in the center focus pres of the selected group. jet In canter focus area of selected group. have 10 select focus area, eds time is required for fo subject moves ou of center focus area, camera v information from o ‘of selected group is highlighted in control pan Focus areas ave groped in pattern | 085 150).
Focus areas are grouped as follows {illustrations show the control panel display): NE [al TG F008 BILLIE] 03 TEFL” Center Rig Tet Center! Center? Right Ls] [on] Bottom Bottom Ld [3 EE EJCa0a04 left’ Center left Center? Center Right Lo] L..] Bottom Bottom Sus area Group the mid he cu i the cen 2 2° fs cay av Center AF Area s selected for Center Button {Custom Setting 11)> Shooting Mode.
Custom Setting a6: AF Activation This option controls whether both the shutter-release but: ton and the AF-0N button can be used to initiate auto focus or whether auto focus is ably initiated when the ARON but ton is pressed. [ie Ie tan bie performed with AFGHAN LCN of by pressing slither (default) release button halfway.
value selected by user, regardless of wi (default) _optimal exposure can be achieved at current exposure settings, If Optimal exposure can Not be achieved at 180) sensitivity Selected by User, 150) sensitivity 5 adjusted to compensate, fo niobium approximately equiv: lent 1 150 200 and madding selected sing Max. Sensitivity option. Flash lave is adjusted appropriately when flash is side.
i | Custom: Setting b2u50 Sensitivity Step Value Chase whether adjustments to sensitivity {ISO equivalent& cy) are made In increments equivalent to BEV (1/3 Step, the default optician, EY (1/2 Step), or TEV (1 Step). Custom Setting Steps for Exposure Control Choose whether adjustments to huller speed, aperture, (1/3 Step, the: default option), EV (1/2 Step), or 1EV (1 Step).
Custom Setting bs: Easy Exposure Compensation This option controls whether the EB button is needed to set exposure compensation @872). IF Otis selected, the 0 at the center of the exposure display will blink even when EXPOSURE Compensation I Set to 0. Exposed Compensation set Dy pressing (default) command dial. Exposure compensation set by rotating command dial only. Disused dew perch on option selected for Custom Setting £5» Change Main/Sub.
Custom Setting bY: Fine Tune Optimal Exposure Use this option to fine-tune the exposure value selected 3 by the camera. Exposure can be fine tuned separately for each metering method by from steps of Yale. Selecting this option displays 4 message warning that the ll icon does not appear when exposure is altered, highlight Yes and press the multi selector to the right {select No to exit without altering exposure).
ARID Lock $Bath focus and exposure dock white QUARREL Burton is pressed. FE Lock Only pone locks wile LAUREL it ion | proved Focus participated.
dries : i ; 158 Custom Setting di: seep Controls the pitch of the beep that sounds when the self timer is counting down or the camera focuses in single servo AF with Focus (the default setting) selected for Cus tom Setting a2 (AF-S Mode Priority). Choose from High (the default option), Low, and Of Ab icon appears in the control panel when High or Low | is selected. Custom Setting d2: Viewfinder Grid Display. Select On to display an-demand grid lines in the viewfinder #16).
Custom. Setting de: File Number Sequence When a photograph is taken, the camera names the file new by adding one to the last file number used. This option cant roils whether file numbering continues from the fast number used when a nev folder is created, the mercenary card i is formatted, or a new memory card is inserted in the camera (cleft) [re matted of new seniority card is inserted in Ca mere. On When new folder 15 created.
Custom Setting d8: MB-D200 Battery Type To ensure that the camera functions as expected when AA batteries are used in the optional MB-D200 battery pack, match the caption selected in this mend 1o the type of bat trey inserted in the battery pack. There is no need to adjust this option when using EN-Else batteries.
Custom Setting eZ: Slowest Speed When Using Flash This option determines the slowest shelter speed pos sable when using front or rear-curtain needy or red-eye reduction in programmed auto of aperture-priority auto exposure made (regardless of the setting chosen, shutter speeds can be as slow as 30s in shutter-priority auto ang manual expanse modes or when the flash Is set wo slow syn, show rear-curtain sync, or red-eye redirection with slow syn.
dries Repeating Flash: The flash fires repeatedly while the shutter is open, producing a strobe-light effect BER I in the contra panel and viewfinder when this option is § selected, Press the multi selector left or right to highlight the following options, up or down to change.
Commander Mode: Choose this option to use the builtin flash as optional a master flash controlling one ¢r mote remote Speed lights groups: (A and B) using Advanced Wireless Lighting Choose flash mode for built-in flash commander fast). FTL tore Menu of dash comparison values wil Ba dismayed; hoo, TTL dale between +3.0 and ~3.0EV in Steps of YALE.
To usc optional Speed lights in camaraderie mods, select Commander Mode for Custom Setting e3 and follow the steps below. oe if TTL or M is selected, additional options can be selected. Press multi selector up or [down to display option, press. right to select. = Select desired flash mode. If TTL selected, additional options can be selected. Press mull selector 0 or down to display caption, press right to select. Repeat Steps 4-5 for Group B. ¥ Highlight Channel, Select channel.
10 Compose shot and arrange optional Speediness os shown below. Smith or less Speeding 60-30 TB wireless remote. flavorless sensor should . H face camera, ir Camera 10m builtin © flash) 30%%0r less & i 5mif16" or lass : 60-30 “¥ maximum distance between optional Sidelights and camera is about 10m (33') when Speeding is positioned in front of camera (within 30° on either side of center inline, or about 5m (16) when Speeding is 30-50° to either side of center fine.
12 Press flash pop-button to raise built-in tosh {note that bile-it flash must be raised even if is selected for Built n> Flash Mode).
Custom Setting 6: Auto-Bracketing in M Underexposure This option controls what settings are affected when AE JR & Flash or AE Only is selected for Custom Setting &5 in manual exposure mode. Ca. sy Flashiness [amend varies Shutter speed (CUSTOM Setting e5 set 10 AE Only; or shew (faultily_ her speed and flash level {Custom Bering ef set 10 AE & Flash) Flash peed Com ares SRE! Speed ord apart [som Set ee 10 AE Aperture.
Unities Woy © dnp 188 Custom Setting 11: Multi-Defector Center Button This option determines what operations can be performed fy pressing the center of the multi selector Shooting Mode: This option controls whit operation can be performed by pressing the center of the multi selector when the camera is in shafting mode, Pressing center of Mul Selector Selects center cus area of Center farinaceous group (group dynamic-AS.
Custom Setting £2: When Multi-Selector ls Pressed; if desired, the multi selector can be used 10 activate the exposure meters of initiate auto focus, Cognition ) TT Description Do Nothing © [Mull selector does fot activate exposure Meters of entire auc default) focus Reset Mt-Off Delay [Pressing mull Disco activates Expose meters. IF AF-S Or AFC mode, pressing mui Senior activates exposure meters.
Custom Setting #4: Assign FUN. Button This option controls the function performed by the FUN, button, FV Lock Jif builtin flash or optional CL-campatible Speed light Js used, dash vale! (default) locks when FUN button is pressed. Press again wo cancel FY lock EV Cocky 175 S00, except 1030 Ult Fh lowered o7 Polygonal LST palate Lens bats [Sidelight is not attached. FUN. button and conformism dis can be used) ito specify fours! length snd aperture of non-CPU lenses Off 52).
pee Rotate Direction: optional MB-D200 battery pack when sating flexible program, shutter speed, aspartame, Easy exposure £m: perspiration, exposure ode, reexport compensation value, bracketing Increment, and Rash syn dime. . Normal (default: Normal command dial operation, Reverse: Reverses formalin of command dials, Change Main/ Sub Exchanges functions of main and sub-command dil ten serving shutter speed and aperture OF (default: Main command dial controls shutter speed, commander dial controls operative.
Custom Setting £6; Setting Method for Buttons and. Dials This option allows adjustments that are normally road by E passing the C28, EM, ©. §. 158 QUA or WB button and rotating a command dial ta be made by rotating the com manic dial after the button is released.
pi Optional Accessories One advantage of digital SLR cameras is the wide variety of accessories available for broadening the: scope of digital photography. The following types of accessory are available for the D200.
mass expulsions ode, reset aperture ing us specter 19 Requires BK 12.97 PK-13 eto extension ing. sing anf determine expositors before hinges, 25 Use preset aperture. In exposure mess A, so aperture using 18 Base compensation required when ached with Al 2B focusing momentum before determining exposure and king SU ERE-AS AI 10 0 35-435, 835-125 photograph. 5-455, of AS B0-260mm 1280. See telecaster + F-4 Replicator Mutt requires Bi-4 Camera Holder, anal or deh, {% incompatible Archdiocesan Non-CREW Lenses.
CPU lenses can be identified by the presence of CPU contacts, Type G lenses are marked with 2°G" on the lens barrel, type D lenses with CPU lens Type Glens Type lens Type G lenses are not equipped with ales aperture ring. Unlike other CPU lenses, there is no need 1o Jock the aperture ring at the minimum aperture settling Maximum f-number when using a ripe G lens Picture Angle and Focal Length The diagonal picture angle of the D200 Is less than that of a 35-mm camera.
Optional Flash Units (Speed lights) When used with i compatible device such as the SB-800, $B-600, and remote SB-R200 Speed lights (available separately); the DION supports the full range of options available with the Nikon Creative Lighting Shyster (CLASS, including FTL flash control G8 76), FV Lock @ 81), and Auto FP High-Speed Sync {8 160), Support for Advanced Wireless Lighting allows the built-in flash to be used as 2 commander unit for remote SB-800, 38-600, and 5B-R200 Speed lights.
The following features are available with the SB-800, SB-600, and S8-R200: Hs { RRSSIRIRIRNRIYYS SIRSIRIRIRIR TRG 1 Functions a teammate ash rly. 5 Hot available wi non fess es les Ga hve been 2 Can nt be rooted on caner aces shoe Cao be use specie uso Ra-CPU Les Data. as rote Tosh f camera is commands mode (88 63H or 6 Use Spending cons sect Neh noe. 38800 Speeding s monies caesura an $8 8H can Available only if Nan-CPU fos i ned without specifying fe led by optional 5-800 wires Specdighicommander.
Bates on Optional Speed lights Refer to the Speed light manual for detailed instructions. Jf the! Speed light supports the Creative Lighting System, refer to the section or} CL-compatibld D200 is not in chided in the digital SLR” category in the SB-80DX, 5 mails. If Ashe: FP High-Speed Sync is not used, the shutter wil synchronize with an extramural flash at speeds of Fas of slower FTL flash control can be used at 150 sensitivities between 100 and 1600.
Other Accessories Al the time of writing, the following accessories were available for the D200, Contact your retailer or focal Nikon representative for details. FLUE #EN-Else Rechargeable Li-ion Battery: Additional EN-Eliza Catteries am av ESC from local retailers and Nikon service representatives. EN-03a and EN-ELL] biters can not be used. J $4B-D200 Battery Pack: The 1B-L200 Takes one or tis equipped with a burrito al chain 30d sub-com operation when taking photographs in portrait tall orientation.
PENA D300 is equipped eth 6 Prepping McKee RES ashy. The terminal is provided with a cap, which protects the contacts when the terminal [2 is net in use.
Approved Memory Cards The following cards have been tested and approved for use in the D200: EVE, 250M. TZN GE S58 AGH SO CTR (type | SORTIE (ype 256, 3 TMG, TAME, 1 GB, 205 408.5! SUCH (xterm i 7 Ta vel Compact ash Can ION, 25GB STINE a iE Nonclerical (0 Too ET passionate A0x with Vek. allusion BOX With Ov.
Caring for the Camera Storage When the caner will not be used for an extended period, replace the monitor cover, remove the battery, and store the battery in a cool, dry area with the terminal cover in place. To prevent mold or mildew, store the camera in a dry, hyperventilated area.
The Low-Pass Filter The image sensor that acts as the cameras picture element is fitted with a low pass filter to prevent molar. Although this filter prevents foreign objects from adhering directly to the image sensor, inter certain conditions dirt or dust on the filter may appear in photographs. i you suspect that dirt or dust inside the camera is affecting your photographs, you can clean the fitter as described below. Note, however, that the low-pass filter is extremely delicate and easily damaged.
© RIFE OUR icy BU) =S810N E3ULPSL 186 4 Holding the caner so that it falls on the ow pass filter examine the filter for dist or line, ff na foreign bisects are present, proceed to Step 6. 5 Remove any dust and dint from the filter with a blower, Do not use a blower-brash, as the bros tas could carnage the filter. Dirt that can not be removed with a blower can ably be removed by Nike-authorized service personnel. Under no circumstances should you touch or wipe the filter.
Caring for the Camera and Battery: Cautions Benet drop The product may mature strong shocks of vibration. Weepy This practiced is nat waterproof, and may mat function if immersed in water or exposed to igh levels of humidity. Rusting of the internal mechanism tan cause reparable damage. void sudden changes in temperature Sudden changes in temperature, such as boar when entering or leaving a heated bluing on a cold day, can cause condensation side the device.
Busies-Soon [eb] 7 wine) BIO} Storage + To prevent mold of mildew store The camera in dry, hyperventilated area. If you wil nat fe sing the product for long periods, remove tha battery 16 prevent leakage and stir the camera in a plastic bag contenting a desiccant. Do rot, however, store the camera case ina plastic bag, 2s this may cause the mater fo deteriorate, Nate that desiccant dillydally loses iss capacity to absorb moist and should be replaced at regular intervals.
Troubleshooting If the camera fails 1 function as expected, check the list of common problems slow before consulting your retailer or Nikon representative, Refer to the page numbers in the right-most column for more information. a pr Camera takes Hume Lo turn on. Delete files or folders. Ads whiner focus. Use optional ditherer adjustment lens, Fenders dark. re bestiary of Insert charged barter. Displays turn off withal warning. Choose Zenger monitor orf or meter off delays.
Probes Exposure compensation Can nat sed code kp j= CET On Notate Tall iis Photo was Taken with Off selected for Auto] 119, Tall (portrait-arientation) phones are] Made Rotation. ; an ora bent . Camera orientation was changed white shut] 27 displayed In wide: landscape) earn |” MET ¢ i doe yer-eledse bull On was pissed in LOLL) made, Camera was Taken, #5 pointed superior down when shot Cn ro dee pho, Photo is protected: remove protection. Some photos ere not displayed dur, ng playback.
Camera Error Messages and Displays This section lists the indicators and error messages that appear in the viewfinder, control panel, and monitor when there is a problem with the camera. [i [CHR panel | finder [nd FEE [Lens aperture ding Is not Jacked |Lock ring et minimum aperture finicky tat minimum aperture (largest f-entomb) Tow battery. Ready full-caned Spare Patient Battery extenuated, L Recharge or exchange with fully-charged spare battery.
felt fa ene GIRL indicator Likes for 35 checker photo In monitor ff ur is 1651 Hes, pot may be under Overexposed, adjust seeings arc) 9% exposed try 203i. Memory insufficient to cards Reduce quality or size. 8 “ ¥ quality w+ Ld Further photos at current Seth Delete photographs. 105, (ois | Bins? ins or camera his run out of 133 file or fonder numbers, «Insert new memory card, Woks) No territory card.
: : D Ler Control Via was RC EL MOOR |e Came cannot detect Turn camera off and confirm) PRESENT Lo memory card that cad is comely inserted Eros accessing peppery «Use Nikon approved card. 1183 cord Check that contacts are] vil clean.
PY LB The Appendix covers the following topic Exposure Program (Mode P) 15 Memory Card Gadgetry and image 15 Bracketing Programs 157-135] Finis Tuning and C Oik Temperature TER Flash Range, Aperture, and Sensitivity 7 eases That Can Be Used with the Blt In Flash 21 Supported Standards 21 Exposure Program {Mode P) The exposure program for mode Bis shown in the following graph: wma 150 200 lens with mausoleums aperture of #714 and pasture Sims £1.
Memory Card Capacity and image Quality/Size The following table shows the approximate number of pictures that can be stored card at different image quality and size settings. 207 Ad NEF WINNIPEG Fine? 35 WINNIPEG Notional* 9 sleiglzlicialzic WEF PEG Basic +? NEF ad 650 337 578 00 76 12 850 57 07 Ti is S 0.33 HE it 10s. a0 approximate.
Bracketing Programs The following bracketing programs are available when WB Bracketing is detected for Custom Setting 5 (Auto BKT Set), +3F 1 TIES FIFE EET FET +07 mut SET rT qF 3% 0,4, 0,12, ill fon
© ema; 198 The programs are available when AE & Flash or Flash Only is selected far Custom Setting 5 (Auto BKT Set) depend on the option selected for Custom Set ting b3 (EV Step) 1/3 Step Defected for £V Step F303 TIGHT IF 157 “IFA SET 3 FLT : y 3,357 FoF : : 0,1 IRE 0,63 “FFT 2 EEE G, FEI : ; FAT : z 6,207,407 BFE FEISTY SEE GTA H07 508 BEE 3 41,30 EET 7 0-708 S08, 07,40 FETE : HE ; 30,10, 410,720,430 GIRT TINE J HET 10,07, 03, #03, 407,410,413 GETS rear : i 13,0 H07 AT ¥30,43 FF Te i O10, 410,730,730, +41
Fine-Tuning and Color Temperature Approximate color temperatures for settings other than A (auto) are given below (values ray differ from color tem perk rues given by photo color meters): ste) Biogen 88001 Lung among then my ary different types of fluorescent | it source, fang fom Jove aperture stadium light Reinterpretation Merrily-vanor amps. Flash Range, Aperture, and Sensitivity Flash range varies with sensitivity (50 equivalency} and aperture, 181 2 1221251381300 3 4 51.
Lenses That Can Be Used with the Built-in Flash The built-in flash can be used with any CPU lens with a focal length of 18-300 mm. Note that the flash may be unable to fight the entire subject if the allowing lenses are not used at or above the minimum ranges given below. pr i EE ARSED 17-3 mn (250, minim [LEE Fi EH TREE A HERE F [0118-35 mm Tummy TSUNAMI in SEER Siva n ARSED 28-70mm 250 38mm 1Omf3R 3in The bui focal leg « Ai 50-300 35am and above » AED 50-300 ein £4.5: use at 105 mm and above I.
© (pel Supported Standards DCF Version 2,0: Design Rule for Camerapeople System (DCF) is standard widely used in the digital camera industry to ensue compatibility among different makes of came. POOF: Digital Print Order Format {POOF Is an industry-wide standard that allows pictures to bie printed from print orders stored on the memory card Enif version 2.21: The D200 supports Enif (Exchangeable Image File Format for Digital Still Cameras) version 2.
J] Er G50) Firmware upgrades Firmware Cory be Uploaded ty ube PY es CRT ed and Traditional, GULCH, Haggish, 1 German, Italian.
EN-Else Rechargeable Li-ion Battery E™ Rechargeable BOIL (On Battery [ TA SDD AN FETE oxi deviate 39.
Menus TE PLAYBACK, 135-112 Delete, 133-134 Playback Folder; 135 Side Show, 135-136 Hide mage, 157-138 print Set. 139-14) Display Mode, 141 Image Review. 141 After Delete, 142 Rotate Tall, 142 CH SHOOTING MERE, 124-152 Shooting Mani Bank, 125-126 Menu Reset. 127 Folders, 128 File Naming. 120 Optimize Image, 45-49 Color Space, 50 Image Quality, 16-23 image Size, 32 JPEG Compression, 30 Raw Compression, 71 White Balance, 35-41 Long Exp. NR. 131 High ISO NR, 131 150 Sensitivity, 33-54 Image Overlay.
Nikon No reproduction in any form of this manual, in whole or in part (except for brief quotation in critical articles or reviews), may be made without written authorization from NIKON CORPORATION. NIKON CORPORATION Fuji 84.
» Return this card to register your purchase and enter our +» One winner of dollars + Due winner of dollars *» Five winners of dollars each « Register online at
pis pmo by Annie J er mac Brn] griffons. tw and $4 0s pre: a Pre vf SELVES Like 500) a he 1 ris $550 seep gins fag 18, 5 ni ends Receiver 31, 7004. Teeter by completing his product Dots, and te words Give Away V wd mai 1 PO. Sox 175091, Det He ivi ads, Jail br slowness ruses. A arr 200. st har ais collie vin congas. 0s of iin Cpe on he paralysis of eight nitrite tiv os EE Jim or io 15. residents at oat 18 oats ig.
Please send products and other | | | Fri Cross correspondence to: fr, Nikon Inc. Po Tic wt 1300 Walt Whitman Rd. a Melville, NY 11747 posts Aun: Marketing Services Department VIOL-01 Nikon PO BOX 173031 DENVER CO 80217-3031 Heddthoahbadbhod ed Blhoalloadlothend bell Please fold Ere Please check all that apply ta your household. 01 [3 Stop by Caterpillar a5. [7 Own Com pct Disc Player Subscribe fo en Intensification Service 02. [1 Stop via the fencer 06. C1 Haves Dog Speak Spanish 03.
NIKON DIGITAL IMAGING LIMITED WARRANTY THIS 1S YOUR NIKON ING. ONE YEAR LIMITED WARRANTY (VALID IN THE CONTINENTAL UNITED STATES, ALASKA, HAW AH, CENTRAL AND SOUTH AMERICA, AND THE CARIBBEAN. YOU MUST PRESENT THIS FORM TOGETHER WITH PROOF OF PURCHASE AND FROUFROU OF PURCHASE DATE (BILL OF SALE) TO OBTAIN WARRANTY SERVICE. ‘This Nikon Digital Imaging Product is warred by Nikon Inc.