
User Guide


Quick Start Guide
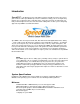
Now that you have registered, launch SpeedEDIT by double-clicking the desktop icon.
The following section is designed to orient you to some of SpeedEDIT’s unique features. Veteran
NewTek editors are likely familiar with many of the following concepts and can review the detailed
user manual online in the SpeedEDIT Documentation folder. If this is your first venture into a
NewTek video editor, it would help to go through the following steps so you can quickly benefit
from the streamlined workflow.
In this chapter, we will take a short sample project from acquisition to editing, and then on to
rendering and final output, covering the following topics:
• Scene-based capture from DV or HDV camera or deck
• Rapid arrangement of clips in Storyboard
• Adding and adjusting audio clips
• Inserting and modifying transitions
• Utilizing the linked Timeline/Storyboard dual view
• Real-time visual clip positioning
• Using Tool Shed to recall motions
• Inheriting clip settings
• Keying video clips
• Color selection and replacement
• Use of Tool Shed markers for quick cuts
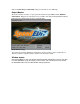
Launch SpeedEDIT
If you haven’t already, launch SpeedEDIT by selecting Start > NewTek >
SpeedEDIT or double-clicking on the SpeedEDIT icon on your desktop. If
there’s not a desktop icon, it’s probably because you declined that setting
during setup, but you can right-click and drag the SpeedEDIT icon to your
desktop for easier access for the next session.
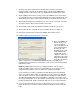
Set Project settings
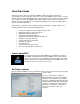
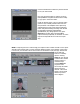
Upon opening SpeedEDIT, you are greeted with a list of recent projects and a short list of popular
project settings.
The most common project settings are
divided by NTSC (The Americas) and PAL
(Europe & Asia) standards. each standard
offers both standard-definition (DV, DV 16:9)
and high-definition (HDV 720p, HDV 1080i)
resolutions for editing. This starting point is
important, as it determines how inserted
video is treated in both aspect and
resolution.