
User manual
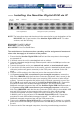


17
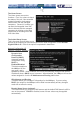
If you have multiple units to upgrade, you may choose the Get latest version button that
will not attempt to upgrade the unit directly, but will instead fetch the required file. This file
can be uploaded to multiple units manually. You may also choose Reboot Myself at the
bottom of the screen to restart the unit without powering on and off.
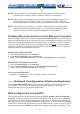
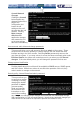
Manual Upload
Enter the name of the firmware file that you received from NewStar into the field provided
(or use the Browse... button). Press Start Upload and wait until a successful upload
message is shown.
NOTE: Remember the following during the firmware upgrade…
y Do NOT turn off power to unit before this operation completes successfully.
It may take several minutes to write to flash memory.
y The unit will sometimes reboot as part of the upgrade procedure, depending
on which system component is upgraded. You will have to reconnect and re-
login in those cases.
y Wait at least two minutes after pressing Start. Do not assume the upload
did not work. There is no status indicator bar to show the progress of the
upload. The upload could simply be slow.
y Each file that is distributed upgrades a different component of the system.
Therefore, be sure to apply all files you are given as part of an upgrade. The
system knows what to do with each file you give it, and they are checked for
validity before being applied.
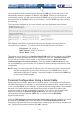
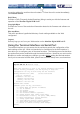
Software Options Upgrade
Certain firmware features may be offered separately from the base unit, in order to reduce
the initial cost for the NewStar Digital KVM via IP.
NOTE: If you wish to upgrade after the system is in operation, go to the Manage Firmware
page and scroll down to the section entitled Purchase Options.
Look for a unique code, like the following one: 4-C80C-B960-1-0
If you provide this code to the technical support department, they can give you an unlock
code that will open any feature you request. Types in the code provided, exactly, into the
area provided and click “Submit”. The new features opened by the code will be enabled
immediately, but you may
need to reboot the unit to
begin using certain
features.
Status Screen
This screen displays a
system security log,
various system settings,
and the ability to generate
a copy of the system
configuration in plain text
format.
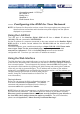
Port Numbers
This table allows you to change TCP port values for services available on the unit. By
default, they are factory-set to common Internet values. You may wish to enhance security
by disabling services that you will not use with the unit. To disable a service, change its
port number to 0. When you have made any necessary changes, click Commit Changes