MPEG-4 Video Recorder_UM_EN.
MPEG-4 Video Recorder_UM_EN.book Page ii Monday, June 19, 2006 8:22 PM Preface Information in this document has been carefully checked for accuracy; however, no guarantee is given as to the correctness of the contents. The information in this document is subject to change without notice. This document contains proprietary information protected by copyright.
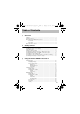
MPEG-4 Video Recorder_UM_EN.book Page iii Monday, June 19, 2006 8:22 PM Table of Contents 1 Overview Features ................................................................................................ 1 Package contents .................................................................................. 2 About the Neuros MPEG-4 Recorder 2 ................................................. 3 Front view .....................................................................................
MPEG-4 Video Recorder_UM_EN.book Page iv Monday, June 19, 2006 8:22 PM Quick setup .................................................................................24 Timer record ............................................................................... 25 Programs .............................................................................. 25 Start and Stop Times ............................................................ 25 Frequency ...........................................................
MPEG-4 Video Recorder_UM_EN.book Page 1 Monday, June 19, 2006 8:22 PM 1. Overview Congratulations on purchasing the Neuros MPEG-4 Recorder 2. Now you can enjoy quality multimedia anywhere you go and record your favorite video programs from a variety of video sources. The Recorder 2 also plays back your favorite audio tracks, and displays photos and video on your TV. Refer to this user manual for detailed descriptions about the product and instructions for using it.
Package contents MPEG-4 Video Recorder_UM_EN.
MPEG-4 Video Recorder_UM_EN.book Page 3 Monday, June 19, 2006 8:22 PM Refer to the following sections for information about the hardware components of the Recorder 2.
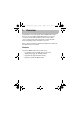
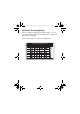
About the remote control MPEG-4 Video Recorder_UM_EN.book Page 4 Monday, June 19, 2006 About the remote control Icon Description 4 1. Turns on the power 2. Switches between NTSC and PAL system 3. Increases the volume 4. Enters the setting menu (Note:settings menu options vary depending on when selected) 5. Decreases the volume 6. Scrolls left 7. Mutes all sound 8. Zooms out 9. Start and stop recording 10. Rewinds playback of video and audio files 11.
MPEG-4 Video Recorder_UM_EN.book Page 5 Monday, June 19, 2006 8:22 PM About the remote control Icon Description NTSC PAL AB 13 14 15 16 13. Returns to the top menu 14. Repeats playback of selected audio/video file. 19 20 15. Returns to the previous menu 21 22 23 24 16. Scrolls up 17. Scrolls right 18. Confirms selection of menu item 19. Zooms in 20. Scrolls down 21. Fast Forwards playback of video and audio files 22. Plays or pauses playback of photo, video and audio 23.
MPEG-4 Video Recorder_UM_EN.book Page 6 Monday, June 19, 2006 8:22 PM Sticker for Recording Setting Before recording for target player (TV, PDA or PSP...), user can refer to the sticker (as picture shows below) for the setting including resolution and quality. Please refer to page 21 to setup the recording format.
MPEG-4 Video Recorder_UM_EN.book Page 7 Monday, June 19, 2006 8:22 PM 2. Getting started This chapter describes the preliminary steps required to set up the Recorder 2 and how to make connections before starting to use the device. Installing the remote control battery Follow these instructions to insert the remote control battery: 1. Push in the clip at the side of the battery holder. 2. Pull battery holder out. 3. Insert the battery as shown, while noting the correct polarity. 4.
Connecting power MPEG-4 Video Recorder_UM_EN.book Page 8 Monday, June 19, 2006 8:22 PM Connecting power Connect the power adaptor to the DCin socket on the rear panel of the Recorder 2. Plug the other end of the adaptor into a power outlet. Turning on the Recorder 2 Once the Recorder 2 is plugged in, the green power LED turns on. Press the button on the remote and the system turns on. Press the button again to turn off the Recorder 2.
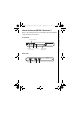
MPEG-4 Video Recorder_UM_EN.book Page 9 Monday, June 19, 2006 8:22 PM Inserting the Compact Flash (CF) or 1"Micro Drive Card Inserting the Compact Flash (CF) or 1"Micro Drive Card Push the CF card or Hitachi 1" Micro Drive into the CF card slot until it is firmly in place. To remove the card, grip the CF card and gently pull. Note1: The Hitachi 1"Micro Drive should be formatted using the Recorder 2 before using (See Page 22).
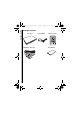
Page 10 Monday, June 19, 2006 8:22 PM Inserting the MS Duo/Pro Duo, MMC or SD Series Card Insert the card into the card slot with the metal contacts going in first and facing up, until the card is firmly in place. The beveled corner of the card must be away from you and to the right as the card is inserted. To remove the card, grip the card and pull gently. O MS See diagram below for proper adapters: CF INSERT MMCmobile 512 MB 1.0 GB microSD/TransFlash to SD Adapter PUSH PUSH 128 MB 1.
MPEG-4 Video Recorder_UM_EN.book Page 11 Monday, June 19, 2006 8:22 PM Connecting to a TV (viewing only) Connecting to a TV (viewing only) Connect the A/V connectors (red, white, and yellow) of the A/V cable, to the corresponding input sockets on the TV. Connect the other end to the AV Out socket at the back of the Recorder 2.
Connecting to a TV, DVD player, VCR or camcorder (recording) MPEG-4 Video Recorder_UM_EN.book Page 12 Monday, June 19, 2006 8:22 PM Connecting to a TV, DVD player, VCR or camcorder (recording) Connect the A/V connectors (red, white, and yellow) of the A/V cable to the corresponding output connectors on the cable box, satellite receiver, VCR, DVD player, camcorder etc. Connect the other end to the AV In socket at the back of the Recorder 2.
MPEG-4 Video Recorder_UM_EN.book Page 13 Monday, June 19, 2006 8:22 PM Note: Different regions of the world use different TV output formats. For example, the U.S. uses NTSC and much of Europe uses PAL. Depending on your region, you may need to change the TV output from NTSC to PAL. If you have a color TV and only black and white is visible when the Recorder 2 menu is visible (the picture may also appear somewhat unstable), you may need to change the TV output as detailed below.
Confirming/Selecting the correct TV output MPEG-4 Video Recorder_UM_EN.book Page 14 Monday, June 19, 2006 8:22 PM 1. Highlight the Setup menu from the main menu screen using the buttons. 2. Press to access the Setup menu options. 3. You should see TV Output as one of the options along the left side. The currently selected format (NTSC or PAL) will be displayed across from it on the right. If this is the desired format, you are finished with this step. Simply exit the menu by pressing the button.
MPEG-4 Video Recorder_UM_EN.book Page 15 Monday, June 19, 2006 8:22 PM 3. Using the Neuros MPEG-4 Recorder 2 Now that you have set up the Recorder 2, you are ready to start using it to view your favorite images, listen to audio tracks, watch videos, and record videos. This chapter provides detailed instructions for these tasks and for navigating through the OSD (On Screen Display) menu. Viewing pictures John_peel_~ _40896894_~ PHOTO The Recorder 2 is able to display.
Viewing pictures MPEG-4 Video Recorder_UM_EN.book Page 16 Monday, June 19, 2006 8:22 PM Photo Settings menu Slide Show usic Folder MUSIC Delete Files On Selected PHOTO To access the Settings menu related to viewing photos, press the while in the main Photo menu. The following three functions will appear: SLIDESHOW To set up a photo slide show, follow the procedure below: 1. Use the buttons to scroll to and highlight the Slideshow option. 2.
MPEG-4 Video Recorder_UM_EN.book Page 17 Monday, June 19, 2006 8:22 PM 6. While playing you can use the picture. and to zoom out and in on 7. Pressing will show the following: File information, Background Volume, Current Date and Time, and the zoom amount. BACKGROUND MUSIC 1. Use the buttons to highlight the Music function. 2. Use the buttons to turn ON or OFF the background music during the slide show . DELETE FILES To delete a file: 1.
Listening to music MPEG-4 Video Recorder_UM_EN.book Page 18 Monday, June 19, 2006 8:22 PM Listening to music <__> MUSIC The Recorder 2 is able to Play. WMA and .MP3 audio file formats. Playing audio To play an audio file: 1. Highlight the Audio menu icon and press list. to access the file 2. Use the buttons to go to the desired file and press play the file.
MPEG-4 Video Recorder_UM_EN.book Page 19 Monday, June 19, 2006 8:22 PM Repeat Delete Files Listening to music Setting menu for Music Folder MUSIC Selected MUSIC To access the Settings menu for Music press while in the main Music menu. The following two functions are available: Repeat Use to Choose Off, Single, Folder or All, then press . Select Off to turn the repeat function off, All repeats all tracks, Single will repeat only a single track, and Folder will repeat all tracks in the folder.
Listening to music MPEG-4 Video Recorder_UM_EN.book Page 20 Monday, June 19, 2006 8:22 PM You can un-select a highlighted file by hitting a second time. 2. Once you have selected all the files you wish to delete, press the button to display the Settings menu for the Music mode. Then scroll to Delete Files to highlight the word "Selected", then press . 3. Use the keys to confirm YES or NO and press . 4. If multiple files are selected, they will all be deleted at once.
MPEG-4 Video Recorder_UM_EN.book Page 21 Monday, June 19, 2006 8:22 PM Watching videos Watching videos beer can c~ computer_h~ glass_pane~ VIDEO The Recorder 2 is able to play.ASF, .AVI and .MP4 image file formats. Playing videos 1. Highlight the Video menu and press to access the file list. 2. Use the to go to the required file and press to play the file.
Watching videos MPEG-4 Video Recorder_UM_EN.book Page 22 Monday, June 19, 2006 8:22 PM Setting menu for Video Folder Repeat Delete Files MUSIC Selected VIDEO To access the Video Settings menu for Video, press while in the main Video menu. The following two functions are available: Repeat Use Press to choose between Off, Single, Folder or All Then .
MPEG-4 Video Recorder_UM_EN.book Page 23 Monday, June 19, 2006 8:22 PM the button to display the Settings menu for the Video mode. Then scroll to Delete Files to highlight the word "Selected", then press . 3. Use the keys to confirm YES or NO and press . 4. If multiple files are selected, they will all be deleted at once. You can un-select a highlighted file by hitting a second time. 23 Watching videos You can un-select a highlighted file by hitting a second time. 2.
Recording video MPEG-4 Video Recorder_UM_EN.book Page 24 Monday, June 19, 2006 8:22 PM Recording video Record menu Resolution Quality Quick Setup 368x208 MUSIC Normal Off Timer Record On Auto Record Off Storage CF RECORDER Resolution To select a resolution: 1. Highlight the record section and press Record Menu. to access the 2. Use the to choose among the resolution settings.(see "Selecting the right recording resolution setting "on page 27").
MPEG-4 Video Recorder_UM_EN.book Page 25 Monday, June 19, 2006 8:22 PM 01 05 06 00 00 02 2000 03 00 00 CF 00 00CF 2000 00 00 CF MUSIC 04 Off Previous Save Recording video Timer record Exit Next RECORDER To access the timer record function, scroll down to highlight Timer record and press the button. The screen is divided into functional areas: PROGRAMS The Recorder 2 has 6 available recording programs. Use the following settings to setup each program.
Recording video MPEG-4 Video Recorder_UM_EN.book Page 26 Monday, June 19, 2006 8:22 PM FREQUENCY The frequency function allows you to choose when this recording is activated. NOTE: The unit must be on for Timer Recording to work. The unit will not turn on automatically for timer recording. 1. Use the or Weekly. 2. Press buttons to choose between OFF, Once, Daily to save. Note: Timer recordings are deactivated while the Recorder 2 is being used for playback.
MPEG-4 Video Recorder_UM_EN.book Page 27 Monday, June 19, 2006 8:22 PM The 320x240,176x120 and the 640x480 modes record in a 4:3 aspect ratio (which is standard screen format found on regular DVD's and most TV's). The 320 x 240-30fps mode is the resolution typical of most handhelds, and the files are fairly compact and will play back on the greatest number of devices. The 640x480 mode provides the highest resolution but also requires the most data storage space.
Recording video MPEG-4 Video Recorder_UM_EN.book Page 28 Monday, June 19, 2006 8:22 PM 176x120, 320x240-3GP and 176x120-3GP are designed for Mobile Phones. Please refer to your Mobile Phones's manual for details concerning supported formats and resolutions. Note: As of the date of this printing, the PSP would not allow zooming on 368x208 resolution files. It is hopeful that Sony will correct this shortcoming in future firmware revisions.
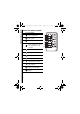
MPEG-4 Video Recorder_UM_EN.book Page 29 Monday, June 19, 2006 8:22 PM Setup menu Setup menu Date M/D/Y 07 / 21 / 2001 Time H:M:S 20 : 57 : 35 Language Factory Reset Reset v01.03.0022 English Format Disk CF TV Output PAL Upgrade Devic~ Upgrade SETUP SETUP Scroll using the buttons to highlight the setup menu, then press to enter. There are seven setup menu options. DATE AND TIME To change the date and time: 1. Press to highlight a selection. 2. Use the buttons to change the value. 3.
Setup menu MPEG-4 Video Recorder_UM_EN.book Page 30 Monday, June 19, 2006 8:22 PM FORMAT DISK To format the memory card: 1. To format the memory card, scroll down to the Format disk section and Press . 2. Select YES to confirm formatting or NO to cancel. TV OUTPUT To select the TV output: 1. Use the buttons to choose between NTSC or PAL. 2. The button on the remote control will provide the same function. FACTORY RESET To restore all settings to the factory default: 1.
MPEG-4 Video Recorder_UM_EN.book Page 31 Monday, June 19, 2006 8:22 PM File browsing File browsing <__> <101MNV01> beer can c~ computer_h~ glass_pane~ File Browser The file browser allows you to view the contents of both the Compact Flash card and the MS/SD/MMC card at the same time. By pressing you can select a file.
File browsing MPEG-4 Video Recorder_UM_EN.book Page 32 Monday, June 19, 2006 8:22 PM COPY The files can be copied from CF card to MS, SD or MMC card or vice versa. Also, the files can be copied to a different folder of the same memory card. 1. Files copied to a different memory card In the File Browser, the left column is the source memory card and right column is the destination. Switch the type of card in the left column in the File Browser by pressing .
MPEG-4 Video Recorder_UM_EN.book Page 33 Monday, June 19, 2006 8:22 PM Playing back files recorded with the Recorder 2. You can use the Recorder 2 to record video for playback on the TM Sony PSP ,Neuros 442 portable media player / recorder, the iPod TM TM video, the Nintendo Gameboy Micro ,and many handhelds. The Recorder 2 files can also be played back on your PC or laptop running any major operating system. Follow the steps below for best results using the various playback devices. I.
Playing back recorded files: MPEG-4 Video Recorder_UM_EN.book Page 34 Monday, June 19, 2006 8:22 PM screen. As of the date of this printing, the PSP would not allow zooming on 368x208 resolution files. It is hopeful that Sony will correct this shortcoming in future firmware revisions. II. Neuros 442 Portable Media Player/Recorder The Neuros 442 is a powerful portable media player that can both play and record videos, photos, and music.
MPEG-4 Video Recorder_UM_EN.book Page 35 Monday, June 19, 2006 8:22 PM Note: Only files recorded in the 320x240-30fps or 368x208 modes can be played back on the iPod Video (the iPod Video cannot play any file with resolution greater than 480x480). iPod Video Playback Procedure: 1. Install the "iTunes" driver on your PC (if you are already using iTunes with your iPod Video, you have already done this and can skip this step). 2.
Playing back recorded files: MPEG-4 Video Recorder_UM_EN.book Page 36 Monday, June 19, 2006 8:22 PM 4.Click on the "Edit" drop-down menu on the iPod Video, then select "Preferences". 5. When the window shown below appears, click on "Video" item. Next select "Automatically update all videos", then confirm "OK". 6. Click on the "File" drop-down menu, then select "Add File to Library".
MPEG-4 Video Recorder_UM_EN.book Page 37 Monday, June 19, 2006 8:22 PM Playing back recorded files: 7. Next, highlight the MPEG-4 video files you wish to load onto the iPod Video.
Page 38 Monday, June 19, 2006 8:22 PM Playing back recorded files: MPEG-4 Video Recorder_UM_EN.book 8. Wait while the iTunes utility loads the selected files onto the iPod.
MPEG-4 Video Recorder_UM_EN.book Page 39 Monday, June 19, 2006 8:22 PM 10. Click on the "File" drop-down menu again, then select "Update 'Username's' iPod". 39 Playing back recorded files: 9. When loading is complete, the loaded files will be listed in the file category of iTunes.
Playing back recorded files: MPEG-4 Video Recorder_UM_EN.book Page 40 Monday, June 19, 2006 8:22 PM 11. Safely disconnect the Video iPod from your PC by following the steps below. .
MPEG-4 Video Recorder_UM_EN.book Page 41 Monday, June 19, 2006 8:22 PM 13. Now you can enjoy the video programs YOU recorded, anytime and anywhere you want. 41 Playing back recorded files: 12. Enter the "Videos" mode of the iPod to play back the loaded files.
Playing back recorded files: MPEG-4 Video Recorder_UM_EN.book Page 42 Monday, June 19, 2006 8:22 PM IV. Nintendo Game Boy Micro The Nintendo Game Boy Micro can support MPEG-4 files with resolution up to 640x 480, so it can play back recordings from all Recorder 2 resolution settings (320x240-30fps, 368x208, and 640x480).
MPEG-4 Video Recorder_UM_EN.book Page 43 Monday, June 19, 2006 8:22 PM How files recorded with the Recorder 2 are transferred to a handheld and whether or not they will play without conversion will depend on the specific handheld. Files can be easily transferred to those that will accept CF, MS, SD, MMC cards and mini-SD, RS-MMC, T-Flash (in the same manner as for the PSP above. Once the files are on the handheld, some may play right away. Others may not.
MPEG-4 Video Recorder_UM_EN.
MPEG-4 Video Recorder_UM_EN.book 4. Page 45 Monday, June 19, 2006 8:22 PM Firmware Upgrade Instructions Neuros may provide firmware upgrades from time to time to fix bugs, add enhancements, etc. You can download these upgrades (usually for free) by going to http://neurostechnology.com/support/ support.asp and following the links for upgrades. The date the latest firmware upgrade was posted will be shown for each Neuros product. You can also see the version number by clicking on the upgrade link.
MPEG-4 Video Recorder_UM_EN.book Page 46 Monday, June 19, 2006 8:22 PM 4. Scroll to the Setup mode by pressing right arrows on the remote, then select the Setup mode by pressing the button. The Setup options should now be displayed. 5. Scroll through the Setup menu to highlight the Firmware Upgrade option, then press the button to start the firmware upgrade. A "Clock" icon will appear on the screen while the firmware is being upgraded.
MPEG-4 Video Recorder_UM_EN.book Page 47 Monday, June 19, 2006 8:22 PM 5. Contact Us You really are important to us. Call us and you'll be amazed how quickly and easily you'll be connected to a real live person with a genuine interest in your satisfaction. Try it. 866-5-NEUROS (866-563-8767) Please use the following e-mail addresses to reach individuals of the Neuros team: General Information or Comments: info@neurostechnology.com Customer Support: support@neurostechnology.
MPEG-4 Video Recorder_UM_EN.
MPEG-4 Video Recorder_UM_EN.book Page 49 Monday, June 19, 2006 8:22 PM 6. Appendix FCC Certification This equipment has been tested and found to comply with the limits for a Class B digital device, pursuant to part 15 of the FCC Rules. These limits are designed to provide reasonable protection against harmful interference in a residential installation.
MPEG-4 Video Recorder_UM_EN.book Page 50 Monday, June 19, 2006 8:22 PM CE Notice (European Union) Marking by the symbol indicates compliance of this recorder to the EMC Directive of the European Union. Such marking indicates that this recorder meets the following technical standards: EN 55013:2002+A1:2003-”Limits and methods of measurement of radio disturbance characteristics of broadcast receivers and associated equipment”.
MPEG-4 Video Recorder_UM_EN.book Page 51 Monday, June 19, 2006 8:22 PM Troubleshooting Please visit the website www.neurostechnology.com to get the latest trouble shooting information and FAQ about the Recorder 2. Symptom Possible cause Possible remedy No video display. Unit has no power. Ensure that unit is plugged in correctly. You should see a green LED on the front panel if it is plugged in correctly. Refer to “About the Neuros MPEG-4 Recorder 2” on page 3.
MPEG-4 Video Recorder_UM_EN.book Page 52 Monday, June 19, 2006 8:22 PM Specifications Video encoder Application Formate Video decoder 1) MPEG-4 SP, MPEG-1 Layer 3 (MP3), 30 fps at D1 resolution 2) DivX 3.11 @ CIF resolution; 4.x; 5.
MPEG-4 Video Recorder_UM_EN.book TV system Page 53 Monday, June 19, 2006 8:22 PM Video Out Format Power source External 5V AC/DC adaptor (100 ~ 240V, 1.
MPEG-4 Video Recorder_UM_EN.