
Installation and Operation Manual Audio/Video Matrix Switch SM-nXm-C5AV-LCD

NTI VEEMUX AUDIO/VIDEO MATRIX SWITCH VIA CAT5
28
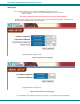
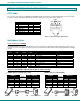
Appendix C- Distances and Resolutions for CAT5/CAT5e and CAT6 Cables
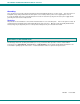
CABLE DISTANCE (feet) RESOLUTION
CAT5/CAT5e (UTP) 600 1024x768 at 60Hz
CAT5/CAT5e (UTP) 400 1280x1024 at 60Hz
CAT5/CAT5e (UTP) 300 1600x1200 at 60Hz
CAT5/CAT5e (UTP) 100 1920x1440 at 60Hz
CAT6 (UTP) 300 1024x768 at 60Hz
CAT6 (UTP) 200 1280x1024 at 60Hz
CAT6 (UTP) 100 1920x1440 at 60Hz
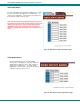
Appendix D- Product Dimensions
CONFIGURATION SIZE (In.) WxDxH
SM-8X8-C5VA-LCD 19x12x1.75
SM-8X16-C5VA-LCD 19x12x1.75
SM-16X8-C5VA-LCD 19x12x1.75
SM-16X16-C5VA-LCD 19x12x3.5
SM-32X8-C5VA-LCD 19x12x3.5
SM-32X16-C5VA-LCD 19x12x3.5
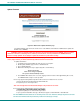
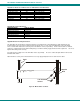
Appendix E- Rack mounting Instructions
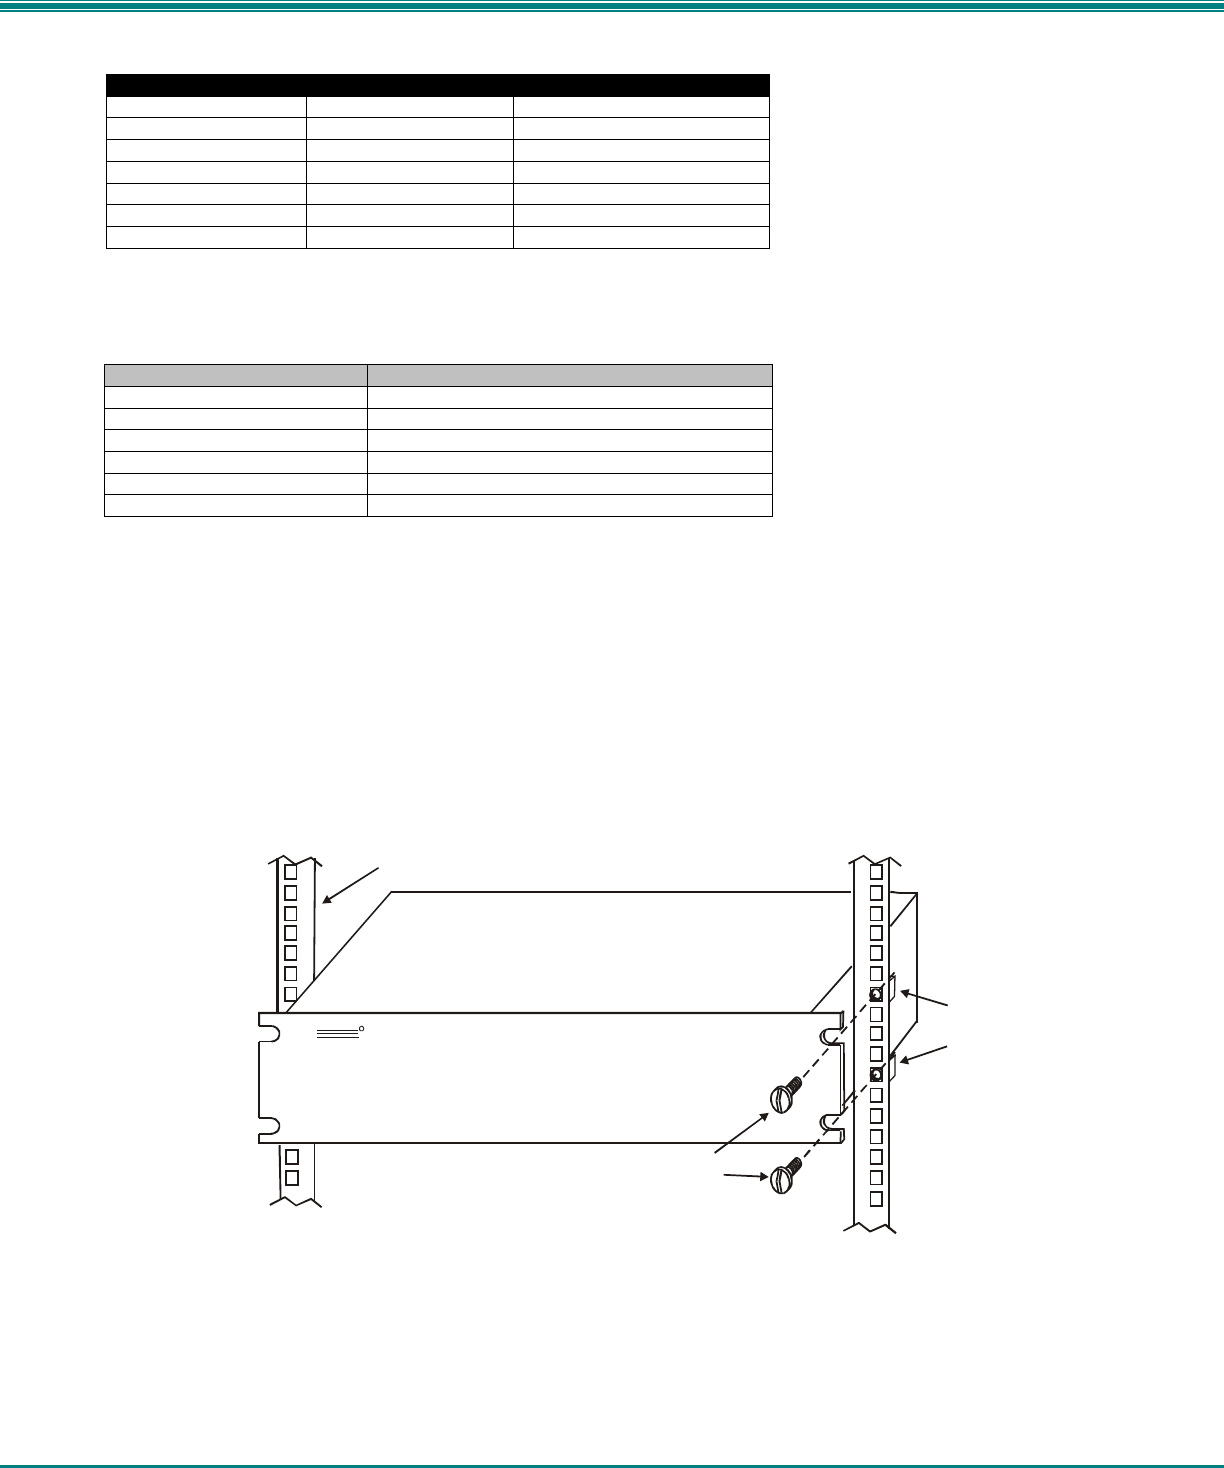
This NTI switch was designed to be directly mounted to a rack and includes a mounting flange to make attachment easy.
Install 4 captive nuts to the rack in locations that line up with the holes (or slots) in the mounting flange on the NTI switch.
Then secure the NTI switch to the rack using four 3/16" diameter screws (not provided). Each screw should be of sufficient
length to go completely through the NTI mounting flange, rack frame and fully engage all threads in the captive nut. Be sure to
tighten all mounting screws securely.
Do not block power supply vents in the NTI switch chassis (if provided) . Be sure to enable adequate airflow in front of and
behind the NTI switch.
Attach all cables securely to the switch and where necessary supply adequate means of strain relief for cables.
Figure 33- Mount Switch to a Rack
1275 Danner Drive
Aurora Ohio 44212
NTI
NETWORK
TECHNOLOGIES
INCORPORATED
Tel: 330-562-7070
Fax: 330-562-1999
R
www. nti 1.c om
Rack
3/16” Diameter
Screws
Captive
Nuts