
User Manual

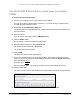
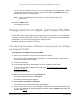
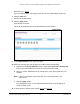

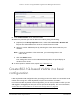

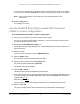
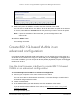

Table Of Contents
- 8-Port or 16-Port 10-Gigabit/Multi-Gigabit Smart Managed Plus Switch with 1 Copper/SFP+ Combo Port
- Contents
- 1 Hardware Setup
- 2 Getting Started
- Configure the switch
- Access the switch using a web browser
- Access the switch with the ProSAFE Plus Utility
- Use the NETGEAR Switch Discovery Tool to access the switch
- Use the NETGEAR Insight App to discover and register the switch
- Change the language of the local browser interface
- Change the password
- Register your product
- 3 Network Settings
- 4 Optimize Performance With Quality of Service
- 5 Use VLANS for Traffic Segmentation
- 6 Manage and Monitor the Switch
- Manage flow control
- Manage the port speed
- Enable loop detection
- Manage Energy Efficient Ethernet and other power saving options
- Upgrade the firmware
- Reboot the switch
- Save the switch configuration
- Restore a saved switch configuration
- Restore factory default settings
- Enable port mirroring
- View switch information
- View the port statistics
- 7 Diagnostics and Troubleshooting
- A Supplemental Information

8-Port or 16-Port 10-Gigabit/Multi-Gigabit Smart Managed Plus Switch
Use VLANS for Traffic Segmentation User Manual59
9. Under each port to be added to a VLAN, enter the VLAN ID of the VLAN.
You can enter a VLAN ID from 1 to 4093. If all the VLANs share an uplink to the Internet
or servers, enter all in the VLAN ID field for the port that you want to use for the uplink.
Note: If ports are members of the same LAG, you must assign them to the
same VLAN.
10. Click the APPL
Y button.
Your settings are saved.
Create 802.1Q-based VLANs in an
advanced configuration
In an advanced 802.1Q-based VLAN configuration, you can assign ports on the switch to a
VLAN with an ID number in the range of 1–4093 and you can add tagged or untagged ports
to a VLAN. In addition, you can use port VLAN IDs (PVIDs). By default, all ports are untagged
members of VLAN 1.
Use the local browser interface to create 802.1Q-based
VLANs in an advanced configuration
To create 802.1Q-based VLANs in an advanced configuration:
1. Connect your computer to the same network as the switch.
You can use a WiFi or wired network connection, or connect directly to a switch that is
of
f-network using an Ethernet cable.
2. Launch a web browser.
3. In the address field of your web browser
, enter the IP address of the switch.
If you do not know the IP address of the switch, see
Access the switch using a web
browser on page 17.
The login window opens.