
User Manual
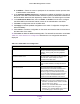

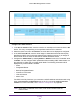
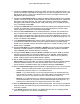
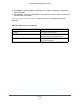
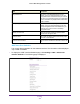
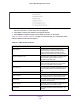
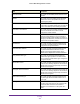
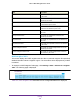
Table Of Contents
- M6100 Web Management User Guide
- Contents
- 1. Getting Started
- 2. Configuring System Information
- 3. Configuring Switching Information
- 4. Routing
- 5. Configuring Quality of Service
- 6. Managing Device Security
- 7. Monitoring the System
- 8. Maintenance
- 9. Help
- A. Default Settings
- B. Configuration Examples
- C. Notification of Compliance

Routing
272
M6100 Web Management User Guide
OSPF Area Range Configuration
To display the OSPF Area Range Configuration page, click Routing > OSPF > Advanced >
Area Range Configuration. The following page is displayed.
Configure the OSPF Area Range.
1. Enter the OSPF Area ID. An
Area ID is a 32-bit integer in dotted decimal format that
uniquely identifies the area to which a router interface connects.
2. Enter the IP Address for the address range for the selected area.
3. Enter the Subnet Mask for the address range for the selected area.
4. From the list in the LSDB T
ype field, select the type of Link Advertisement associated
with the specified area and address range. Options are: Network Summary or NSSA
External. The default type is Network Summary.
5. Configure the Advertise field by selecting Enable or Disable from the list. If you select
Enable, the address range is advertised outside the area via a Network Summary LSA.
The default is Enable.
6. Click Add to add the new address range to the switch.
7. Click Apply to send the updated configuration to the switch. Configuration changes take
ef
fect immediately.
8. Click Cancel to cancel the configuration on the screen and reset the data on the screen to
the latest value of the switch.
9. Click Delete to remove the specified address range from the area configuration.
OSPF Interface Configuration
To display the OSPF Interface Configuration page, click Routing > OSPF > Advanced >
Interface Configuration. The following page is displayed.