
User Manual


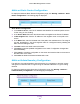


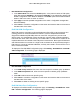


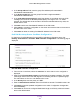

Table Of Contents
- M6100 Web Management User Guide
- Contents
- 1. Getting Started
- 2. Configuring System Information
- 3. Configuring Switching Information
- 4. Routing
- 5. Configuring Quality of Service
- 6. Managing Device Security
- 7. Monitoring the System
- 8. Maintenance
- 9. Help
- A. Default Settings
- B. Configuration Examples
- C. Notification of Compliance

Routing
360
M6100 Web Management User Guide
7. Click Update to update the page with the latest information on the switch.
Table 147, IPv6 PIM BSR Candidate Configuration describes the non-configurable data that
is displayed.
Table 147. IPv6 PIM BSR Candidate Configuration
Field Description
BSR Expiry Time (hh:mm:ss) Time (in hours, minutes and seconds) in which the learned elected bootstrap
router (BSR) expires.
IP Address Displays the IP address of the Elected BSR.
Next bootstrap Message (hh:mm:ss) Time (in hours, minutes, and seconds) in which the next bootstrap message
is due from this BSR.
Next Candidate RP Advertisement
(hh:mm:ss)
Time (in hours, minutes, and seconds) in which the next candidate RP
advertisement will be sent.
IPv6 PIM Static Rendezvous Point Configuration
Use this page to statically configure the Rendezvous Point (RP) address for one or more
multicast groups.
To display the IPv6 PIM Static RP Configuration page, click Routing IPv6 Multicast IPv6
PIM
Static RP Configuration. The following page is displayed.
IPv6 PIM Static RP Configuration
1. In the RP Address field, enter the IP address of the RP to be created or deleted.
2. Enter the Group Address of the RP to be created or deleted.
3. Enter the Group Mask of the RP to be created or deleted.
4. In the Override field, select the Enable or Disable option. Enable indicates that, if there is
a conflict, the RP configured with this option prevails over the RP learned by BSR.
5. Click Add to add a new static RP address for one or more multicast groups.
6. Click Apply to send the updated configuration to the switch. Configuration changes take
ef
fect immediately.
7. Click Cancel to cancel the configuration on the screen and reset the data on the screen to
the latest value of the switch.
8. Click Delete to remove the selected RP address.