
User Manual
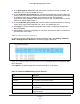
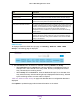


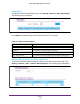
Table Of Contents
- M6100 Web Management User Guide
- Contents
- 1. Getting Started
- 2. Configuring System Information
- 3. Configuring Switching Information
- 4. Routing
- 5. Configuring Quality of Service
- 6. Managing Device Security
- 7. Monitoring the System
- 8. Maintenance
- 9. Help
- A. Default Settings
- B. Configuration Examples
- C. Notification of Compliance

Routing
348
M6100 Web Management User Guide
PIM Global Configuration
1. In the Admin Mode field, select the protocol of PIM in the router
. Possible values are
Disable, PIM-SM, or PIM-DM. The default is Disable.
2. Click Apply to send the updated configuration to the switch. Configuration changes take
ef
fect immediately.
3. Click Cancel to cancel the configuration on the screen and reset the data on the screen to
the latest value of the switch.
PIM SSM Configuration
While PIM employs a specially-configured Rendezvous Point (RP) router that serves as a
meeting junction for multicast senders and listeners, Protocol-Independent Multicast
Single-Source Multicast (PIM-SSM) does not use an RP. It supports only source route
delivery trees. It is used between routers so that they can track which multicast packets to
forward to each other and to their directly-connected LANs. The SSM service model can be
implemented with a strict subset of the PIM protocol mechanisms. Both regular IP Multicast
and SSM semantics can coexist on a single router, and both can be implemented using the
PIM protocol. A range of multicast addresses, currently 232.0.0.0/8 in IPv4 and FF3x::/32 in
IPv6, is reserved for SSM.
To display the Multicast PIM SSM Configuration page, click Routing
Multicast PIM SSM
Configuration. The following page is displayed.
PIM SSM Configuration
1. In the SSM Group
Address field, enter the source-specific multicast group ip-address.
2. In the SSM Group Mask field, enter the source-specific multicast group ip-address
mask.
3. Click Add to add a new source-specific group.
4. Click Cancel to cancel the configuration on the screen and reset the data on the screen to
the latest value of the switch.
5. Click Delete to delete an existing source-specific group.