
User's Manual

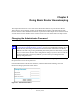


Table Of Contents
- NETGEAR Wireless Router Setup Manual
- Contents
- Chapter 1 About This Guide
- Chapter 2 Getting to Know Your NETGEAR Wireless Router
- Chapter 3 Connecting the Router to the Internet
- Prepare to Install Your Wireless Router
- First, Connect the Wireless Router to the Internet
- Now, Set Up a Computer for Wireless Connectivity
- Troubleshooting Tips
- Overview of How to Access the Wireless Router
- How to Manually Configure Your Internet Connection
- Using the Smart Setup Wizard
- NETGEAR Product Registration, Support, and Documentation
- Chapter 4 Optimizing Wireless Connectivity and Security
- Chapter 5 Doing Basic Router Housekeeping
- Chapter 6 Troubleshooting Common Problems
- Appendix A Technical Specifications
- Appendix B Preparing Your Network
- What You Need To Use a Router with a Broadband Modem
- Preparing Your Computers for TCP/IP Networking
- Configuring Windows 95, 98, and Me for TCP/IP Networking
- Configuring Windows NT4, 2000 or XP for IP Networking
- Configuring the Macintosh for TCP/IP Networking
- Verifying the Readiness of Your Internet Account
- Restarting the Network
- Glossary

NETGEAR Wireless Router Setup Manual
Doing Basic Router Housekeeping 5-3
February 2005
To restore your settings from a saved configuration file, enter the full path to the file on your PC or
click the Browse button to browse to the file. When you have located it, click the Restore button to
send the file to the wireless router. The wireless router will then reboot automatically.
Warning: Do not interrupt the reboot process.
Erasing the Configuration
It is sometimes desirable to restore the wireless router to original default settings. This can be done
by using the Erase function, which will restore all factory settings. After an erase, the wireless
router's password will be password, the LAN IP address will be
192.168.1.1, and the wireless
router's DHCP client will be enabled.
To erase the configuration, click the Erase button.
To restore the factory default configuration settings without knowing the login password or IP
address, you must use the Default Reset button on the rear panel of the wireless router. See
“Restoring the Default Configuration and Password” on page 6-7.
Upgrading the Wireless Router Software
The routing software of the wireless router is stored in FLASH memory, and can be upgraded as
new software is released by NETGEAR. Upgrade files can be downloaded from the NETGEAR
Web site. If the upgrade file is compressed (.ZIP file), you must first extract the file before sending
it to the wireless router. The upgrade file can be sent to the wireless router using your browser.
Note: Erasing the configuration will restore the factory default settings. When the router
is in the factory default state, the Smart Wizard installation assistant will automatically
connect to your browser. You can either go through the installation wizard again, or you
can bypass the wizard by following the instructions at “How to Bypass the Configuration
Assistant” on page 3-11.
Note: Before upgrading the wireless router software, use the wireless router backup
utility to save your configuration settings. Any wireless router upgrade will revert the
wireless router settings back to the factory defaults. After completing the upgrade, you
can restore your settings from the backup.