
User's Manual


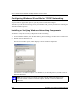
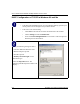

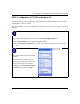
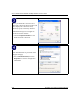
Table Of Contents
- Trademarks
- Statement of Conditions
- Federal Communications Commission (FCC) Compliance Notice: Radio Frequency Notice
- Canadian Department of Communications Compliance Statement
- CE Declaration of Conformity
- Contents
- Chapter 1 About This Manual
- Chapter 2 Introduction
- Chapter 3 Basic Installation and Configuration
- Observing Placement and Range Guidelines
- Default Factory Settings
- Understanding WG602 v2 Wireless Security Options
- Installing the 54 Mbps Wireless Access Point WG602 v2
- Two Ways to Log In to the WG602 v2
- Using the Basic IP Settings Options
- Understanding the Basic Wireless Settings
- Understanding Wireless Security Options
- How to Configure WEP Wireless Security
- How to Configure WPA-PSK Wireless Security
- How to Restrict Wireless Access by MAC Address
- Chapter 4 Management
- Chapter 5 Advanced Configuration
- Chapter 6 Troubleshooting
- Troubleshooting
- No lights are lit on the access point.
- The Ethernet LAN light is not lit.
- The Wireless LAN activity light is not lit.
- I cannot configure the wireless access point from a browser.
- I cannot access the Internet or the LAN with a wireless capable computer.
- When I enter a URL or IP address I get a timeout error.
- Using the Reset Button to Restore Factory Default Settings
- Troubleshooting
- Appendix A Specifications
- Appendix B Wireless Networking Basics
- Appendix C Network, Routing, Firewall, and Cabling Basics
- Appendix D Preparing Your PCs for Network Access
- Glossary
- Index

User’s Guide for the WG602 54 Mbps Wireless Access Point
Preparing Your PCs for Network Access D-3
If you need to add TCP/IP:
a. Click the Add button.
b. Select Protocol, and then click Add.
c. Select Microsoft.
d. Select TCP/IP, and then click OK.
If you need to add the Client for Microsoft Networks:
a. Click the Add button.
b. Select Client, and then click Add.
c. Select Microsoft.
d. Select Client for Microsoft Networks, and then click OK.
If you need to add File and Print Sharing for Microsoft Networks:
a. Click the Add button.
b. Select Client, and then click Add.
c. Select Microsoft.
d. Select File and Print Sharing for Microsoft Networks, and then click OK.
3. Restart your PC for the changes to take effect.
Enabling DHCP to Automatically Configure TCP/IP Settings
After the TCP/IP protocol components are installed, each PC must be assigned specific
information about itself and resources that are available on its network. The simplest way to
configure this information is to allow the PC to obtain the information from a DHCP server in the
network.
You will find there are many similarities in the procedures for different Windows systems when
using DHCP to configure TCP/IP.
The following steps will walk you through the configuration process for each of these versions of
Windows.