
Quick Reference Guide


ProSafe Wireless-N VPN Firewall SRXN3205 Reference Manual
7-18 Virtual Private Networking Using SSL
v1.0, January 2010
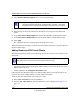
Adding a Policy
To add a policy, follow these steps:
1. Select VPN > SSL VPN from the main/submenu.
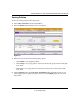
2. Select the Policies tab. The Policies screen will be displayed (see Figure 7-8 on this page).
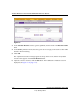
3. Make your selection from the following Query options:
• Click Global if this new policy is to exclude all users and groups.
• Click Group if this new policy is to be limited to a selected group.
Open the pull-down menu and choose the relevant group’s name.
• Click User if this new policy is to be limited to a selected user.
Open the pull-down menu and choose the individual user’s name.
4. Click Add. The Add Policies screen appears.
5. In the Add SSL VPN Policies section, review the Apply Policy To options and click one.
Depending upon your selection, specific options to the right are activated or inactivated as
noted in the following:
• If you choose Network Resource, enter a descriptive policy name in the Policy Name
field, and then select a Defined Resource and a relevant Permission (PERMIT or DENY)
from the pull-down menus.
Note: You should have already created the needed groups or users as described in
“Adding Authentication Domains, Groups, and Users” on page 8-1.
Figure 7-9