
User Manual
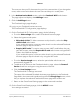

5. Under Security Options, select a WPA option:
•
WPA2-PSK [AES]
•
WPA-PSK [TKIP] + WPA2-PSK [AES]
The WPA2 option uses the newest standard for the strongest security, but some
older computers and WiFi devices cannot use WPA2. If your network includes old
computers and WiFi devices, select the WPA-PSK [TKIP] + WPA2-PSK [AES] radio
button.
The Password (Network Key) field displays.
6.
In the Password (Network Key) field, enter the network key (password) that you
want to use.
It is a text string from 8 to 63 characters.
7.
Write down the new password and keep it in a secure place for future reference.
8. Click the Apply button.
Your settings are saved.
Set Up a Guest Network With a Captive
Portal
A captive portal is an entry to a guest network that requires guests to view a splash page
and agree to terms and conditions before using the network. When using captive portal
guest networks visitors cannot see other devices that are connected and they cannot
access the local area network (LAN).
To set up a guest network with a captive portal:
1.
Launch a web browser from a computer or mobile device that is connected to your
Orbi network.
2. Enter orbilogin.com.
A login window opens.
3. Enter the admin user name and password.
The user name is admin. The password is the one that you specified the first time
that you logged in. The user name and password are case-sensitive.
The BASIC Home page displays.
4. Select Guest Portal.
The Guest Portal Settings page displays.
User Manual76Specify Network Settings
Orbi Pro