
User Manual


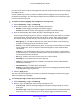
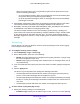
Table Of Contents
- S3300 Smart Managed Pro Switch
- Contents
- 1. Getting Started
- Getting Started with the NETGEAR Switch
- Switch Management Interface
- Connect the Switch to the Network
- Discover a Switch in a Network with a DHCP Server
- Discover a Switch in a Network without a DHCP Server
- Configure the Network Settings on the Administrative System
- Access the Management Interface from a Web Browser
- Understand the User Interfaces
- Interface Naming Convention
- Configuring Interface Settings
- Online Help
- Registration
- 2. Configure System Information
- 3. Configuring Switching
- 4. Configuring Routing
- 5. Configuring Quality of Service
- 6. Managing Device Security
- 7. Maintenance
- 8. Monitoring the System
- A. Configuration Examples
- B. Hardware Specifications and Default Values

Monitoring the System
329
S3300 Smart Managed Pro Switch
prior to the last reboot. Only the messages that meet the configured severity level are logged
to FLASH memory.
Use the FLASH Log screen to enable or disable persistent logging, set the severity filter of
persistent log messages, and view log messages stored in FLASH for the current boot cycle
or for the previous boot cycle.
To enable persistent logging and configure the severity level:
1. Select Monitoring > Logs > FLASH Log.
2. Next to Admin Status, select one of the following radio buttons:
• Enable. Enable logging messages to persistent logging.
• Disable. Prevent the system from logging messages in persistent storage.
3. From the Severity Filter field, specify the type of log messages to record.
A log records messages equal to or above a configured severity threshold. For example,
if you select Error, the logged messages include Error, Critical, Alert, and Emergency.
The default severity level is Alert (1). The severity can be one of the following levels:
• Emergency (0). The highest warning level. If the device is down or not functioning
properly, an emergency log is saved to the device.
• Alert (1). The second-highest warning level. An alert log is saved if there is a serious
device malfunction, such as all device features being down. Action must be taken
immediately.
• Critical (2). The third-highest warning level. A critical log is saved if a critical device
malfunction occurs, for example, two device ports are not functioning, while the rest of
the device ports remain functional.
• Error (3). A device error has occurred, such as if a port is offline.
• Warning (4). The lowest level of a device warning.
• Notice (5). Normal but significant conditions. Provides the network administrators
with device information.
• Informational (6). Provides device information.
• Debug (7). Provides detailed information about the log. Debugging should be entered
only by qualified support personnel.
4. Click the Apply button.
The rest of the screen displays the number of persistent messages the system has logged
and the persistent log messages.
To view log messages stored in persistent storage:
1. Select Monitoring > Logs > FLASH Log.
2. Next to Logs to be Displayed, select the log messages to view:
• Current Logs. View the messages logged to persistent storage during the current
boot cycle.
• Previous Logs. View the messages logged to persistent storage during the previous
boot cycle. The screen displays up to 64 messages logged to persistent storage