
User Manual
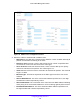
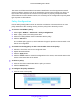
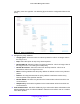
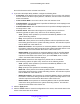
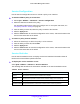

Table Of Contents
- S3300 Smart Managed Pro Switch
- Contents
- 1. Getting Started
- Getting Started with the NETGEAR Switch
- Switch Management Interface
- Connect the Switch to the Network
- Discover a Switch in a Network with a DHCP Server
- Discover a Switch in a Network without a DHCP Server
- Configure the Network Settings on the Administrative System
- Access the Management Interface from a Web Browser
- Understand the User Interfaces
- Interface Naming Convention
- Configuring Interface Settings
- Online Help
- Registration
- 2. Configure System Information
- 3. Configuring Switching
- 4. Configuring Routing
- 5. Configuring Quality of Service
- 6. Managing Device Security
- 7. Maintenance
- 8. Monitoring the System
- A. Configuration Examples
- B. Hardware Specifications and Default Values

Configuring Quality of Service
231
S3300 Smart Managed Pro Switch
Class Configuration
Use the Class Configuration screen to add a new DiffServ class name, or to rename or delete
an existing class. The screen also allows you to define the criteria to associate with a DiffServ
class. As packets are received, these DiffServ classes are used to prioritize packets. You can
have multiple match criteria in a class. The logic is a Boolean logical-and for this criteria. After
creating a Class, click the class link to the Class screen.
To create a DiffServ class:
1. Select Qo
S > DiffServ > Advanced > Class Configuration.
2. In the Cla
ss Name field, enter a class name.
3. Select the
class type
4. Click the Ad
d button.
The switch supports only the Class Type value
All, which means all the various match
criteria defined for the class should be satisfied for a packet match. All signifies the logical
AND of all the match criteria.
5. Click the Canc
el button to cancel the configuration on the screen, and reset the data on the
screen to the latest value of the switch.
To rename an existing class:
1. Select
the check box next to the configured class.
2. In the Cla
ss Name field, update the name.
3. Click the Ap
ply button.
To delete a class:
1. Sel
ect the check box next to the class name.
2. Click the Del
ete button.
To configure the class match criteria:
1. Click the class name for an e
xisting class.
Figure 94. DiffServ Class Name
The class name is a hyperlink. The following figure shows the configuration fields for the
class.