
User Manual
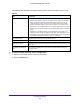

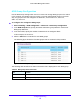
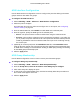
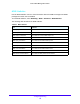
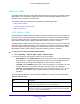
Table Of Contents
- S3300 Smart Managed Pro Switch
- Contents
- 1. Getting Started
- Getting Started with the NETGEAR Switch
- Switch Management Interface
- Connect the Switch to the Network
- Discover a Switch in a Network with a DHCP Server
- Discover a Switch in a Network without a DHCP Server
- Configure the Network Settings on the Administrative System
- Access the Management Interface from a Web Browser
- Understand the User Interfaces
- Interface Naming Convention
- Configuring Interface Settings
- Online Help
- Registration
- 2. Configure System Information
- 3. Configuring Switching
- 4. Configuring Routing
- 5. Configuring Quality of Service
- 6. Managing Device Security
- 7. Maintenance
- 8. Monitoring the System
- A. Configuration Examples
- B. Hardware Specifications and Default Values

Configuring Switching
187
S3300 Smart Managed Pro Switch
MVR Interface Configuration
Use the MVR Interface Configuration screen to configure the ports that belong to the MVR
groups and their roles within the groups.
To configure the MVR interfaces:
1. Select Switching > MVR > Advanced > MVR Interface Configuration.
2. Select the ports to configure.
For information about how to select and configure one or more ports, see Configuring
Interface Settings on page 32.
3. From the Admin Mode list, select Enable to enable MVR on the selected ports.
4. From the Type list, specify the MVR type for the selected ports:
• Source. The port to which the multicast traffic flows using the multicast VLAN.
• Receiver. The port where a listening host is connected to the switch. It can utilize any
(or no) VLAN, except the multicast VLAN. This implies that the MVR switch performs
VLAN tag substitution from the multicast VLAN source port to the VLAN tag used by
the receiver port.
5. (Optionally for receiver ports) From the Immediate Leave list, select Immediate Leave
mode to allow the receiver port to be removed from the multicast group membership when
an IGMP leave message is received without sending an IGMP query message and waiting
for the IGMP group membership report.
6. Click the Apply button.
MVR Group Membership
Use the MVR Configuration screen to add or remove ports from MVR groups.
To configure MVR group membership:
1. Select Switching > MVR > Advanced > MVR Group Membership.
2. From the Group IP list, select the IP address of the MVR group to configure.
3. Click under Group IP to display the ports.
4. To add a port to the selected MVR group, click the box directly below the port number so
that a check mark appears in the box.
5. Click the Apply button.