
User Manual


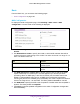
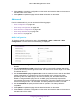


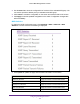


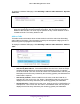
Table Of Contents
- M6100 Web Management User Guide
- Contents
- 1. Getting Started
- 2. Configuring System Information
- 3. Configuring Switching Information
- 4. Routing
- 5. Configuring Quality of Service
- 6. Managing Device Security
- 7. Monitoring the System
- 8. Maintenance
- 9. Help
- A. Default Settings
- B. Configuration Examples
- C. Notification of Compliance

Configuring Switching Information
184
M6100 Web Management User Guide
6. Click Cancel to cancel the configuration on the screen and reset the data on the screen to
the latest value of the switch.
7. Click Update to update the page with the latest information on the switch.
Advanced
From the Advanced link, you can access the following pages:
• MVR Configuration on page 184
• MVR Group Configuration on page 185
• MVR Interface Configuration on page 185
• MVR Group Membership on page 186
• MVR Statistics on page 187
MVR Configuration
To display the MVR Configuration page, click Switching > MVR > Advanced > MVR
Configuration. A screen similar to the following is displayed.
1. Use the MVR Running to Enable or Disable the MVR feature. The factory default is
Disable.
2. Use the MVR Multicast VLAN to specify the VLAN on which MVR multicast data will be
received.
All source ports belong to this VLAN. The value can be set in a range of 1 to 4094.
The default value is 1.
3. Use the MVR Global query response time to set the maximum time to wait for the IGMP
reports membership on a receiver port.
This time applies only to receiver-port leave
processing. When an IGMP query is sent from a receiver port, the switch waits for the
default or configured MVR query time for an IGMP group membership report before
removing the port from the multicast group membership. The value is equal to the tenths of
second. The range is from 1 to 100 tenths. The factory default is 5 tenths or one-half.
4. Use the MVR Mode to specify the MVR mode of operation.
The factory default is
compatible.
5. Click Update to update the page with the latest information on the switch.
6. Click Cancel to cancel the configuration on the screen and reset the data on the screen to
the latest value of the switch.