
Owner's Manual
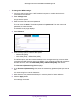
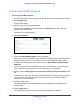
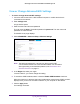
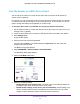

Table Of Contents
- User Manual
- Table of Contents
- Overview
- Connect to the Network and Access the Router
- Specify Your Internet Settings
- Use the Internet Setup Wizard
- Manually Set Up the Internet Connection
- Specify IPv6 Internet Connections
- Requirements for Entering IPv6 Addresses
- Use Auto Detect for an IPv6 Internet Connection
- Use Auto Config for an IPV6 Internet Connection
- Set Up an IPv6 6rd Tunnel Internet Connection
- Set Up an IPv6 6to4 Tunnel Internet Connection
- Set Up an IPv6 Pass Through Internet Connection
- Set Up an IPv6 Fixed Internet Connection
- Set Up an IPv6 DHCP Internet Connection
- Set Up an IPv6 PPPoE Internet Connection
- Change the MTU Size
- Control Access to the Internet
- Optimize Performance
- Specify Network Settings
- View or Change WAN Settings
- Dynamic DNS
- Set Up a Default DMZ Server
- Change the Router’s Device Name
- Change the LAN TCP/IP Settings
- Specify the IP Addresses That the Router Assigns
- Disable the DHCP Server Feature in the Router
- Manage Reserved LAN IP Addresses
- Custom Static Routes
- Specify Basic WiFi Settings
- Set Up a Guest WiFi Network
- View or Change Advanced WiFi Settings
- Use the Router as a WiFi Access Point
- Generate a New Backhaul Password
- Manage Your Network
- Customize Internet Traffic Rules for Ports
- Use VPN to Access Your Network
- Troubleshooting
- Supplemental Information
- Specs
- Quick Start Guide
- Spec Sheet
Specify Network Settings
74
Orbi High-Performance AC3000 Tri-band WiFi System
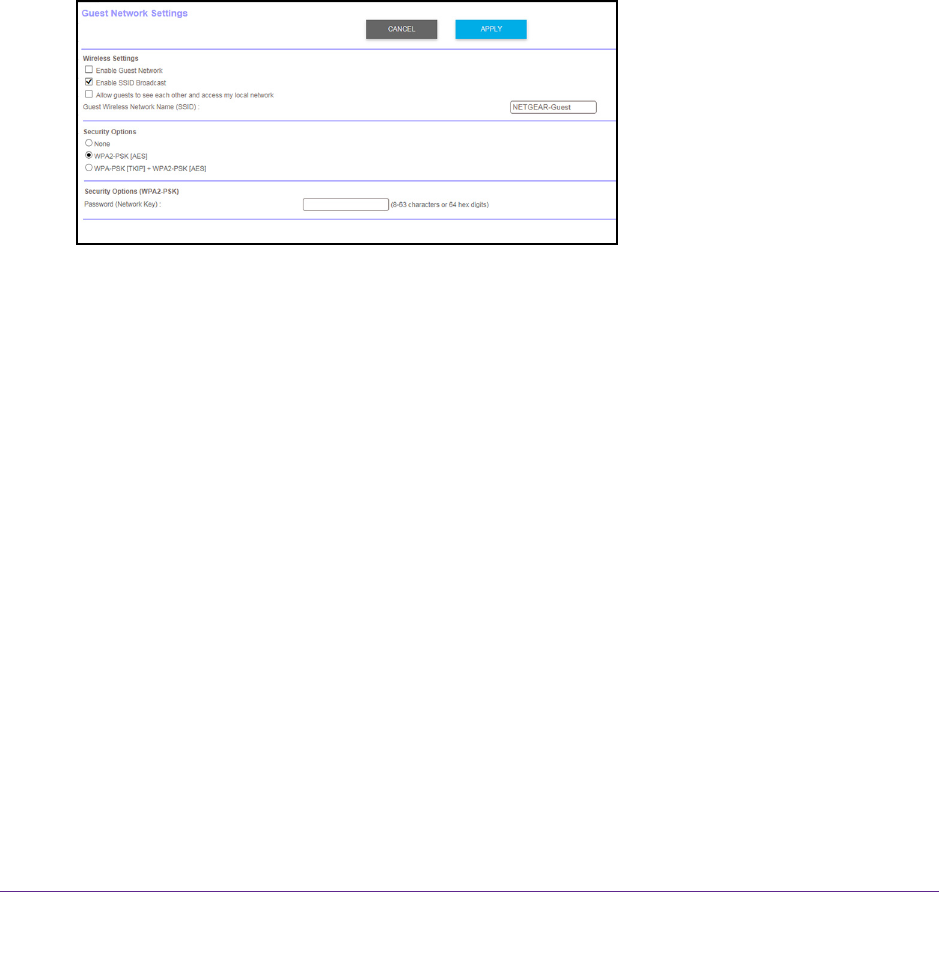
Set Up a Guest WiFi Network
To set up a guest WiFi network:
1. Launch a web browser from a computer or WiFi device that is connected to the network.
2. Enter orbilogin.com.
A login window opens.
3. Enter the router user name and password.
The user name is admin.
The default password is password. The user name and
password are case-sensitive.
The BASIC Home page displays.
4. Select Guest Network.
5. Select the Enable Guest Network check box.
6. Leave the Enable SSID Broadcast check box selected.
Allowing the router to broadcast its WiFi network name (SSID) makes it easier to find your
network and connect to it. If you clear this check box, that creates a hidden network.
7. T
o change the network name, type a new name in the Guest Wireless Network Name
(SSID) field.
The name can be up to 32 characters long and it is case-sensitive. If you change the
name, make sure to write down the new name and keep it in a safe place.
8. Select or clear the Allow guests to see each other and access my local network check
box.
To protect your privacy, this check box is cleared by default. That means your guests can
use your Internet connection but they cannot access computers or devices that are
connected to your Orbi network.
9. Select a security option.
The WPA2 options use the newest standard for the strongest security. WPA2 is the
default setting.
10. Click the Apply button.
Your settings are saved. The router sends the new settings to the satellite.