
Owner's Manual
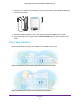
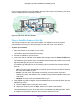

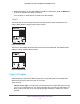
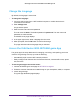
Table Of Contents
- User Manual
- Table of Contents
- Overview
- Connect to the Network and Access the Router
- Specify Your Internet Settings
- Use the Internet Setup Wizard
- Manually Set Up the Internet Connection
- Specify IPv6 Internet Connections
- Requirements for Entering IPv6 Addresses
- Use Auto Detect for an IPv6 Internet Connection
- Use Auto Config for an IPV6 Internet Connection
- Set Up an IPv6 6rd Tunnel Internet Connection
- Set Up an IPv6 6to4 Tunnel Internet Connection
- Set Up an IPv6 Pass Through Internet Connection
- Set Up an IPv6 Fixed Internet Connection
- Set Up an IPv6 DHCP Internet Connection
- Set Up an IPv6 PPPoE Internet Connection
- Change the MTU Size
- Control Access to the Internet
- Optimize Performance
- Specify Network Settings
- View or Change WAN Settings
- Dynamic DNS
- Set Up a Default DMZ Server
- Change the Router’s Device Name
- Change the LAN TCP/IP Settings
- Specify the IP Addresses That the Router Assigns
- Disable the DHCP Server Feature in the Router
- Manage Reserved LAN IP Addresses
- Custom Static Routes
- Specify Basic WiFi Settings
- Set Up a Guest WiFi Network
- View or Change Advanced WiFi Settings
- Use the Router as a WiFi Access Point
- Generate a New Backhaul Password
- Manage Your Network
- Customize Internet Traffic Rules for Ports
- Use VPN to Access Your Network
- Troubleshooting
- Supplemental Information
- Specs
- Quick Start Guide
- Spec Sheet

Overview
13
Orbi High-Performance AC3000 Tri-band WiFi System
Place and Sync an Add-On Satellite
If you already set up an Orbi router and satellite are adding an optional add-on satellite (sold
separately) follow these steps.
To place and sync your satellite:
1. Place your Orbi satellite in a corner of your house that is far away from your existing
Orbi router and satellite, but still within range or your Orbi router and satellite.
If your house has multiple floors, place your Orbi satellite on a different floor than your
existing Orbi router and satellite.
2. Connect the satellite to a power source.
3. If the Power LED on the back of the satellite does not light, press the Power On/Off button.
4. Wait about two minutes for the satellite’s ring LED to light solid white.
5. Press the Sync button on the back of the satellite and within two minutes, press the Sync
button on the back of your Orbi router.
The satellite’s ring LED pulses white, then lights one of the following colors for about
three minutes and then turns off:
• Blue. The Orbi router and satellite successfully synced, and the connection between
the router and satellite is good.
• Amber. The Orbi router and satellite successfully synced, and the connection
between the router and satellite is fair. Consider moving the Orbi satellite closer to the
Orbi router.
• Magenta. The Orbi router and satellite failed to sync. Move the satellite closer to the
router and try again.