
User Manual
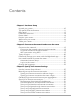
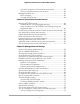
Table Of Contents
- Contents
- 1. Hardware Setup
- 2. Connect to the network and access the router
- 3. Specify Your Internet Settings
- Use the Internet Setup Wizard
- Manually set up the Internet connection
- Get Multi-Gig Internet with Internet port aggregation
- Specify IPv6 Internet connections
- Requirements for entering IPv6 addresses
- Use auto detect for an IPv6 Internet connection
- Set up an IPv6 6to4 tunnel Internet connection
- Set up an IPv6 pass-through Internet connection
- Set up an IPv6 fixed Internet connection
- Set up an IPv6 DHCP Internet connection
- Set up an IPv6 PPPoE Internet connection
- Use auto config for an IPv6 Internet connection
- Set up an IPv6 6rd Internet connection
- Manage the MTU size
- 4. Control Access to the Internet
- Manage NETGEAR Armor
- Enable access control to allow or block access to the Internet
- Use keywords to block Internet sites
- Delete keywords from the blocked list
- Block services from the Internet
- Prevent blocking on a trusted computer
- Manage network access control lists
- Schedule when to block Internet sites and services
- Set up security event email notifications
- 5. Manage Network Settings
- View or change the WAN settings
- Set up a default DMZ server
- Change the Router’s Device Name
- Change the LAN TCP/IP settings
- Specify the IP addresses that the router assigns
- Disable the DHCP server feature in the router
- Manage reserved LAN IP addresses
- Use the WPS Wizard for WiFi connections
- Specify basic WiFi settings
- Change the WiFi mode
- Change the WiFi password or the WiFi security
- Set up a guest WiFi network
- Control the WiFi radios
- Set up a WiFi schedule
- Specify WPS settings
- Set up the router as a WiFi access point
- Set up a bridge for a port group or VLAN tag group
- Manage custom static routes
- Enable or disable airtime fairness
- Enable or disable MU-MIMO
- Enable or disable PMF
- Set up the router in bridge mode
- Manage Ethernet port aggregation to a LAN device
- 6. Optimize Performance
- 7. Manage Your Router
- Update the router firmware
- Change the admin password
- Enable admin password recovery
- Recover the admin password
- View information about the router and the Internet and WiFi settings
- Display the statistics of the Internet port
- Check the Internet connection status
- View and manage logs of router activity
- View devices currently on the network
- Monitor Internet traffic
- Manage the router configuration file
- Manage remote access
- Connect to your router with Anywhere Access
- Disable LED blinking or turn off LEDs
- Set your time zone
- Set the NTP Server
- Specify ReadyDLNA Media Server Settings
- Return the router to its factory default settings
- 8. Share USB Storage Devices Attached to the Router
- USB device requirements
- Connect a USB storage device to the router
- Access a storage device connected to the router from a Windows-based computer
- Map a USB device to a Windows network drive
- Access a storage device that is connected to the router from a Mac
- Back up Windows-based computers with ReadySHARE Vault
- Back up Mac computers with Time Machine
- Enable FTP access within your network
- View network folders on a storage device
- Add a network folder on a USB storage device
- Edit a network folder on a USB storage device
- Safely remove a USB storage device
- 9. Use Dynamic DNS to Access USB Storage Devices Through the Internet
- 10. Use VPN to Access Your Network
- 11. Use a VPN client to connect to a VPN server
- 12. Manage port forwarding and port triggering
- 13. Troubleshooting
- 14. Supplemental Information

Install OpenVPN Software on Your Windows Computer.......138
Install OpenVPN software on your Mac computer..................141
Install OpenVPN software on an iOS device............................142
Install OpenVPN software on an Android device....................142
Use a VPN tunnel on your Windows computer............................143
Use VPN to access the router’s USB device and media..............145
Use VPN to access your Internet service at home........................145
Set up VPN client Internet access in the router........................146
Block VPN client Internet access in the router.........................146
Use a VPN tunnel to access your Internet service at home....147
Chapter 11 Use a VPN client to connect to a VPN server
Set up a VPN client...........................................................................150
Enable a VPN client..........................................................................150
View your VPN connection status...................................................151
View VPN client longs......................................................................152
Chapter 12 Manage port forwarding and port triggering
Manage port forwarding to a local server.....................................154
Set up port forwarding to a local server...................................154
Add a custom port forwarding service.....................................155
Edit a port forwarding service....................................................156
Delete a port forwarding entry..................................................157
Application xxample: Make a local web server public...........157
How the router implements the port forwarding rule.............158
Port triggering..................................................................................158
Add a port triggering service.....................................................159
Enable port triggering................................................................160
Application example: Port triggering for Internet relay chat port
triggering......................................................................................160
Chapter 13 Troubleshooting
Quick tips...........................................................................................163
Sequence to restart your network.............................................163
Check the power adapter and Ethernet cable connections...163
Check the WiFi settings..............................................................163
Check the network settings........................................................163
Troubleshoot with the LEDs............................................................164
Standard LED behavior when the router is powered on........164
Power LED is off or blinking.......................................................164
LEDs never turn off......................................................................164
Internet or Ethernet LAN port LEDs are off..............................165
WiFi LED is off..............................................................................165
You cannot log in to the router.......................................................165
7
Nighthawk AX8 8-Stream Tri-Band WiFi 6 Router