
Owner's Manual


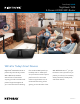
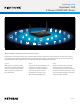
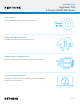
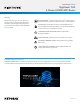
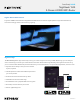
Table Of Contents
- User Manual
- Contents
- 1. Hardware Setup
- 2. Connect to the Network and Access the Router
- 3. Specify Your Internet Settings
- Use the Internet Setup Wizard
- Manually set up the Internet connection
- Specify IPv6 Internet connections
- Requirements for entering IPv6 addresses
- Use auto detect for an IPv6 Internet connection
- Set up an IPv6 6to4 tunnel Internet connection
- Set up an IPv6 pass-through Internet connection
- Set up an IPv6 fixed Internet connection
- Set up an IPv6 DHCP Internet connection
- Set up an IPv6 PPPoE Internet connection
- Use auto config for an IPv6 Internet connection
- Set up an IPv6 6rd Internet connection
- Manage the MTU size
- 4. Control Access to the Internet
- 5. Manage Network Settings
- View or change the WAN settings
- Set up a default DMZ server
- Change the Router’s Device Name
- Change the LAN TCP/IP settings
- Specify the IP addresses that the router assigns
- Disable the DHCP server feature in the router
- Manage reserved LAN IP addresses
- Use the WPS Wizard for WiFi connections
- Specify Basic WiFi Settings
- Change the WiFi Mode
- Change the Transmission Power Control
- Change the WiFi password or the WiFi security
- Set up a guest WiFi network
- Control the WiFi radios
- Set up a WiFi schedule
- Specify WPS settings
- Set up the router as a WiFi access point
- Set up a bridge for a port group or VLAN tag group
- Manage custom static routes
- Enable or disable implicit beamforming
- Enable or disable airtime fairness
- 6. Optimize Performance
- 7. Manage Your Router
- Update the router firmware
- Change the admin password
- Enable admin password recovery
- Recover the admin password
- View information about the router and the Internet and WiFi settings
- Display the statistics of the Internet port
- Check the Internet connection status
- View and manage logs of router activity
- View devices currently on the network
- Monitor Internet traffic
- Manage the router configuration file
- Manage remote access
- Remotely access your router using the Nighthawk app
- Disable LED blinking or turn off LEDs
- Set your time zone
- Return the router to its factory default settings
- 8. Share USB Storage Devices Attached to the Router
- USB device requirements
- Connect a USB storage device to the router
- Access a storage device connected to the router from a Windows-based computer
- Map a USB device to a Windows network drive
- Access a storage device that is connected to the router from a Mac
- Back up Windows-based computers with ReadySHARE Vault
- Back up Mac computers with Time Machine
- Enable FTP access within your network
- View network folders on a storage device
- Add a network folder on a USB storage device
- Edit a network folder on a USB storage device
- Safely remove a USB storage device
- 9. Use the Router as a Media Server
- 10. Use Dynamic DNS to Access USB Storage Devices Through the Internet
- 11. Use VPN to Access Your Network
- 12. Manage Port Forwarding and Port Triggering
- 13. Troubleshooting
- 14. Supplemental Information
- Quick Start for Nighthawk App
- Quick Start Guide
- Update the Firmware
- Data Sheet

Data Sheet | RAX40
Nighthawk
®
AX4
4-Stream AX3000 WiFi Router
PAGE 7 of 10
Gigabit WiFi to Mobile Devices
Support for 160MHz channel allows the Nighthawk AX4 WiFi 6 Router to stream at Gigabit speeds to supported mobile devices,
which are increasingly used for video streaming or gaming.
Nighthawk App
The NETGEAR Nighthawk
®
App makes it easy to set up your router and get more out of your WiFi. With the app, you can install your
router in a few steps—just connect your mobile device to the router network and the app will walk you through the rest. Once set up,
you can use the intuitive dashboard to pause the Internet on your connected devices, run a quick Internet speed test, and much more!
• Anywhere Access—Easily monitor your home network
anytime, anywhere
• Internet Speed Test—Check the broadband speeds from
your service provider
• Pause Internet—Pause the Internet to any device
• Trafc Meter—Track Internet data usage
• Guest Networks—Set up separate WiFi access for guests
• Quick Setup—Get connected in just minutes
• Get it at nighthawk-app.com