
User Manual


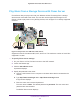


Table Of Contents
- Nighthawk X4 AC2350 Smart WiFi Router
- Contents
- 1. Hardware Setup
- 2. Connect to the Network and Access the Router
- 3. Specify Your Internet Settings
- Use the Internet Setup Wizard
- Manually Set Up the Internet Connection
- Specify IPv6 Internet Connections
- Requirements for Entering IPv6 Addresses
- Use Auto Detect for an IPv6 Internet Connection
- Use Auto Config for an IPv6 Internet Connection
- Set Up an IPv6 6to4 Tunnel Internet Connection
- Set Up an IPv6 Pass Through Internet Connection
- Set Up an IPv6 Fixed Internet Connection
- Set Up an IPv6 DHCP Internet Connection
- Set Up an IPv6 PPPoE Internet Connection
- Change the MTU Size
- 4. Optimize Performance
- 5. Control Access to the Internet
- 6. Share Storage Devices Attached to the Router
- Connect an eSATA Device to the Router
- USB Device Requirements
- Connect a USB Device to the Router
- Access an Storage Device Connected to the Router
- Map a USB Device to a Windows Network Drive
- Back Up Windows Computers with ReadySHARE Vault
- Back Up Mac Computers with Time Machine
- Control Access to a Storage Device
- Use FTP Within the Network
- View Network Folders on a Device
- Add a Network Folder on a Storage Device
- Edit a Network Folder on a Storage Device
- Approve USB Devices
- Safely Remove a USB Device
- 7. Access Storage Devices Through the Internet
- 8. Use the Router as a Media Server
- 9. Share a USB Printer
- 10. Manage Your Network
- 11. Network Settings
- Disable LED Blinking or Turn off LEDs
- View WAN Settings
- Set Up a Default DMZ Server
- Change the Router’s Device Name
- Change the LAN TCP/IP Settings
- Specify the IP Addresses That the Router Assigns
- Disable the DHCP Server Feature in the Router
- Manage Reserved LAN IP Addresses
- Use the WPS Wizard for WiFi Connections
- Specify Basic WiFi Settings
- Change the WiFi Password or Security Level
- Set Up a Guest WiFi Network
- Enable a Video Guest WiFi Network
- Control the Wireless Radios
- Set Up a Wireless Schedule
- Specify WPS Settings
- Use the Router as a Wireless Access Point
- Use the Router in Bridge Mode
- 12. Use VPN to Access Your Network
- 13. Specify Internet Port Settings
- 14. Troubleshooting
- A. Supplemental Information

Use the Router as a Media Server
85
Nighthawk X4 AC2350 Smart WiFi Router
Specify ReadyDLNA Media Server Settings
By default, the router acts as a ReadyDLNA media server, which lets you view movies and
photos on DLNA/UPnP AV-compliant media players, such as Xbox360, Playstation, and
NETGEAR media players.
To specify media server settings:
1. Launch a web browser from a computer or wireless device that is connected to the
network.
2. Type http://www.routerlogin.net or http://www.routerlogin.com.
A login screen displays.
3. Enter the router user name and password.
The user name is admin. The default password is password. The user name and
password are case-sensitive.
The BASIC Home screen displays.
4. Select ADVANCED > ReadySHARE > ReadySHARE Storage > Media Server.
The Media Server Settings screen displays.
5. Specify the settings:
• Enable DLNA Media Server. Select this check box to enable this device to act as a
media server.
• Enable TiVo support. Select this check box if you want to play ReadyNAS media on
your TiVo device. See the
Play Media from a USB Device on TiVo on page 87.
• Media Server Device Name. Specify the name of the media server.
6. Click the Apply button.
Your changes are saved.