
User Manual
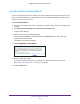
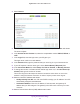

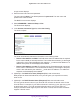
Table Of Contents
- Nighthawk AC1750 Smart WiFi Router
- Contents
- 1. Hardware Setup
- 2. Connect to the Network and Access the Router
- 3. Specify Your Internet Settings
- Use the Internet Setup Wizard
- Manually Set Up the Internet Connection
- Specify IPv6 Internet Connections
- Requirements for Entering IPv6 Addresses
- Use Auto Detect for an IPv6 Internet Connection
- Use Auto Config for an IPv6 Internet Connection
- Set Up an IPv6 6to4 Tunnel Internet Connection
- Set Up an IPv6 Pass Through Internet Connection
- Set Up an IPv6 Fixed Internet Connection
- Set Up an IPv6 DHCP Internet Connection
- Set Up an IPv6 PPPoE Internet Connection
- Maximum Transmission Unit
- 4. Optimize Performance
- 5. Control Access to the Internet
- 6. Share USB Drives Attached to the Router
- USB Drive Requirements
- Access a USB Device on the Network
- Back Up Windows Computers with ReadySHARE Vault
- Back Up Mac Computers with Time Machine
- Control Access to the USB Drive
- Use FTP Within the Network
- View Network Folders on a USB Drive
- Add a Network Folder on a USB Drive
- Edit a Network Folder on a USB Drive
- Approve USB Devices
- Safely Remove a USB Drive
- 7. Access the Router’s USB Drive Through the Internet
- 8. Use the Router as a Media Server
- 9. Share a USB Printer
- 10. Specify Network Settings
- Disable LED Blinking or Turn Off LEDs
- View WAN Settings
- Set Up a Default DMZ Server
- Change the Router’s Device Name
- Change the LAN TCP/IP Settings
- Specify the IP Addresses That the Router Assigns
- Disable the DHCP Server Feature in the Router
- Reserve LAN IP Addresses
- Use the WPS Wizard for WiFi Connections
- Specify Basic WiFi Settings
- Change the WiFi Security Option
- Set Up a Guest Network
- How the Router Manages Wireless Clients
- Control the Wireless Radios
- Set Up a Wireless Schedule
- Specify WPS Settings
- Use the Router as a Wireless Access Point
- Set Up the Router in Bridge Mode
- Set Up a Wireless Distribution System
- 11. Manage Your Network
- 12. Use VPN to Access Your Network
- 13. Specify Internet Port Settings
- 14. Troubleshooting
- A. Supplemental Information

Specify Your Internet Settings
28
Nighthawk AC1750 Smart WiFi Router
Your Internet service provider (ISP) can provide this information. For more information
about IPv6 Internet connection, see the following sections.
- Use Auto Detect for an IPv6 Internet Connection on page 28
- Use Auto Config for an IPv6 Internet Connection on page 29
- Set Up an IPv6 6to4 Tunnel Internet Connection on page 31
- Set Up an IPv6 Pass Through Internet Connection on page 32
- Set Up an IPv6 Fixed Internet Connection on page 33
- Set Up an IPv6 DHCP Internet Connection on page 35
- Set Up an IPv6 PPPoE Internet Connection on page 36
6. Click the Apply button.
Your changes take effect.
Requirements for Entering IPv6 Addresses
IPv6 addresses are denoted by eight groups of hexadecimal quartets that are separated by
colons. You can reduce any four-digit group of zeros within an IPv6 address to a single zero
or omit it. The following errors invalidate an IPv6 address:
• More than eight groups of hexadecimal quartets
• More than four hexadecimal characters in a quartet
• More than two colons in a row
Use Auto Detect for an IPv6 Internet Connection
To set up an IPv6 Internet connection through auto detection:
1. Launch an Internet browser from a computer or wireless device that is connected to the
network.
2. Type http://www.routerlogin.net or http://www.routerlogin.com.
A login screen displays.
3. Enter the router user name and password.
The user name is admin. The default password is password. The user name and
password are case-sensitive.
The BASIC Home screen displays.
4. Select ADVANCED > Advanced Setup > IPv6.
The IPv6 screen displays.
5. In the Internet Connection Type list, select Auto Detect.