
User Manual
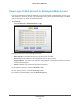
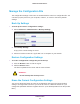
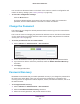
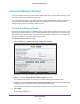
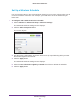
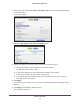
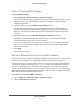
Table Of Contents
- R6250 Smart WiFi Router
- Contents
- 1. Hardware Setup
- 2. Getting Started
- 3. NETGEAR genie Basic Settings
- 4. NETGEAR genie Advanced Home
- 5. USB Storage
- 6. ReadySHARE Printer
- 7. Security
- Keyword Blocking of HTTP Traffic
- Block Services (Port Filtering)
- Port Triggering to Open Incoming Ports
- Port Forwarding to Permit External Host Communications
- How Port Forwarding Differs from Port Triggering
- Set Up Port Forwarding to Local Servers
- Set Up Port Triggering
- Schedule Blocking
- Security Event Email Notifications
- 8. Administration
- 9. Advanced Settings
- 10. Troubleshooting
- A. Supplemental Information
- B. Notification of Compliance

Advanced Settings
89
R6250 Smart WiFi Router
3. Scroll down and select the Use other operation mode check box and the Enable Bridge
mode radio button.
The screen adjusts.
4. Click the setup bridge mode wireless settings button.
5. Specify the settings of the other router to which this router will connect.
a. Select the wireless network frequency (2.4 GHz or 5 GHz).
For 802.11ac mode, select 5 GHz.
b. In the Name (SSID) field, enter the wireless network name (SSID).
c. In the Security Option section, select a radio button.
d. If prompted, type the passphrase (the WiFi password that you use to connect
wirelessly to the other router).
6. Click Apply.
The settings for the other router are saved and the Advanced Wireless Settings screen
displays.
7. Click Apply on the Wireless Settings screen.
Your changes take effect.