
User Manual
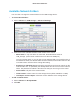
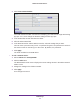
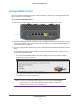
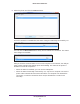
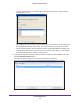
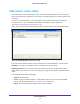
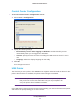
Table Of Contents
- R6250 Smart WiFi Router
- Contents
- 1. Hardware Setup
- 2. Getting Started
- 3. NETGEAR genie Basic Settings
- 4. NETGEAR genie Advanced Home
- 5. USB Storage
- 6. ReadySHARE Printer
- 7. Security
- Keyword Blocking of HTTP Traffic
- Block Services (Port Filtering)
- Port Triggering to Open Incoming Ports
- Port Forwarding to Permit External Host Communications
- How Port Forwarding Differs from Port Triggering
- Set Up Port Forwarding to Local Servers
- Set Up Port Triggering
- Schedule Blocking
- Security Event Email Notifications
- 8. Administration
- 9. Advanced Settings
- 10. Troubleshooting
- A. Supplemental Information
- B. Notification of Compliance

ReadySHARE Printer
57
R6250 Smart WiFi Router
6. Select the printer and click the Connect button.
Once the connection is established, the status changes to Manually connected by xxx.
You can click the Disconnect button at any time to release the connection. The status
then changes to Available.
After you click the Connect button once on each computer in the network, the utility on
each of them manages the printing queue and handling. The status of the printer is
Available on all of the computers.
• When the status is
Available, you can use the USB printer.
• When the status is Manually connected by xxx, only the xxx computer can use the
printer
. Other network devices must wait until the xxx computer has released the
connection, or until the connection times out (the default time-out value is 30
seconds).